Workflow features are part of the configuration of a Space.
This page explains how to set up approvals for the "Upload/Add approval" Workflow, and for the "Usage approval" Workflow.
Roles control the permissions users can access in Chorus. For an explanation of roles and permissions, see A3.3 About: Member permissions and roles.
Workflows - such as the ability to require approval for new uploads or for requests to use files - are attached to roles in your Space. Each Workflow implements a kind of approval or automation that Chorus can provide.
Preparing the Workflow Catalog
Before you use Workflow in a particular Space, you need to add the Workflow features to the catalog for the Space.
To access the Workflow Catalog click on the Space and then click "Manage Space..." in the right-hand tools menu. For more information on how to manage a Space, see C10.3 Manage an existing space. You will need to be a Manager of the Space.
Next, click on the Workflow tab. This is identified by the Workflow icon ![]() .
.
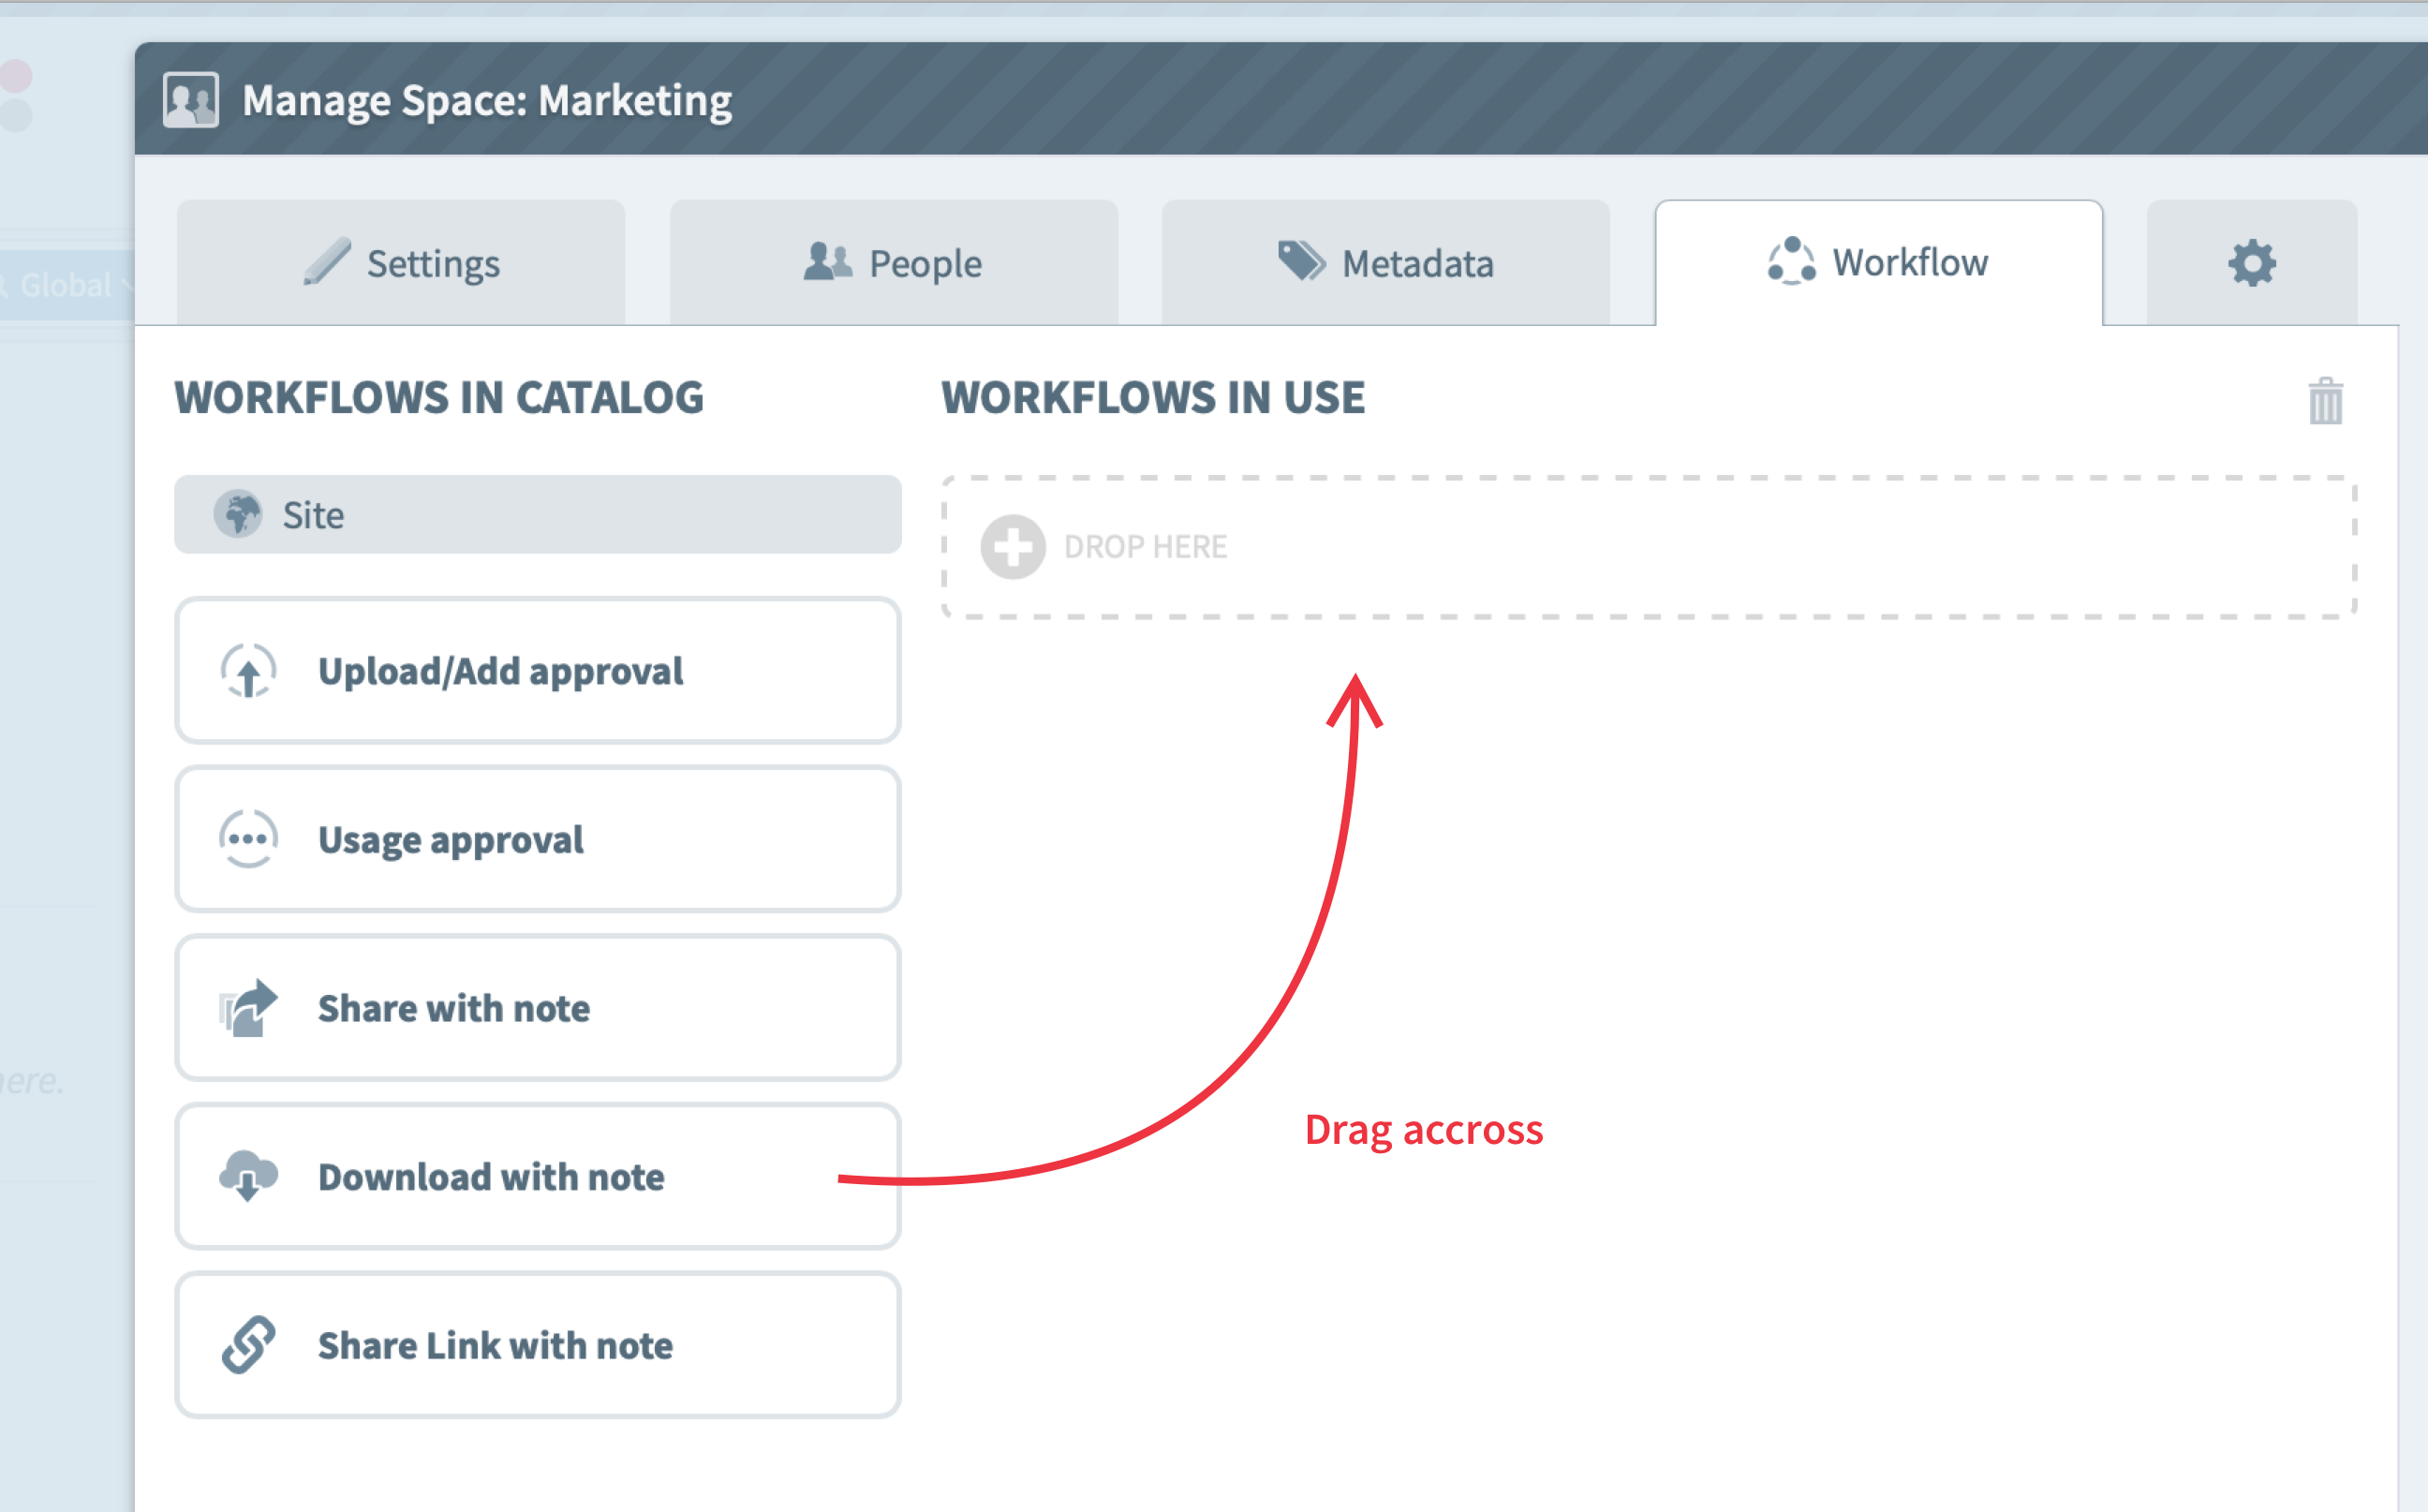
On the left-hand side of this page, there is a list of the available Workflows. There are five workflows. They are:
Upload/Add approval: The ability to require approval by a nominated role when files or folders are added to the Space.
Usage approval: The ability to require approval by a nominated role when a user requests download, edit or sharing features for a file.
Share with note: The ability to set files to be automatically approved for sharing in a collection, as long as the user leaves a note.
Download with note: The ability to set files to be automatically approved for download, as long as the user leaves a note.
Share link with note: The ability to set files to be automatically approved for sharing with a link, as long as the user leaves a note.
To use one of the Workflows, drag it from the left to the right.

When additional Workflow or automation abilities are developed by Third Light, they will appear in the "Workflows in Catalog" list.
Each Workflow can be configured. For example, the "Usage approval" Workflow allows you to choose which role acts as the approver for requests made.
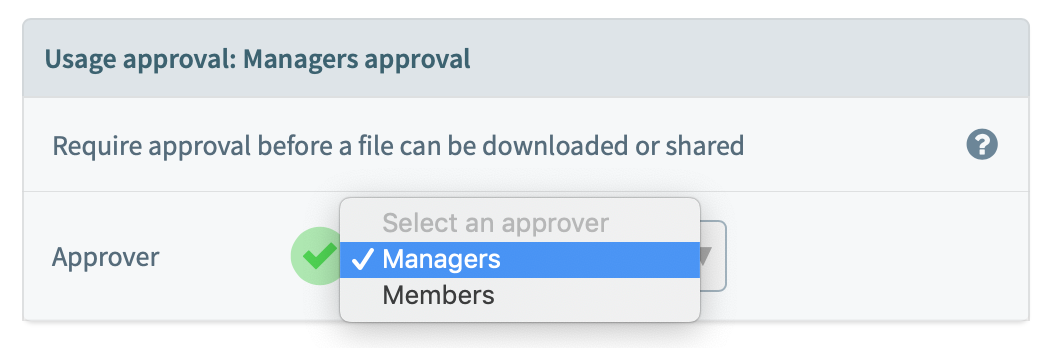
The default is the Managers role, but you can use the drop-down list to change this to any role. You can also click on the title to change the label or description of the Workflow, which may help to clarify its purpose later.

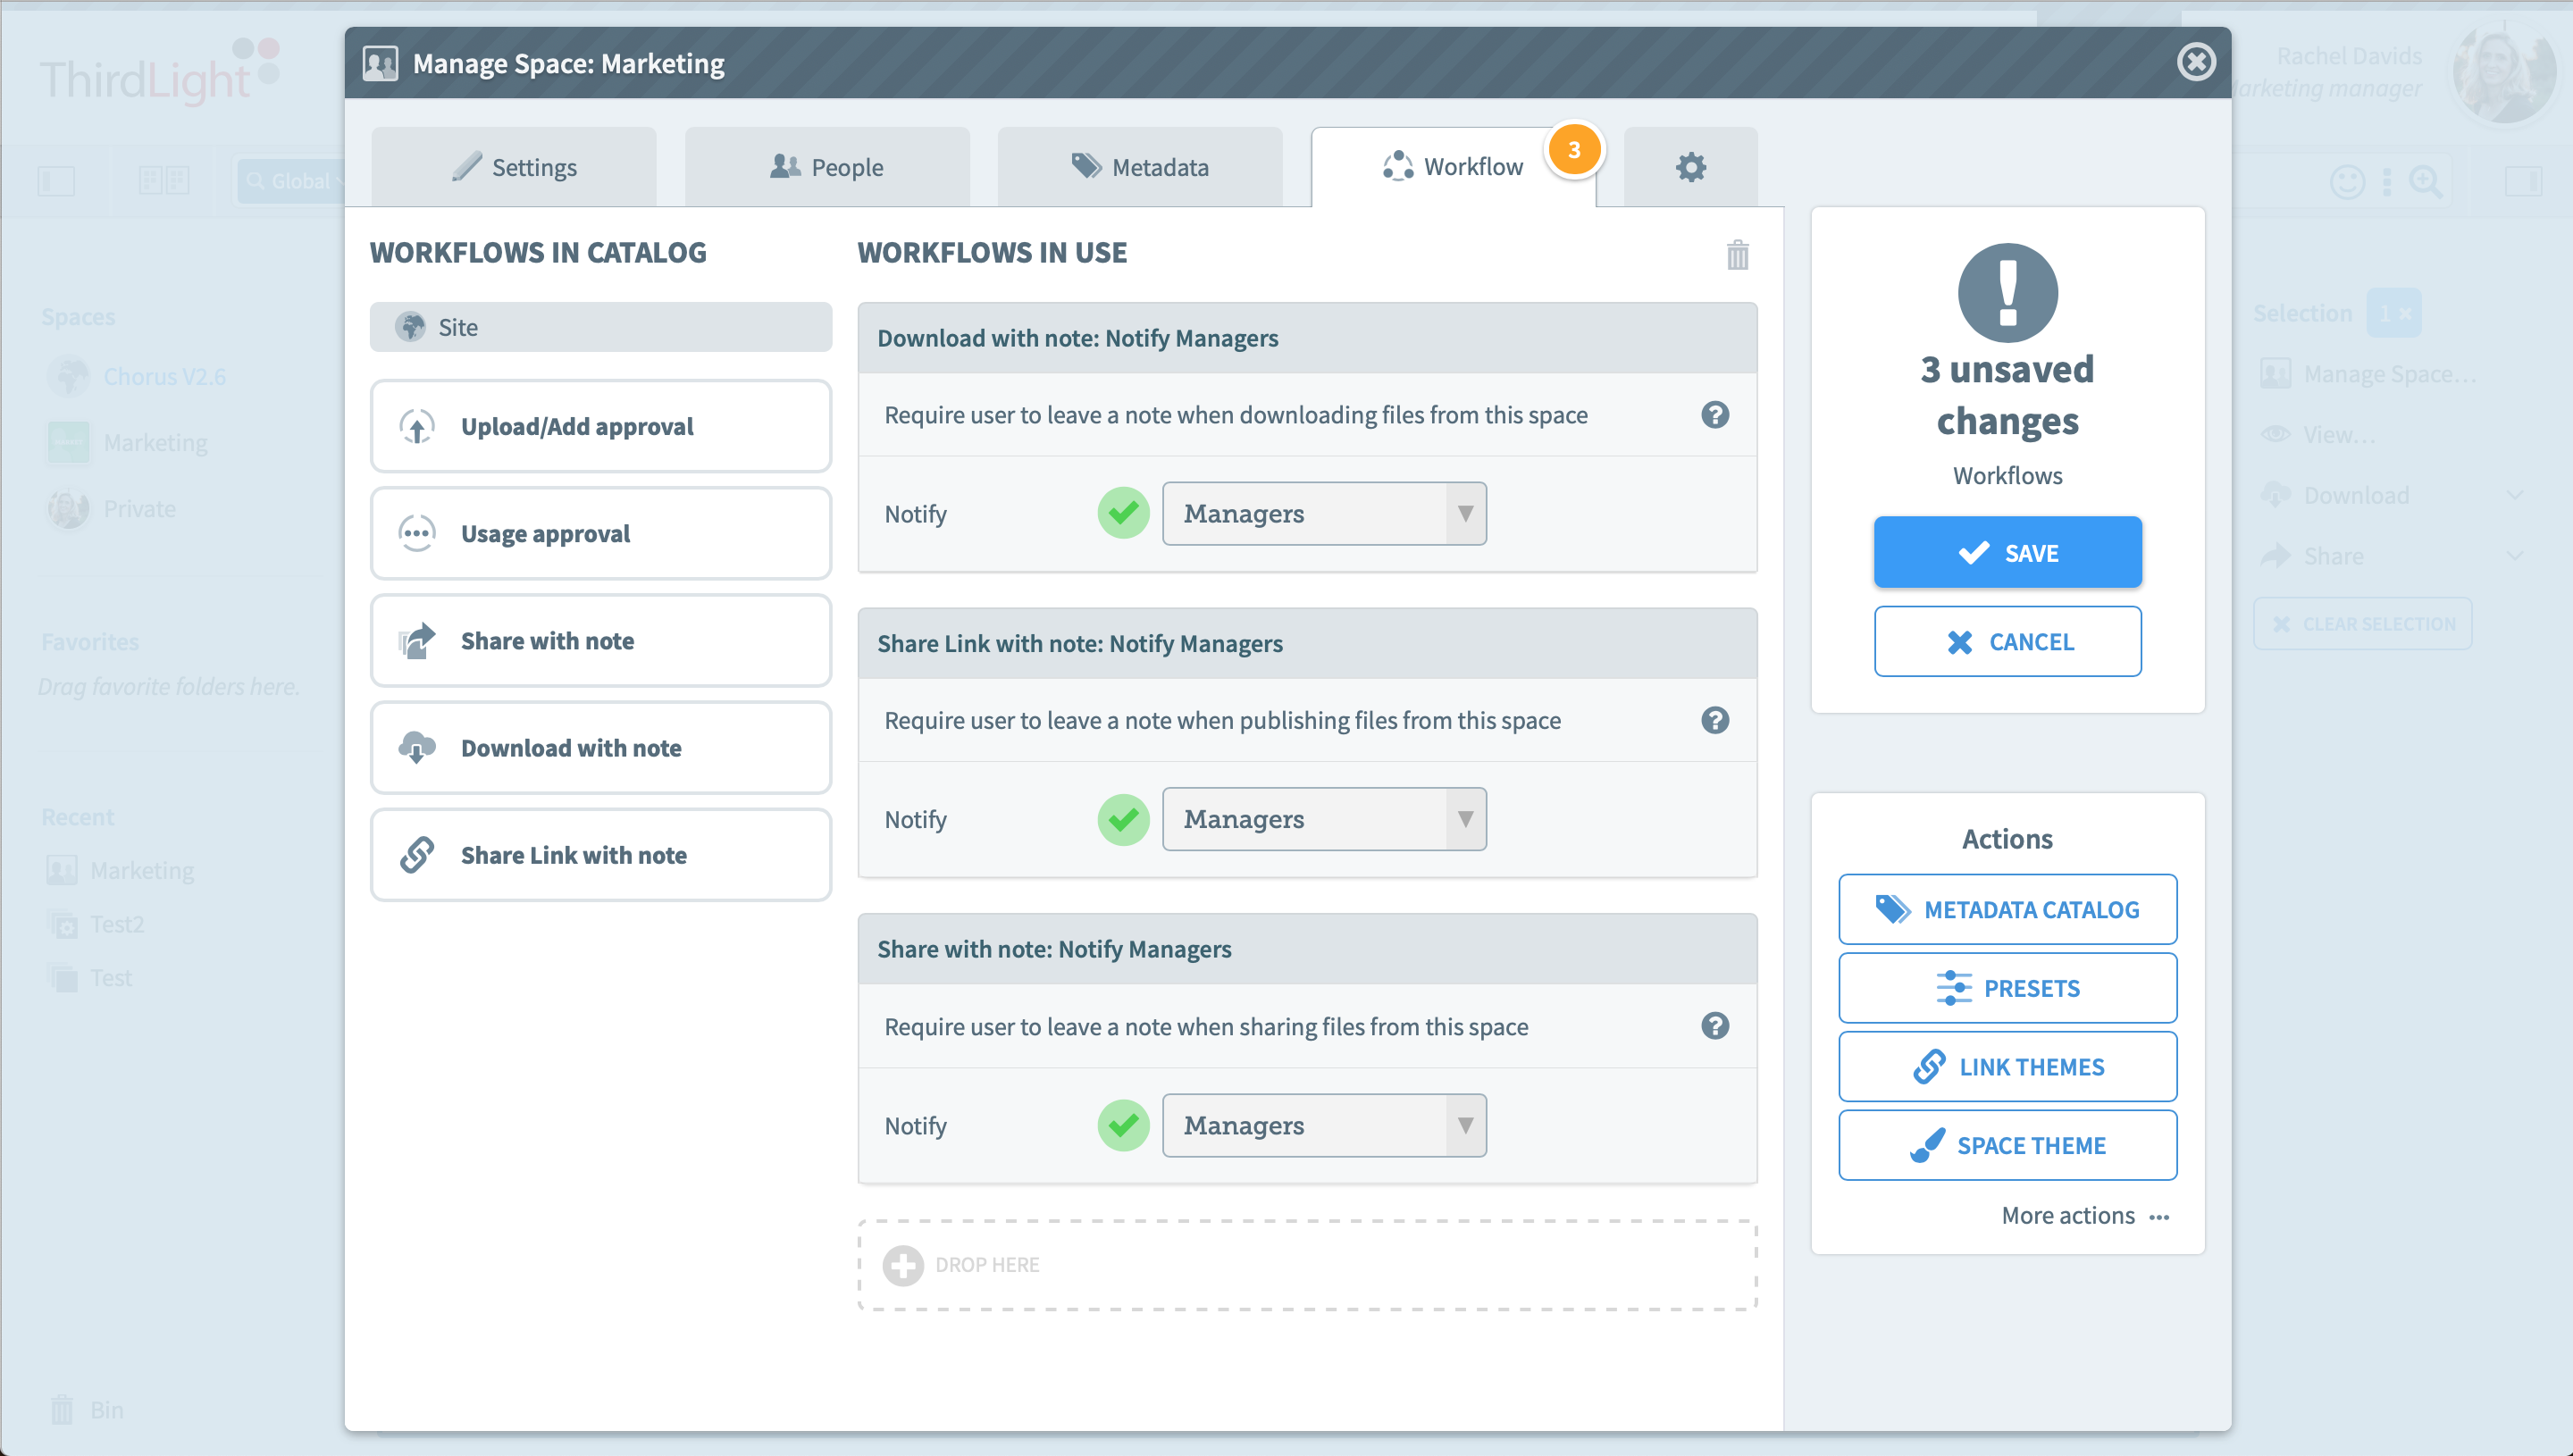
When you have added the Workflows to the Space by dragging them to the "Workflows in Use" pane, your Space is ready to use Workflow.
Click Save.
Next, go to the People tab.
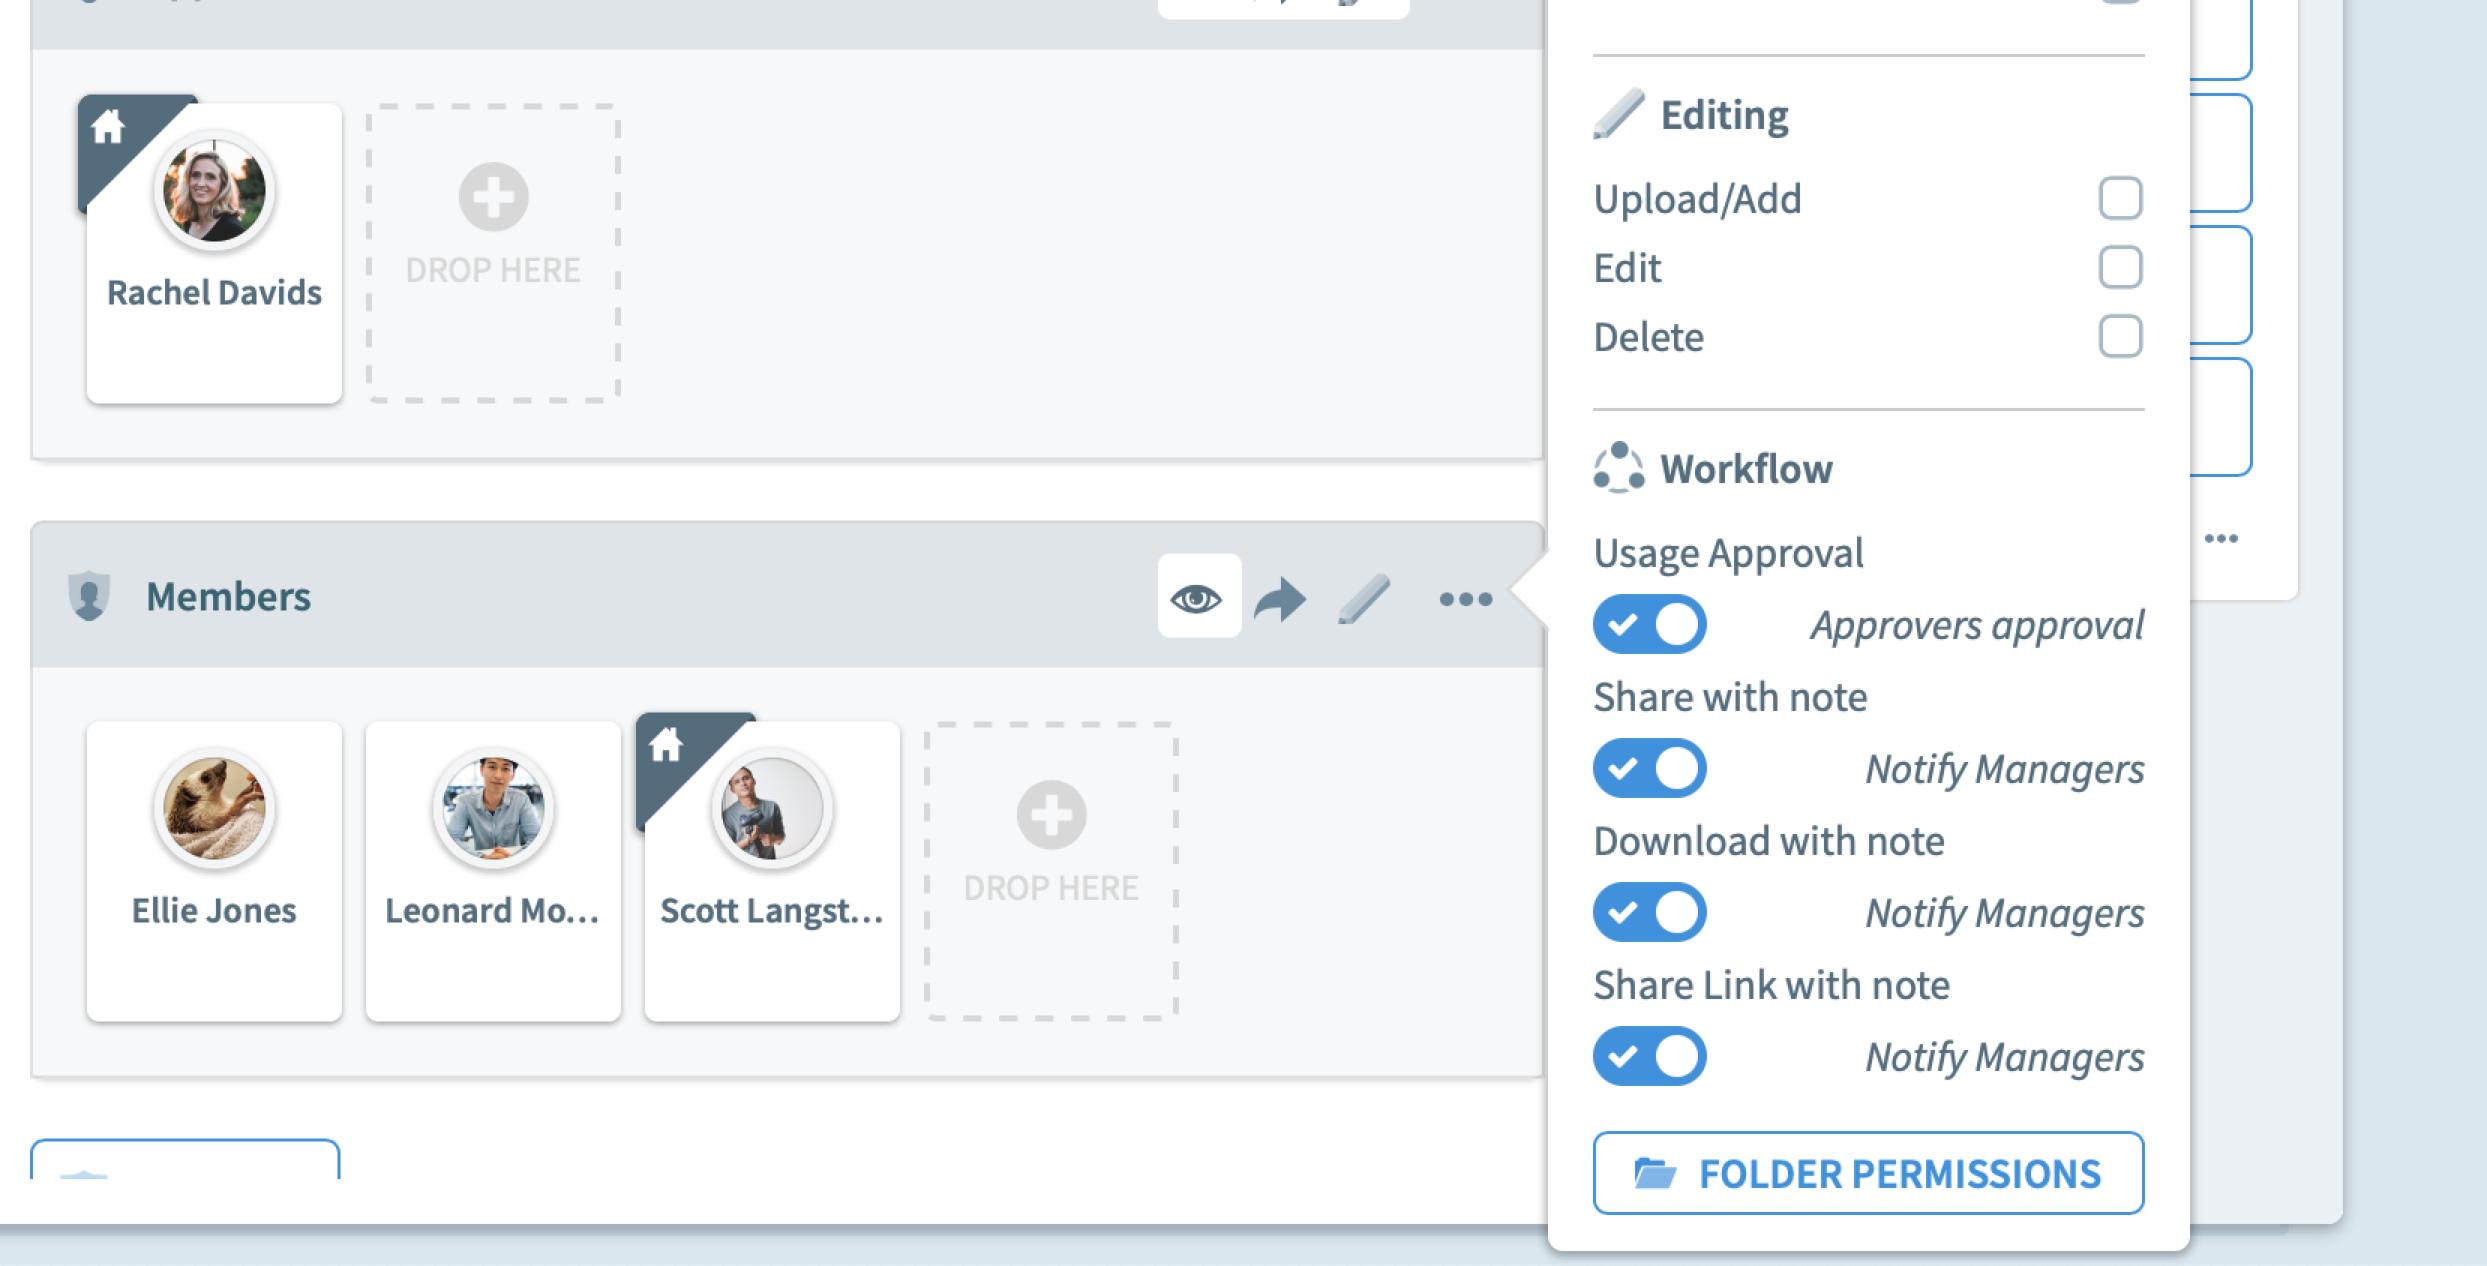
Adding Workflow to a role
Users and roles are managed from the People tab.
To add Workflow features to a role, click on the advanced permissions button, "..." on the right of the name of the role.
You can also create a new role which is specifically for users who will require approval.
To do this, click "Add Role" under the list of existing roles, and name the role. In this example, the new role is named "Require approval" to make its purpose easy to remember.

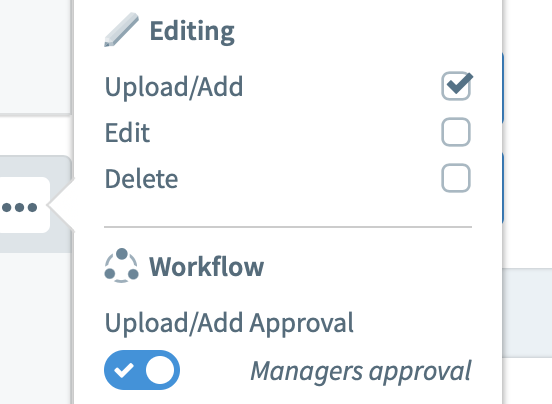
The "Upload/Add approval" Workflow
The "Upload/Add approval" Workflow is related to the upload permission. This also includes adding files by dragging them from other Spaces, and adding folders. To enable this Workflow, first tick the Upload permission for the role, then toggle the upload button in the Workflow section and select one of the "Upload/Add approval" Workflows. The drop-down list will include all of the Workflows in the catalog for the Space which can interact with the upload permission.
The "Usage approval" Workflow
The "Usage approval" workflow replaces several other permissions. It controls the user's ability to share, download, or edit files in the Space. Instead of users having direct access to those permissions, they can request them via an action button in the right-hand menu when selecting files. The action is labelled "Request" in that menu. From there, they can select "Usage approval" and then specify which permissions they need.
Users will also be able to Request Usage approval for another user or space.
It is usually a good idea to disable the permissions for Download, Edit, Delete etc - as these are provided by the Usage approval feature. Once they have been disabled, enable the Usage approval option, as above. This prevents any confusion arising from the user already having permission to do something without needing approval (in such cases, the approval step would not be seen by the user). In effect, it is normal to use the Usage approval option on its own.
It can also be useful to define new roles to make explicit lists of users who will act as approvers for specific workflows. For example, you might consider having a role for "Upload Approvers".
The "Share with note", "Download with note" and "Share as link with note" workflows
Each of these workflows replaces the corresponding permission. It allows users to either share files, download them or share them in a link, but only if they leave a note before they do detailing why they need to do it.
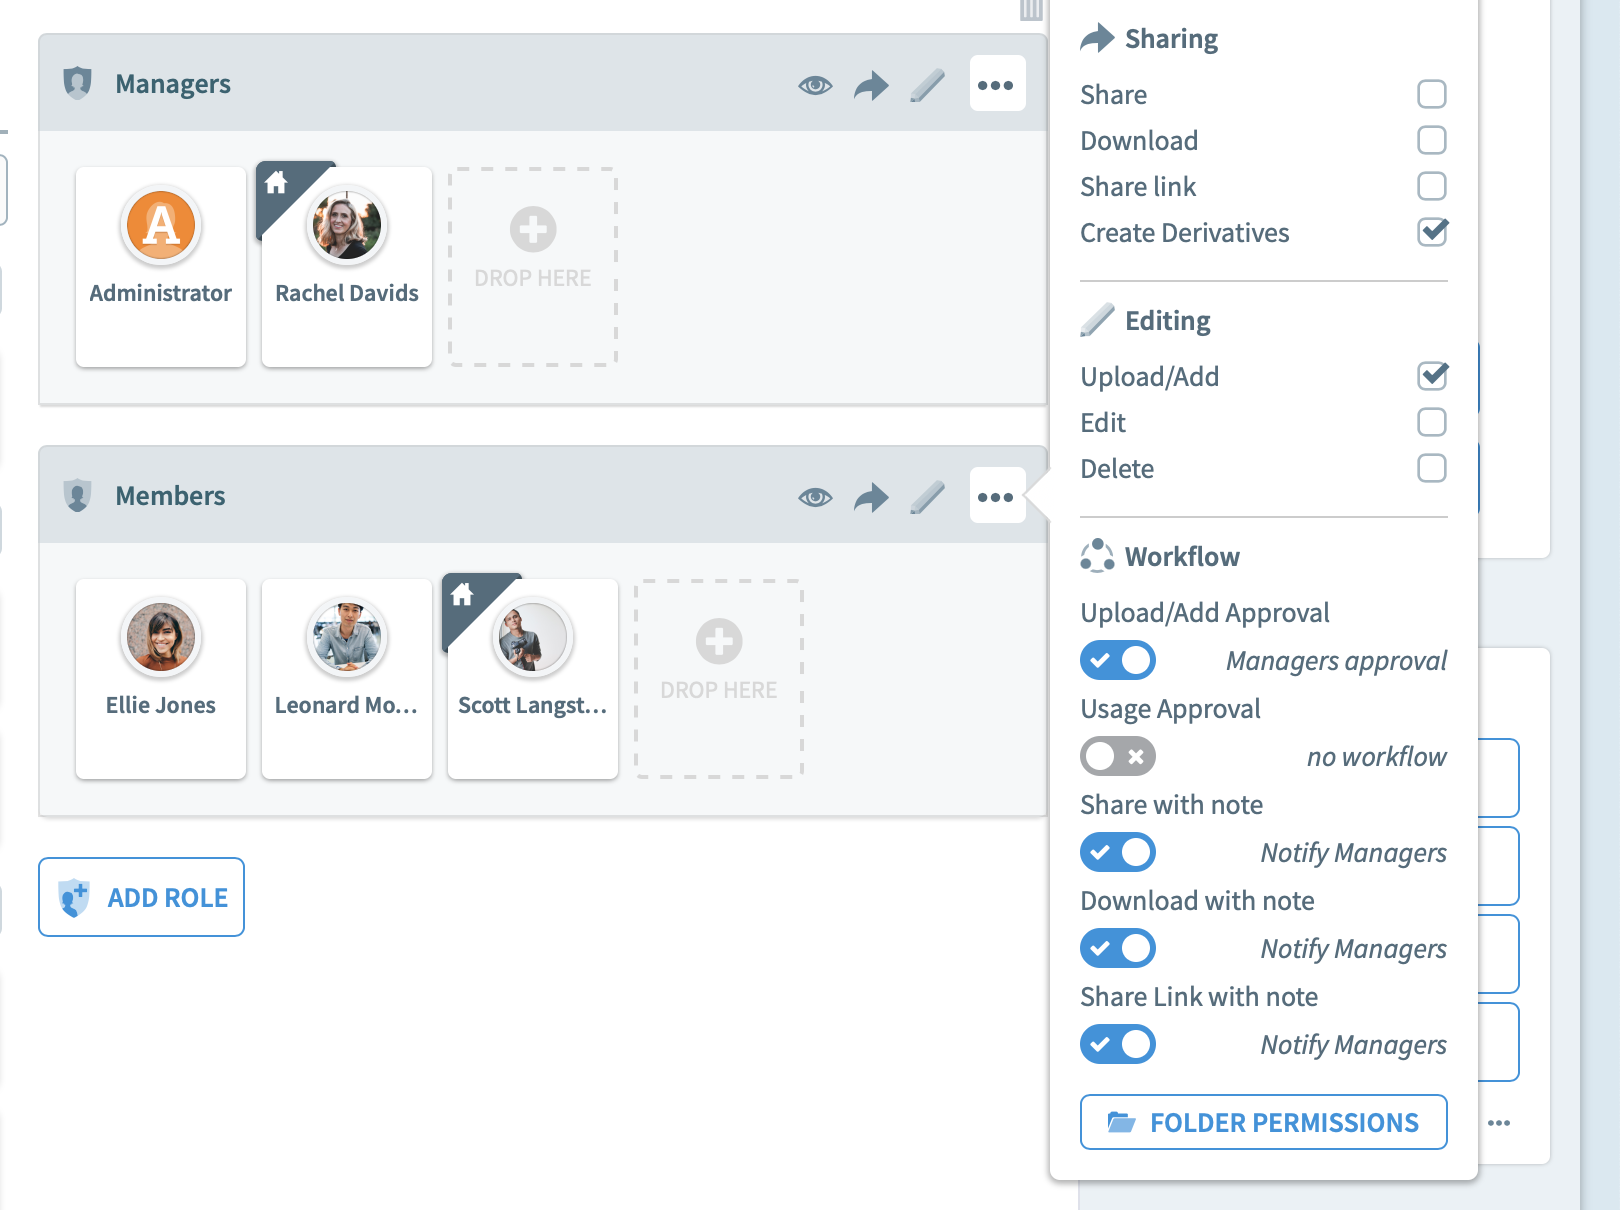
This process does not require an approval, so there is no need to set a specific role as approver. However, you will need to set which role will get to view and be notified when a user leave a new note.
Click Save to commit the new custom permission for the role.
Next, add any users or other Spaces to the role, as required. For details on how to add users to roles, see C11. Manage users in a space.Anyone in the role with Workflow features active will now be required to get approval.
