| Panel | ||||||||
|---|---|---|---|---|---|---|---|---|
| ||||||||
Fields created for the site metadatacatalogmanager can only be edited by site admins.For this reason, fields with vocabularies (listed below) should be applied with caution. When applied site-wide, they can inadvertently curtail the creation of rich vocabularies for these fields at a space level. Fields with controlled vocabularies:
Good to know: Chorus comes prepackaged with some fields for your use. These are listed at About metadata fields. |
First, open the site metadata catalog:
1. Click Admin at the top of Chorus and sign in to elevate.
2. Choose Presets > Metadata from the Admin menu. The Metadata Manager for Site will open. Proceed to edit the metadata.
In the Panels Available section, you will find two tabs:
- Site: this is where the local space panels will show
- Shared: this is where any panel shared by another space or a user will show
Step-by-step: Create a new metadata field
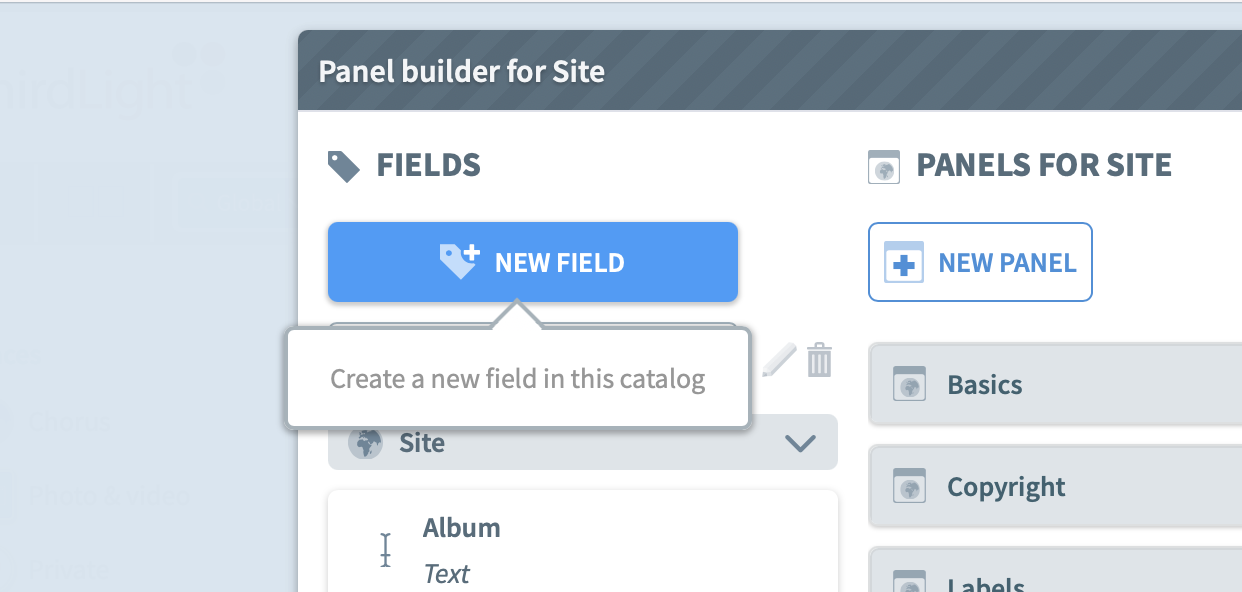
1. Choose the Fields tab of the metadata catalog modal Click the Panel Builder button.
2. Click the Plus icon to add a field. A New Field modal will open. Click the New field button.

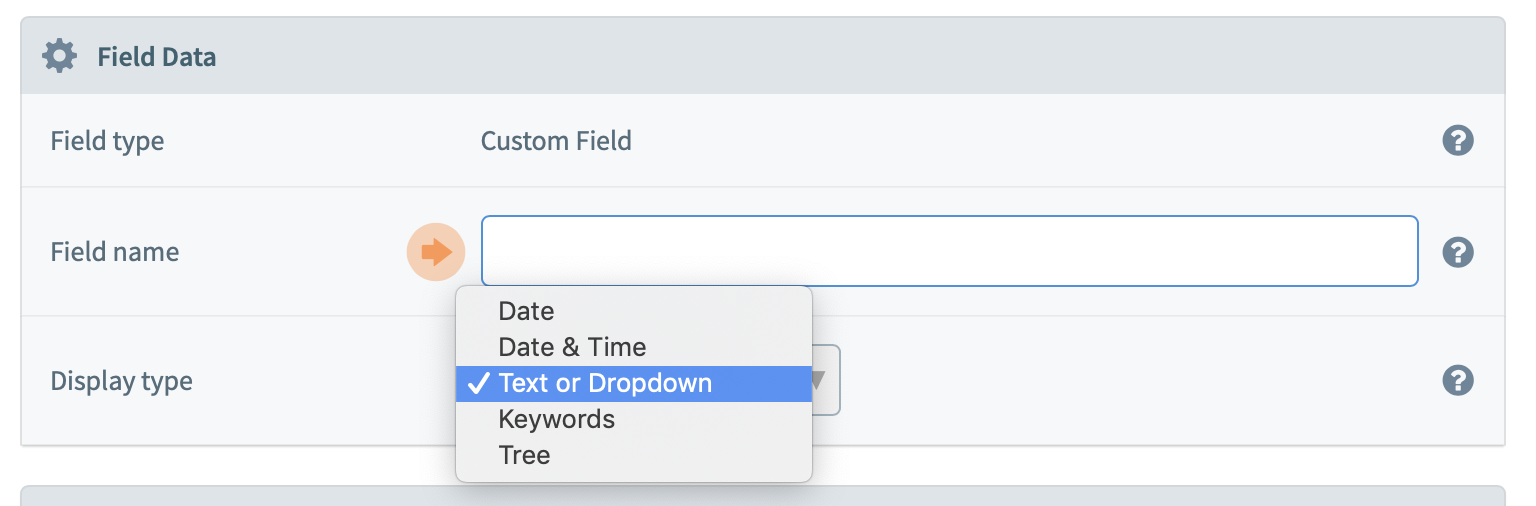
3. In the modal, edit the field settings as follows:
| Field Settings Explained | |
|---|---|
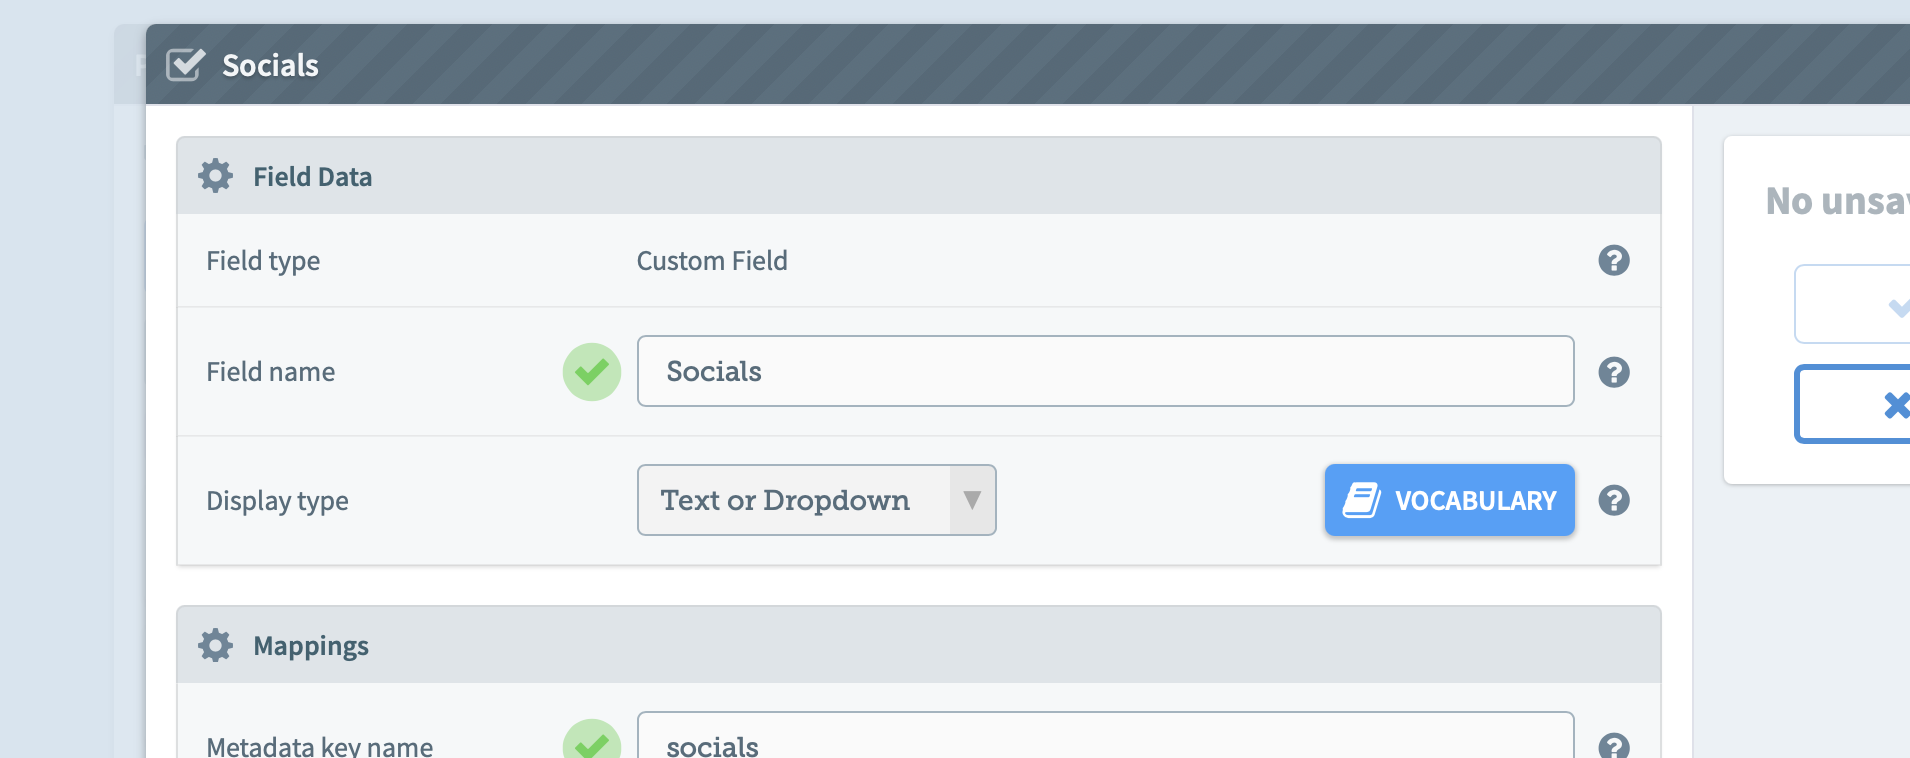
| Field name | The field name tells users about the metadata they should enter in this field. Eg. ‘Sales Keywords or ‘Design Comments’. |
| Display type | Choose the display format for this field. Format options are Date, Date & Time, Text, Dropdown, Keywords and Tree. Examples of these can be seen at page: About metadata fields.
|
| Metadata key name | If this this does not autofill, enter a short string of characters to identify this field. Third party API integrations will require this value. |
| XMP path | To map this field to XMP standards, enter a Chorus XMP Tag here. For a full list, see page: Map metadata fields to XMP standards. |
| Exif field | To map this field to Exif (Exchangeable image file format)standards, enter an Exif tag here. Eg. ImageWidth, Make, Model, Compression. |
| General Search settings | Allow or disallow this field to be searched in a global search. |
| Advanced (Refined) Search settings | Allow or disallow this field to be searched in a refined search. |
| Facets settings | Allow or disallow this field to be included for browsing with facets in search results. |
| Field Types Supported | This metadata field will be made available on files of this type. |
4. Click Save and close. You will be taken back to the Panel builder, where you can then drag and drop the field into a panel.

5. If this field offers a controlled vocabulary, a Vocabulary button will appear. See About: Controlled vocabularies for more.

Step-by-step: Edit an existing metadata field
1. Choose the Panels tab of the metadata catalogClick the Panel Builder button in the site metadata manager.
2. Click the triangle symbol at the left-hand side of the panel which houses the field you want to edit. The panel's fields and options will appear.
3. To remove a field from a panel, select the field and click Delete in the top left-hand side of the modal.
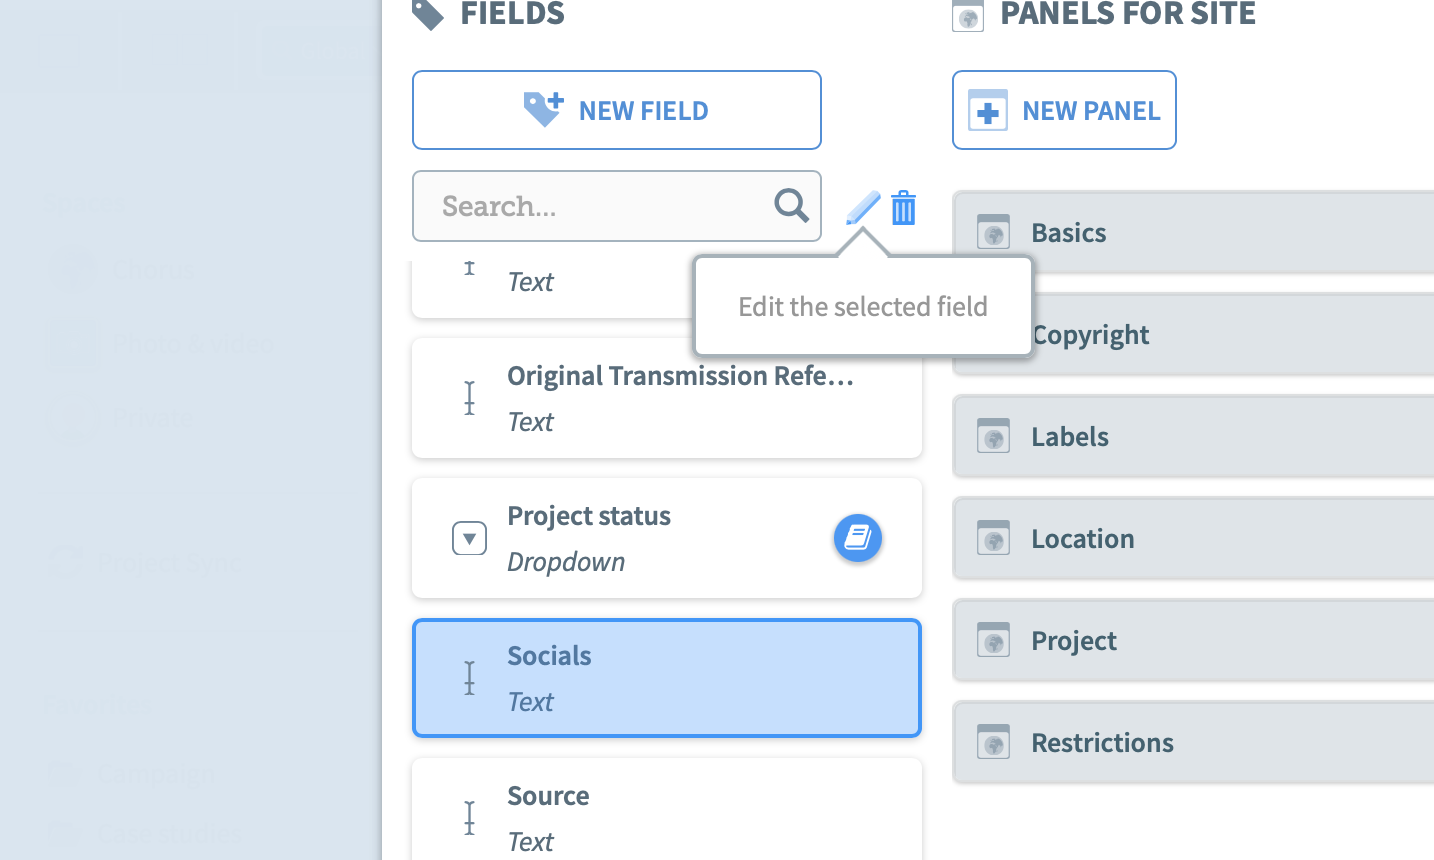
4. Click Edit in the top left-hand side of the modal, or To edit a field: Select the field in the fields section and click the pen icon, or double-click on the field. An edit field modal will open.
53. Edit the field's settings as above.
64. Click Save. The form is saved.
5. To delete a field, select the field in the fields section and click the trashcan icon.
6. In the Panel builder modal,to remove a field from a panel, select the field and click Remove (trashcan) in the top right-hand side of the modal. The field will not be deleted from the site in this case, only removed from the panel.
6. Click Save.
| Content by Label | ||||||||||
|---|---|---|---|---|---|---|---|---|---|---|
|
