The Lightweight Directory Access Protocol (LDAP) is an industry standard protocol used to centrally store usernames and passwords. Chorus can use LDAP to integrate with your Active Directory domain.
The remote LDAP server must be contactable from the Chorus server (e.g. via a public IP address), so you may wish to consider using AD FS instead if you do not want to do this for security or policy reasons.
Pre-requisites
- The DNS domain of your Active Directory (a full-qualified hostname, not the short-form name of the domain).
- A domain administrator account that will be used to create a Computer account for Third Light. Detail of this account will not be stored.
- Active Directory Domain controllers with valid, verifiable SSL certificates for their LDAP interface:
- https://support.microsoft.com/en-ca/help/321051/how-to-enable-ldap-over-ssl-with-a-third-party-certification-authority
- If you are acting as your own certificate authority, please ensure that you have added a trusted certificate via the Chorus Manager configuration pages first (start at https://[your-chorus-server]/apps/manager/). Trusted certificates are added under Global Configuration > Trusted Certificates > Add Trusted Certificate.
You will see an error about being unable to connect to the LDAP URI if the certificate chain cannot be fully validated.
- You should prepare Active Directory groups that include the users who should be permitted to use Chorus. These groups may include other groups.
When fully-configured, Chorus integration with Active Directory provides a high level of integration. Groups and users will be imported from Active Directory, including nested groups. Membership of any groups in Active Directory will be kept in sync (once per hour), as will any changes in name, email address or description. Groups imported from Active Directory can be used as a membership placeholders when you manage Spaces in Chorus, and unwanted or irrelevant system groups can be hidden.
Configuration using the Setup Wizard
We recommend using the Setup Wizard to reduce the chance of misconfiguration.
Step-by-step:
1. Click Admin at the top of your desk and sign in to elevate.
2. Choose Settings > Site from the Admin menu. The Site Admin modal will open.
3. Go to LDAP settings.
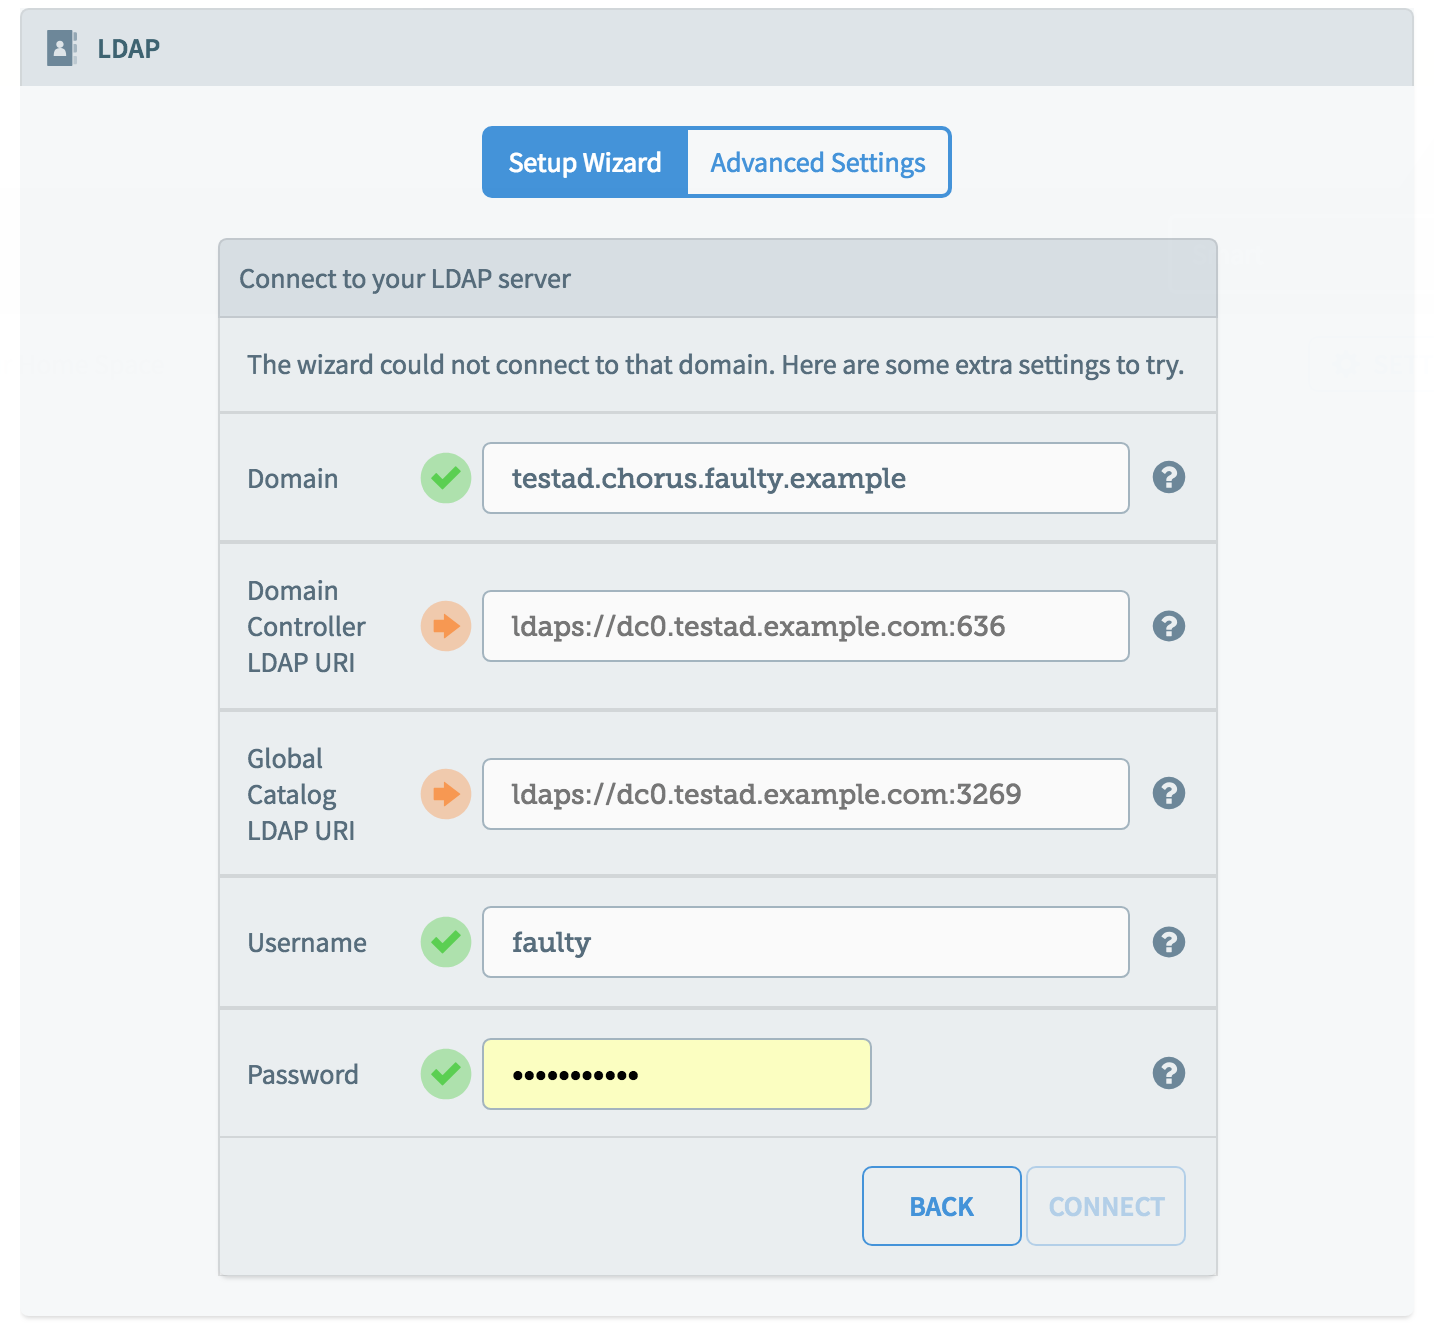
Enter the address your domain controller, a domain administrator account username and password. These credentials are used to create a Computer Account for Chorus (and are not stored).

Tips: enter the domain address, not the address of the domain controller, and the full username (DOMAIN\username) of your domain administrator account.
4. Click Connect.
If your settings are correct, you will see a list of your groups to authorize. If there is a problem connecting, you will see the following screen. If you have made a mistake, try clicking "Back" to return to the wizard.
When the settings are accepted, you can proceed to the next stage, authorizing groups.
Authorizing Groups
Place a checkbox next to the Active Directory groups that you wish to be able to use Chorus. Note that this selection affects users' ability to login, and all groups are unchecked by default. You must select at least one group. Any users in the group, or its sub-groups, will be able to login to Chorus.
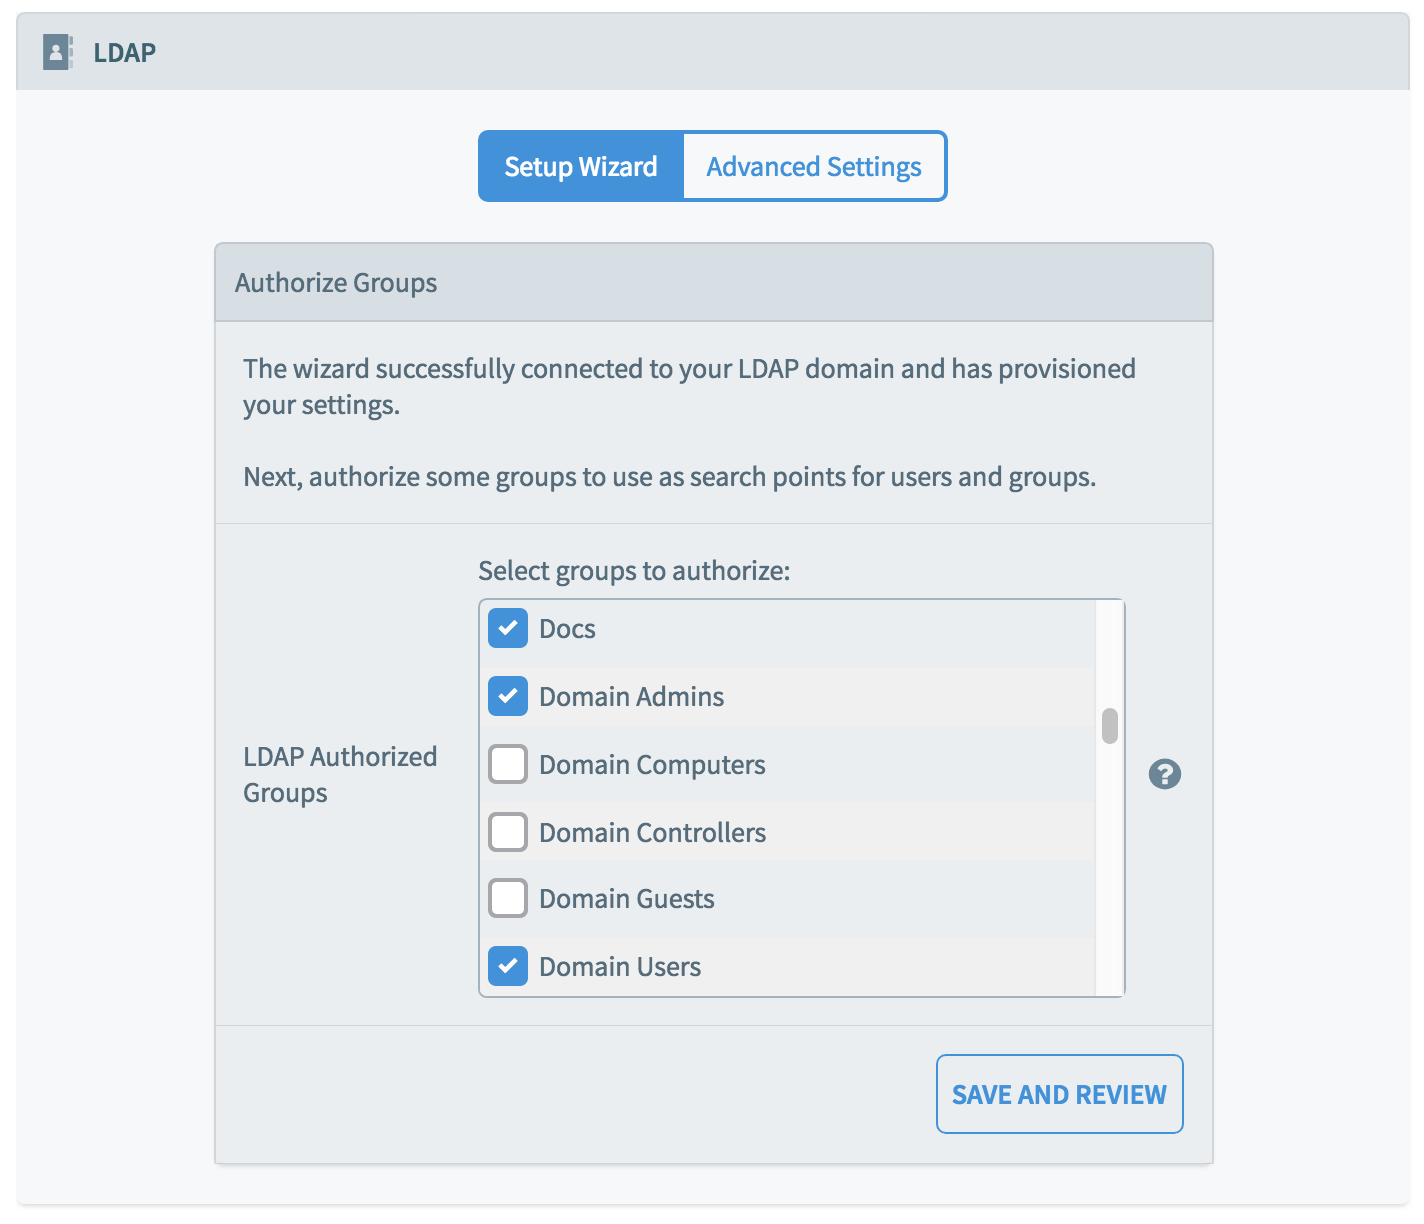
Click "Save and Review" when you are ready.
Chorus will now show you a list of the groups that are in scope, and a list of the users that are in scope. This list cannot be edited, but is to help you review the scope of the groups you chose in the previous step. If you are not happy with the results, click Back to change the authorized groups.

If you are happy with the authorized groups, click Next, to proceed to the next stage, Group Visibility.
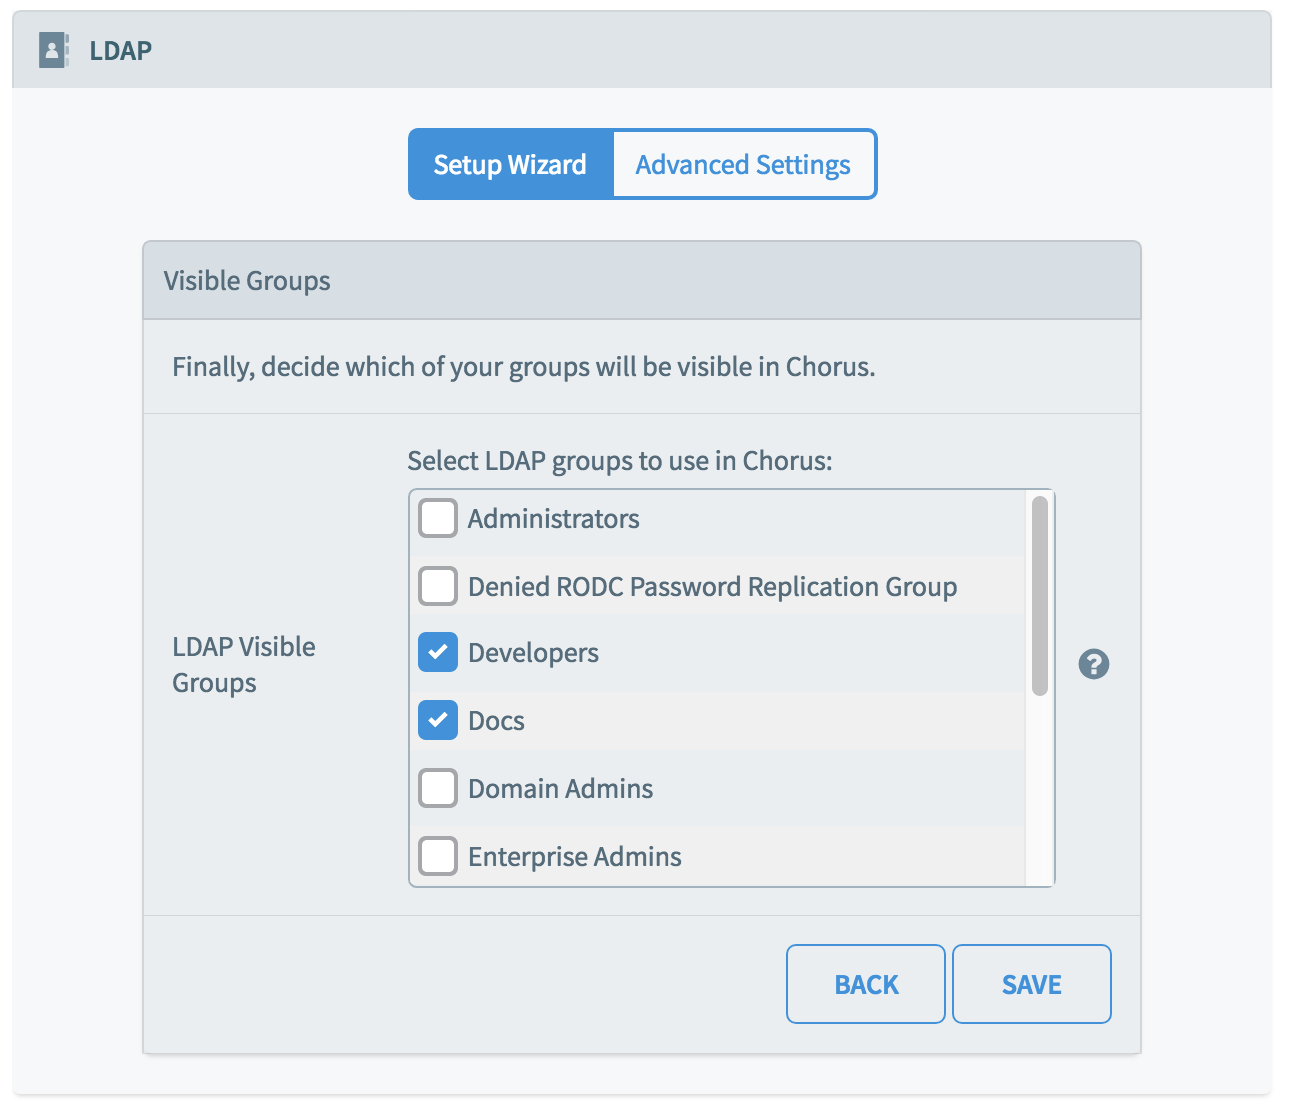
Group Visibility
After selecting the authorized groups, above, you can now choose whether to expose those groups within Chorus. Uncheck any groups that you do not wish to be visible in Chorus, and click 'Save'.
This completes the setup of your Active Directory integration with Chorus.
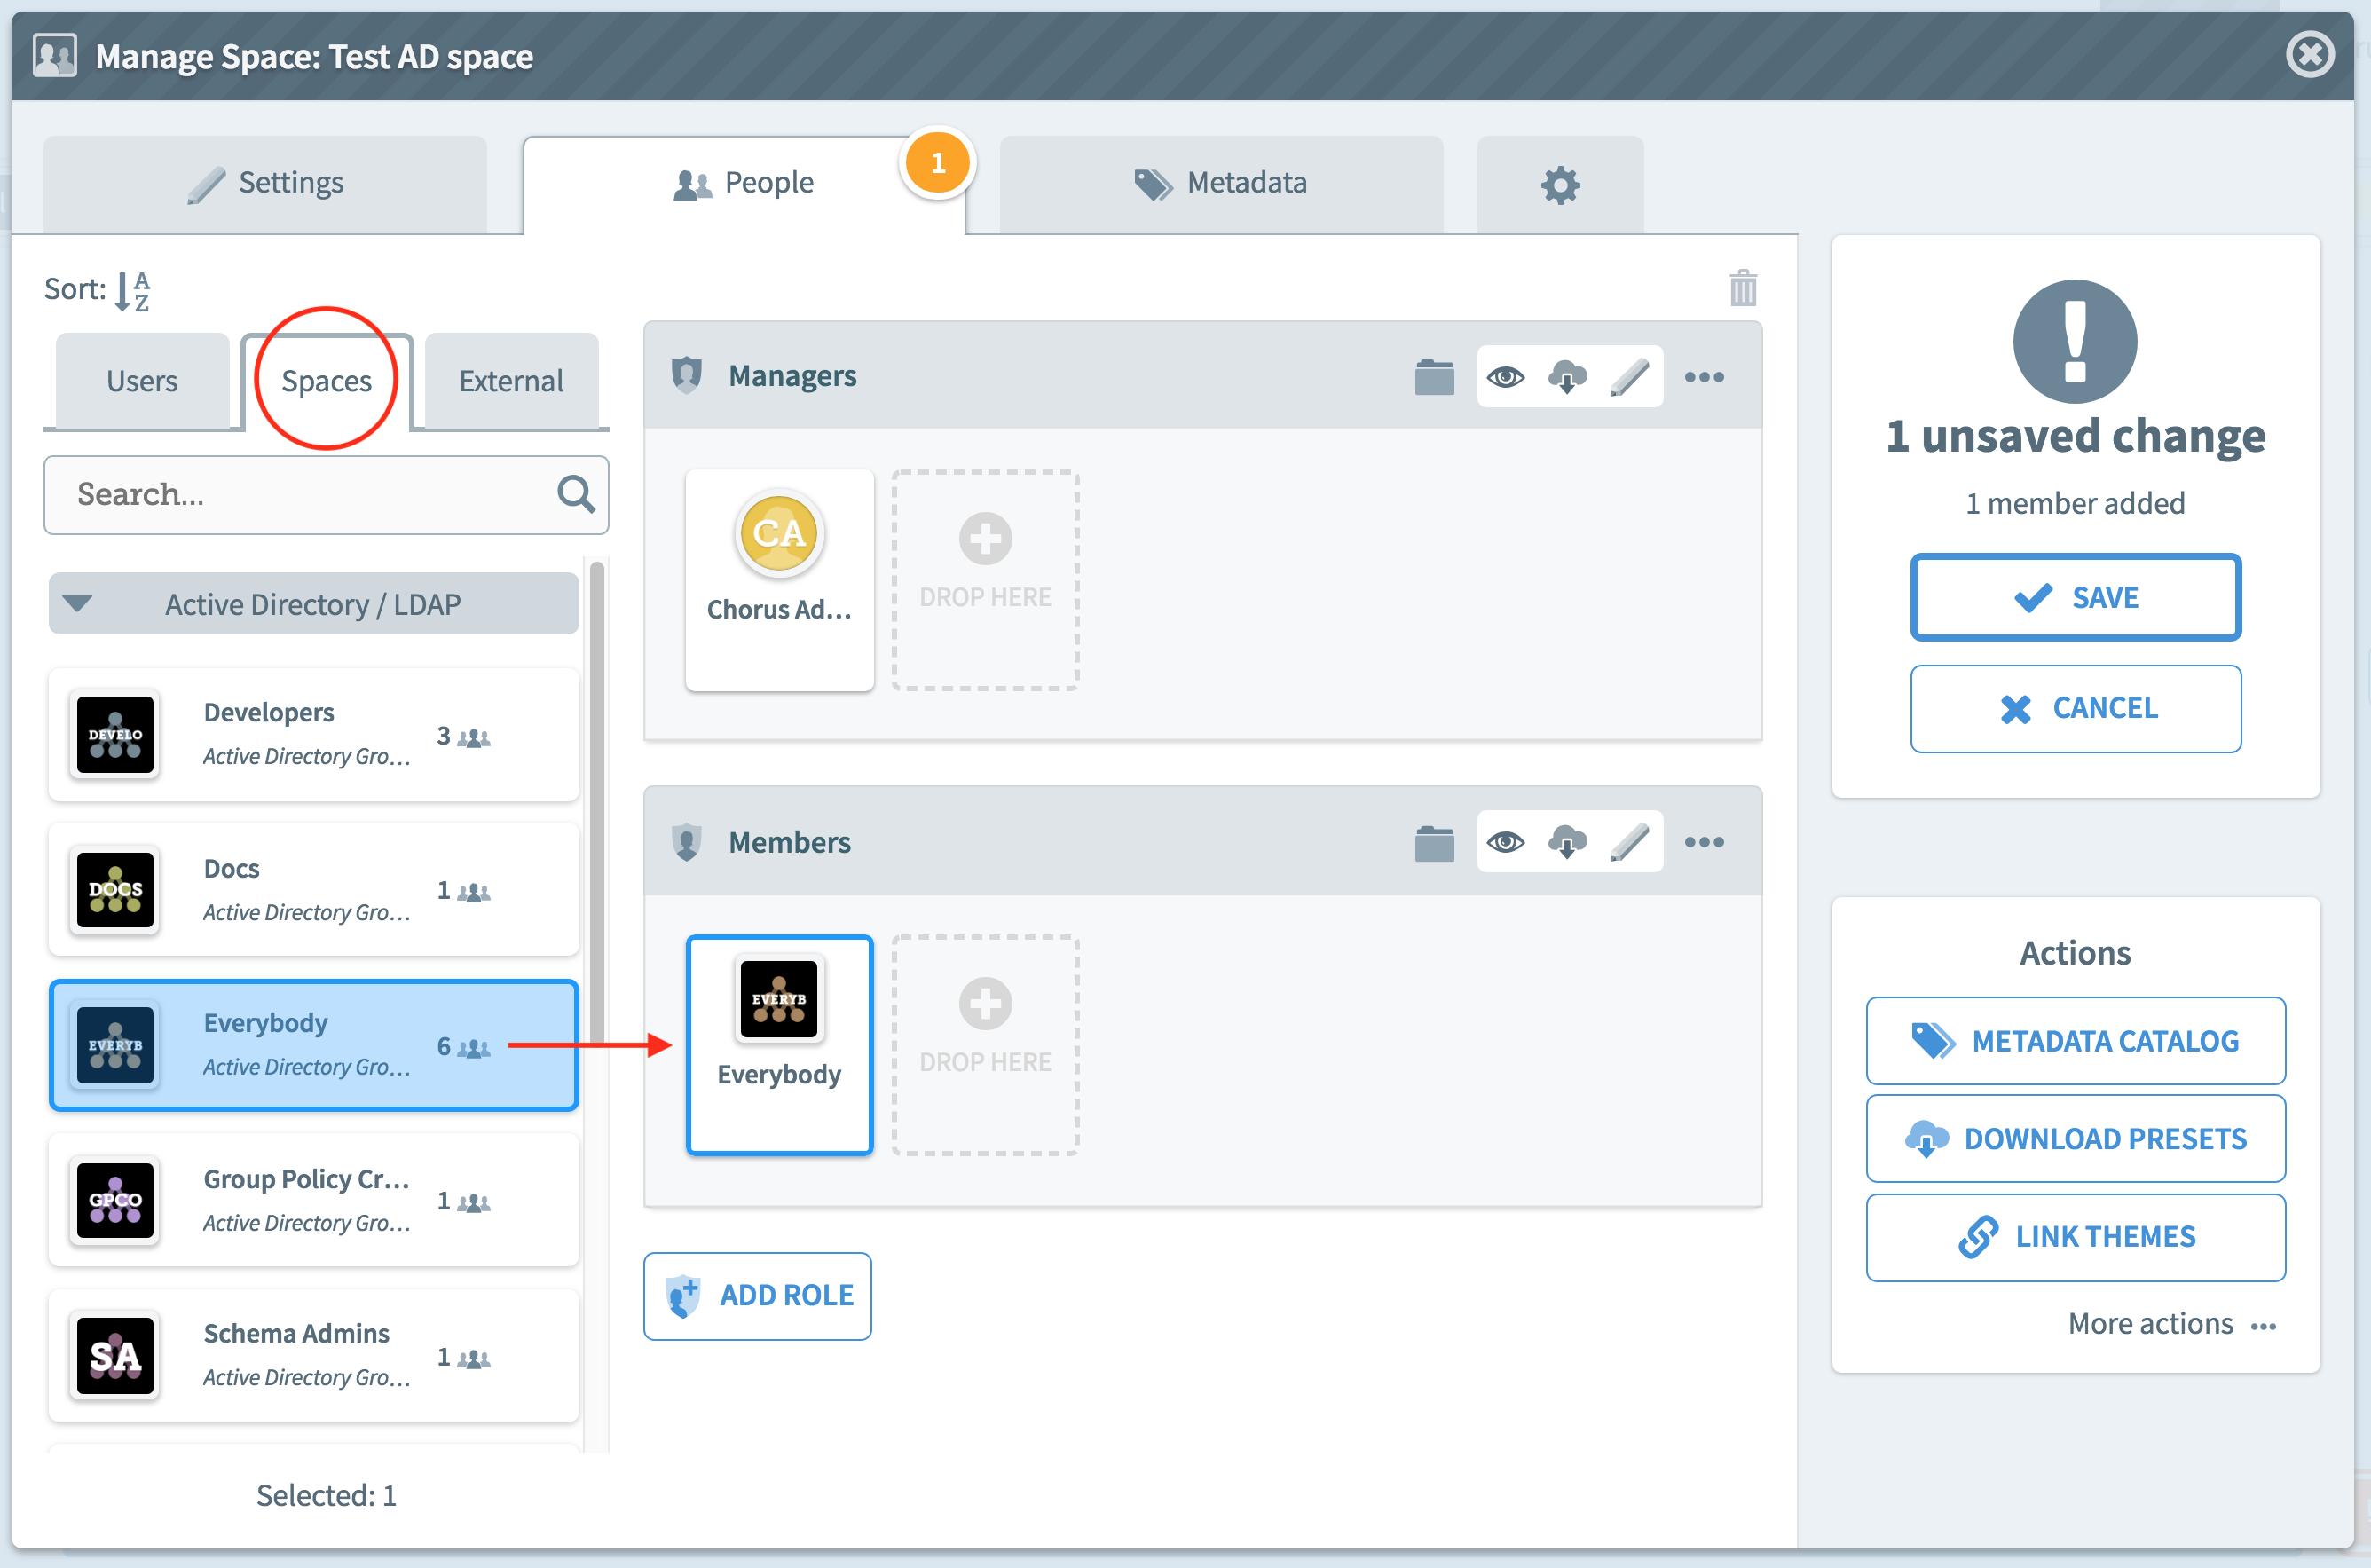
Using Active Directory groups in Spaces
When an Active Directory group is included in the authorization list, and is visible, then that group can be used in Spaces. The Space manager will use a distinctive Active Directory icon. The Active Directory Group can be dropped onto roles such as Managers, Members and all users in that group will be given the corresponding level of access in that Space.
Advanced Settings
Generally, these will be set by the wizard and should be left unchanged. You can re-run the wizard if necessary. The test button at the top of the form can be used to check contact with the LDAP servers and the validity of the bind user and password.
LDAP Authorized Groups
You can add or remove authorized groups by checking or unchecking groups in the left-hand scrolling window. Click 'Save' to see the changes. The Groups (and therefore also users) in scope are updated in the central and right-hand columns.
If you uncheck a group from the Authorized Groups list, then users whose sole access to Chorus relied upon their membership of that group will be locked out of Chorus from their next login. Their account will not be deleted.
If a group is deleted in Active Directory, then Chorus will continue to display the group but it will have no members.

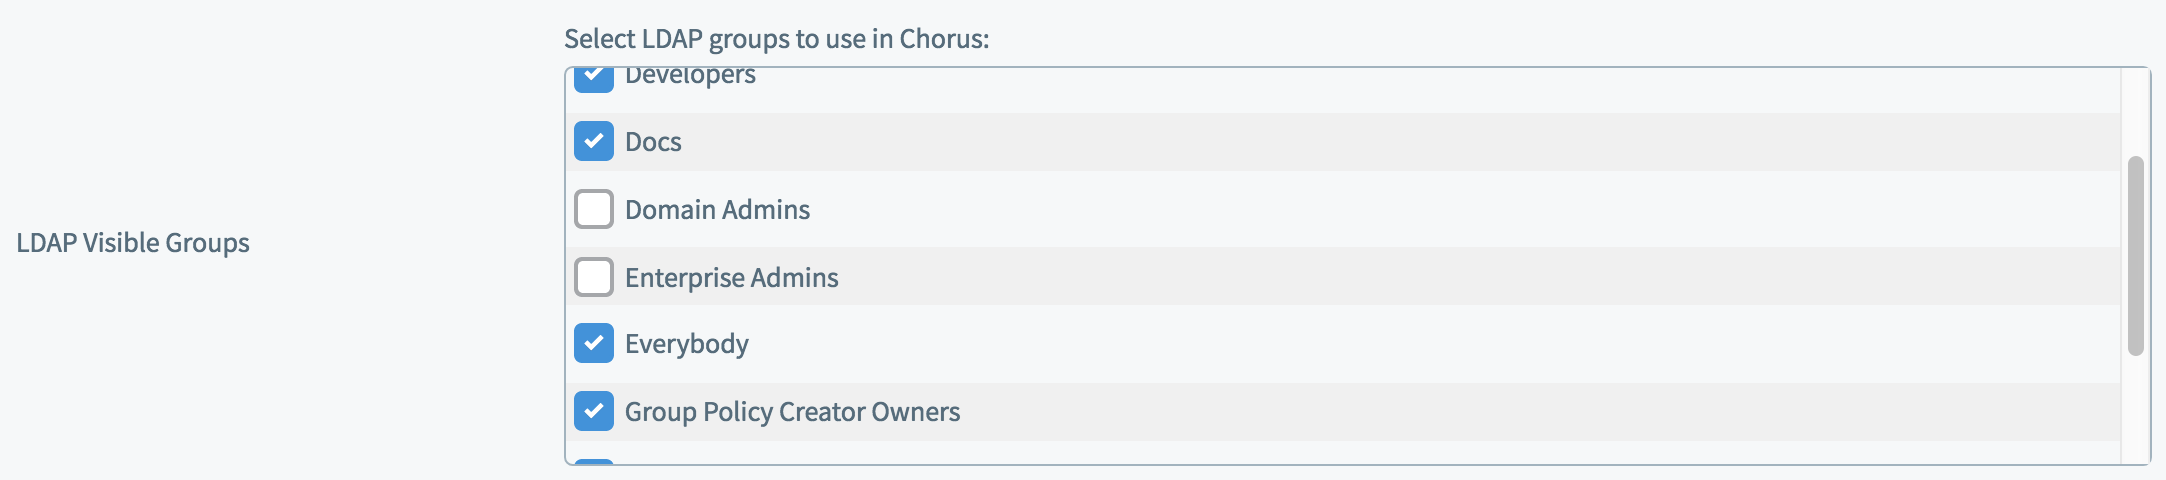
LDAP Visible Groups
Groups imported from Active Directory can be unchecked, for example to reduce clutter or avoid using groups that do not help Chorus users to organize their Spaces. Uncheck any groups to remove them.
If a group is in use in any Spaces, unchecking it from the list of visible groups does not remove it. Those Spaces will continue to use the group, and it will continue to be displayed inside those Spaces. To remove the group completely, you should delete it in Active Directory. Chorus will continue to display the group but it will have no members. You can uncheck it from the list of visible groups to hide it, preventing further use.
Login, Population and Synchronization
At the end of the wizard, all three of these are enabled. This is the typical correct configuration.
- Enable LDAP Login
- May be disabled (e.g. when using hybrid SAML2 mode) so that AD users do not learn to log in with their username and password
- Enable LDAP Population
- Turning this off means that the users and groups that are found are not created. This allows you to adjust the authorized groups without creating a lot of new objects in Chorus.
- Enable LDAP Synchronization
- Disabling this would mean that new users, groups or changes will not be synchronised to Chorus. All password authentication at login continues to be managed by LDAP.
Combine SAML2 and LDAP
If you have configured SAML2 authentication, then your Chorus server can use this to discover groups and memberships, and use SAML2 for single sign-on.
On the SAML2 configuration page, check the box "Combine SAML2 and LDAP". Chorus will then use AD/LDAP to find users, groups and memberships (including nested group memberships), and direct users to your AD FS/SAML2 SSO to log in.
When enabled, new user accounts will not be provisioned on demand for all SSO users. Instead, only those that correspond to imported LDAP users can log in.
This mode combines the advantages of LDAP and SAML external authentication systems: using LDAP your users and groups can be located, pre-populated, and configured at set up time. Using SAML, your users' passwords are only ever handled by your existing central SSO system, can be signed in transparently, and use existing multi-factor policies. This mode can be enabled on top of an existing LDAP configuration without reconfiguring individual users (unlike transitioning from pure-LDAP to pure SAML2).
This feature requires that your SAML2 IdP be configured to provide either Object GUID (http://schemas.xmlsoap.org/ws/2005/05/identity/claims/objectguid) or Primary SID (http://schemas.microsoft.com/ws/2008/06/identity/claims/primarysid) claims for users, matching the equivalent LDAP attribute. The equivalent LDAP attribute for Primary SID is objectSid. The equivalent LDAP attribute for Object GUID is objectGuid.
More on external authentication:
You are here:
