Introduction
Availability
AD FS and Shibboleth support (using SAML2) is only available with our Premium and Enterprise Editions with the Authentication Module with support for AD FS, Shibboleth, Active Directory and OpenID.
Prior to using it, you must configure SSL for your site.
Terminology
SAML2 | An acronym for "Security Assertion Markup Language 2.0", which is the standard implemented by AD FS and Shibboleth to allow integration with applications (such as Third Light IMS). |
|---|---|
Identity Provider (IdP) | The third party service used by Third Light IMS (as a Service Provider) to authenticate a user. This is provided by either your AD FS or Shibboleth service. |
Service Provider (SP) | The part of Third Light IMS which requests authentication from the IdP. |
Relying Party (RP) | The application that is using the SP and IdP to authenticate, in this case Third Light IMS. |
Entity ID | The unique ID of the IdP or SP. Normally it looks like a URL, but it is not necessary for the Entity ID to be resolvable. |
Metadata | The details of the IdP or SP. If Third Light can connect to the IdP (and vice-versa) you can use the URL and this enables automatic lookup of the metadata. Otherwise, you will have to manually supply the metadata. |
Name ID | This is the primary data returned when Third Light IMS completes authentication with the IdP. |
Attributes | Attributes are pieces of data about the user who has been authenticated by the IdP. This allows Third Light IMS to know who has been authenticated and to which group the user belongs. |
AD FS Installation
See Deploying AD FS.
Configuration
IMS Configuration
The Metadata URL is "https://adfs.example.com/FederationMetadata/2007-06/FederationMetadata.xml", where adfs.example.com is the host of your AD FS server.
Go to Configuration › System Administration.
Select the "SAML2" tab (if this isn't available, see the 'Availability' info box at the top of this document).
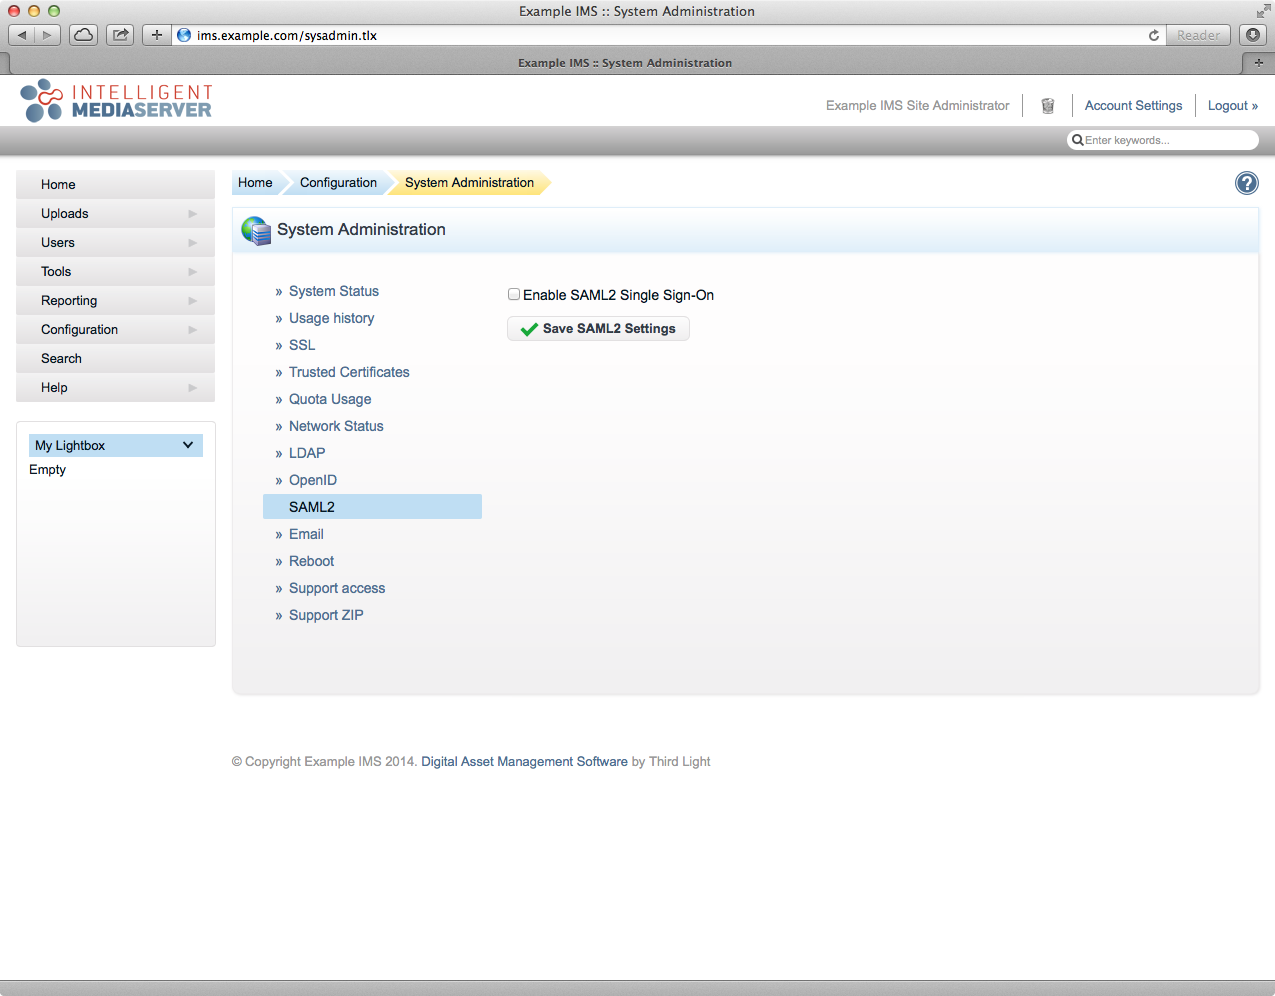
Tick the 'Enable SAML2 Single Sign-On' checkbox, this will reveal the SAML2 configuration fields.
If your IMS server can access your AD FS server:
IMS will automatically load the Metadata from the URL that you provide and check for updates once a day.
Ensure the "Load IdP Metadata from URL" radio option is selected.
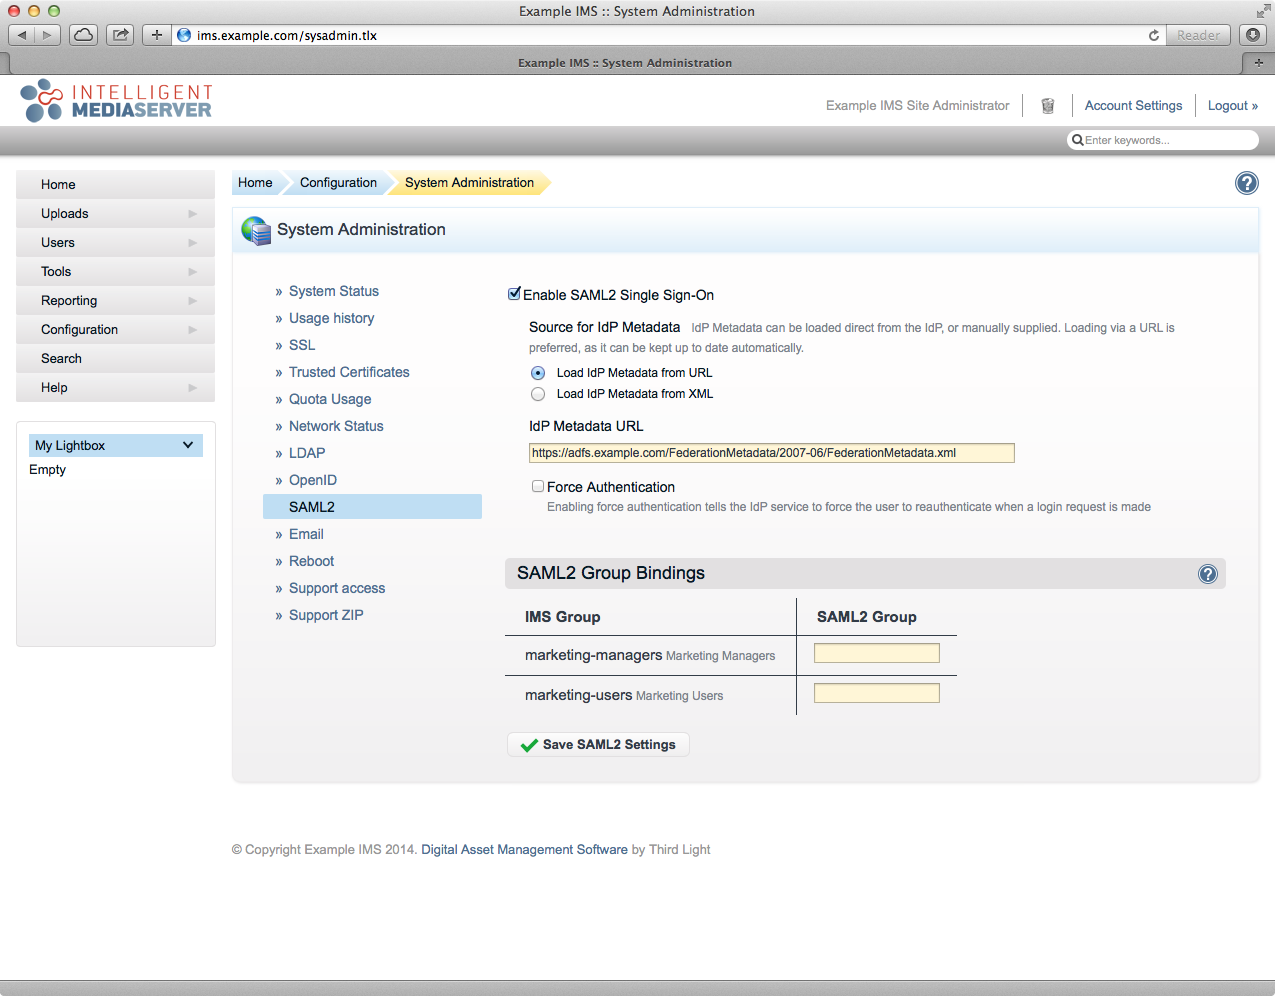
- Enter the Metadata URL (see info box at the top of this section) into the field labelled "IdP Metadata URL".
If your IMS server cannot access your AD FS server:
IMS will not automatically update the Metadata if you change your AD FS configuration. If you make any changes, then you may have to re-add the Metadata manually (as below).
- Select the "Load IdP Metadata from XML" radio option.
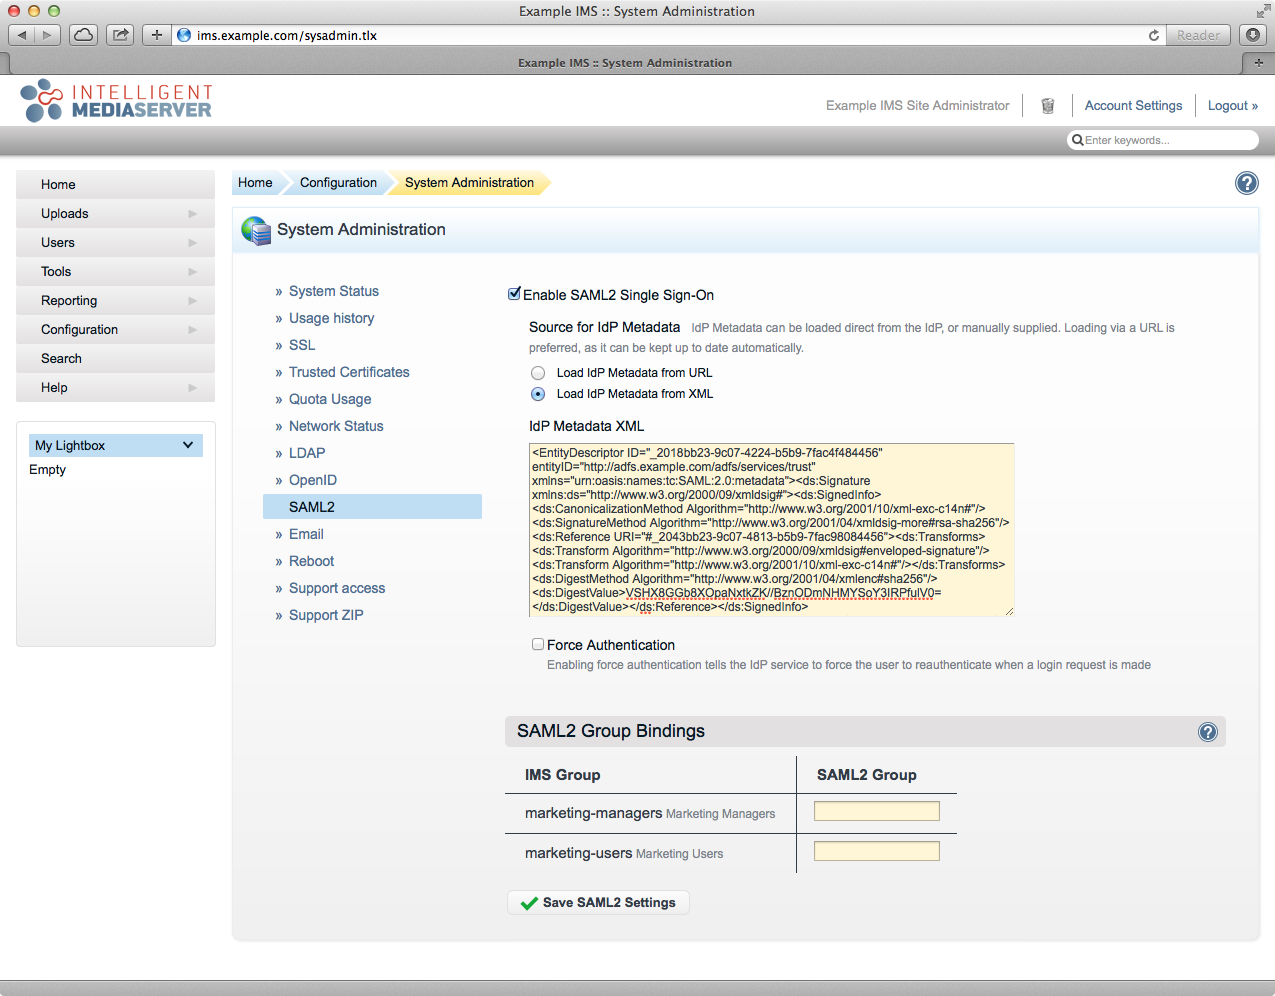
- Paste the Metadata into the text field labelled "IdP Metadata XML" (see the info box at the top of this section).
- Select the "Load IdP Metadata from XML" radio option.
- Click the "Save SAML2 Settings".
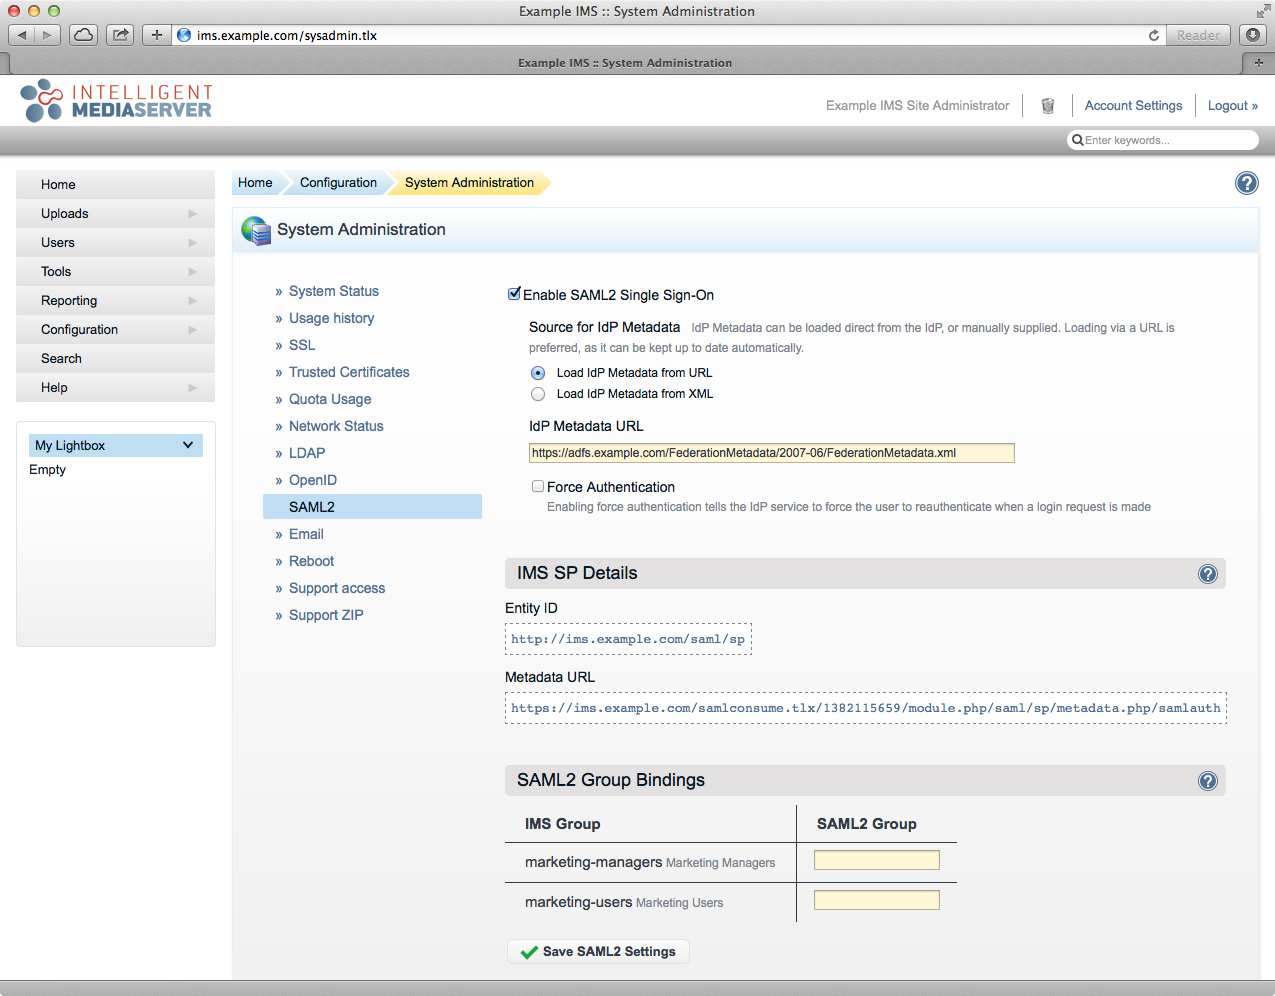
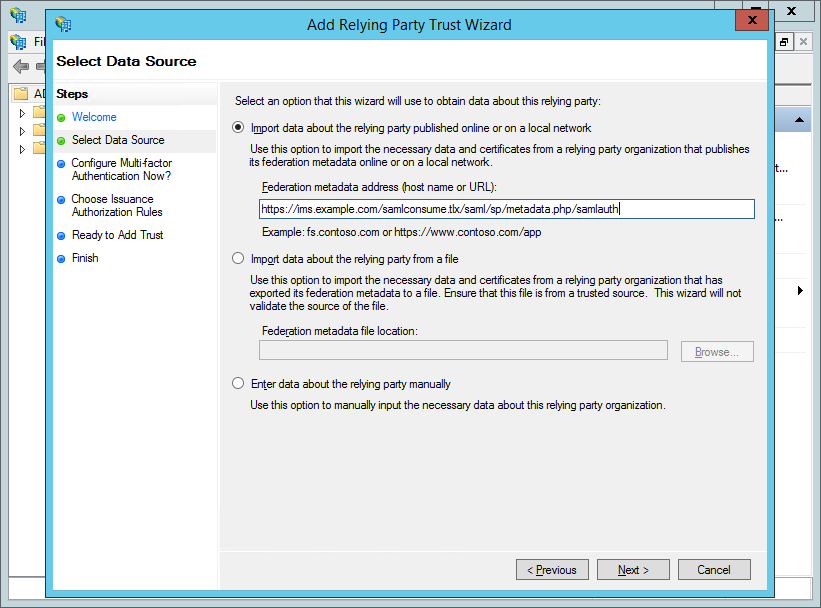
Note that there there is now an Entity ID and Metadata URL for the SP (e.g. https://ims.example.com/samlconsume.tlx/1382115659/module.php/saml/sp/metadata.php/samlauth). Keep note of this as you will need it to configure the Relying Party in AD FS, below.
AD FS Configuration
Open AD FS Management from Administrative Tools.
Right-click the top-level "AD FS" folder.
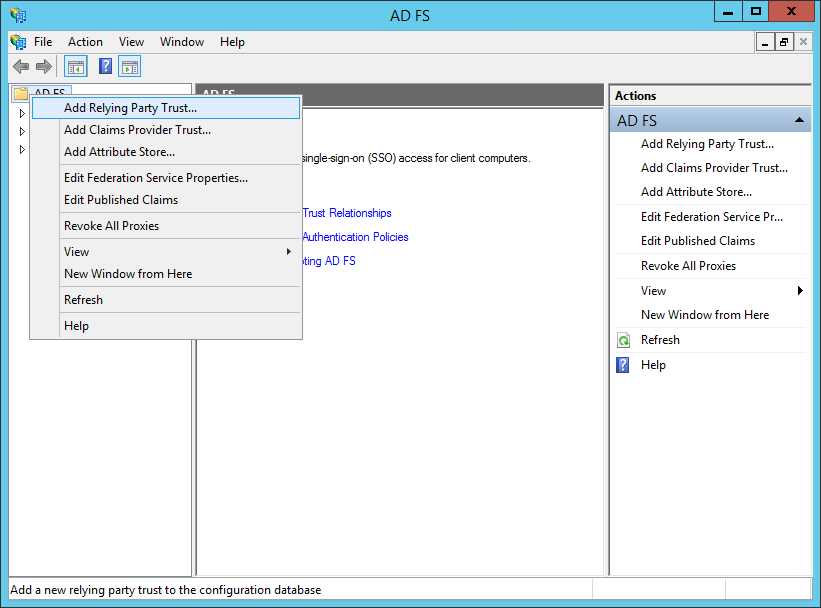
Select "Add Relying Party Trust…".
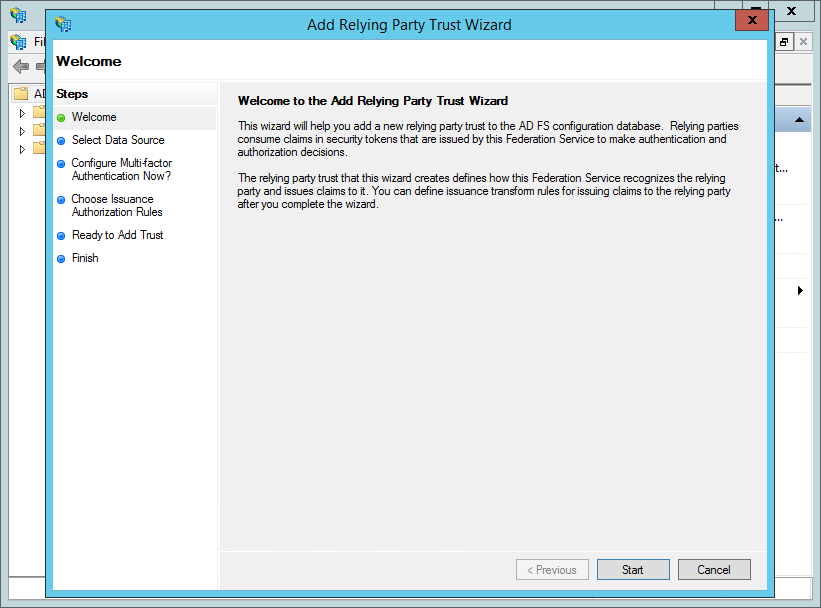
Click "Start".
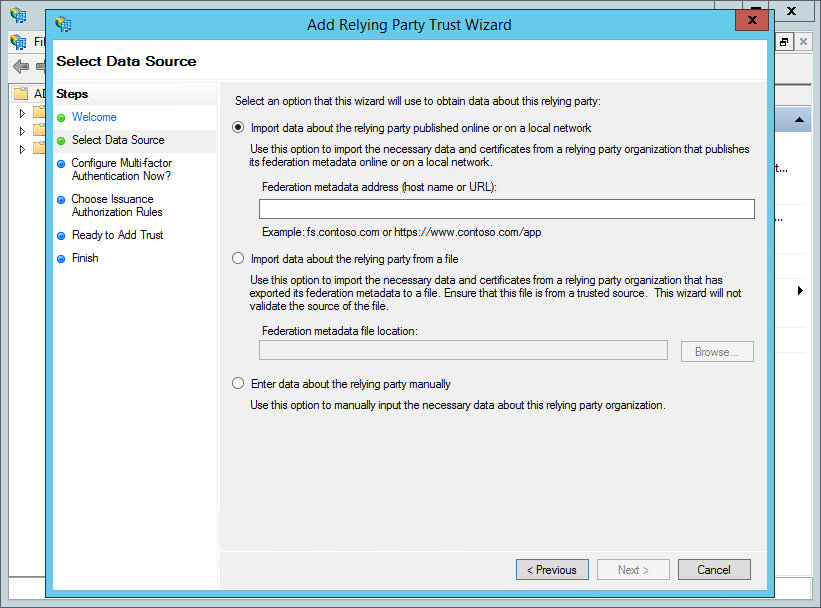
If your AD FS server can directly access IMS, then:
- Enter the Metadata URL for the IMS SP in the field labelled "Federation metadata address (host name or URL)".
- If you get a warning (screenshot below), you can ignore this by clicking "OK".

- If you get an error "AD FS could not create ssl/tls secure channel", this may indicate that your AD FS server does not support TLSv1.2. See the Microsoft documentation to enable this - at the time of writing, this can be found at https://docs.microsoft.com/en-us/windows-server/identity/ad-fs/operations/manage-ssl-protocols-in-ad-fs#enable-and-disable-tls-12
- Enter the Metadata URL for the IMS SP in the field labelled "Federation metadata address (host name or URL)".
If your AD FS server cannot directly access IMS, then:Click "Next".
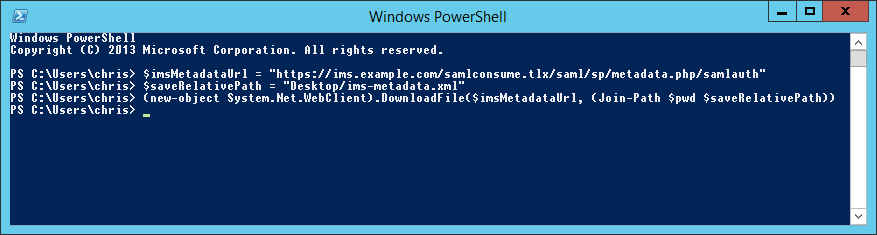
- You will need to download the SPMetadata from IMS into a file and get this onto the AD FS server. For example:
- Open a new Powershell Window
Run the following command (change the URL on the first line to the value of the Metadata URL for IMS and '1234567890' to the Id specific for your installation).
$imsMetadataUrl = "https://ims.example.com/samlconsume.tlx/1234567890/module.php/saml/sp/metadata.php/samlauth"
$saveRelativePath = "Desktop/ims-metadata.xml"
(new-object System.Net.WebClient).DownloadFile($imsMetadataUrl, (Join-Path $pwd $saveRelativePath))
- Open a new Powershell Window
- Click the radio button to the left of "Import data about the relying party from a file".
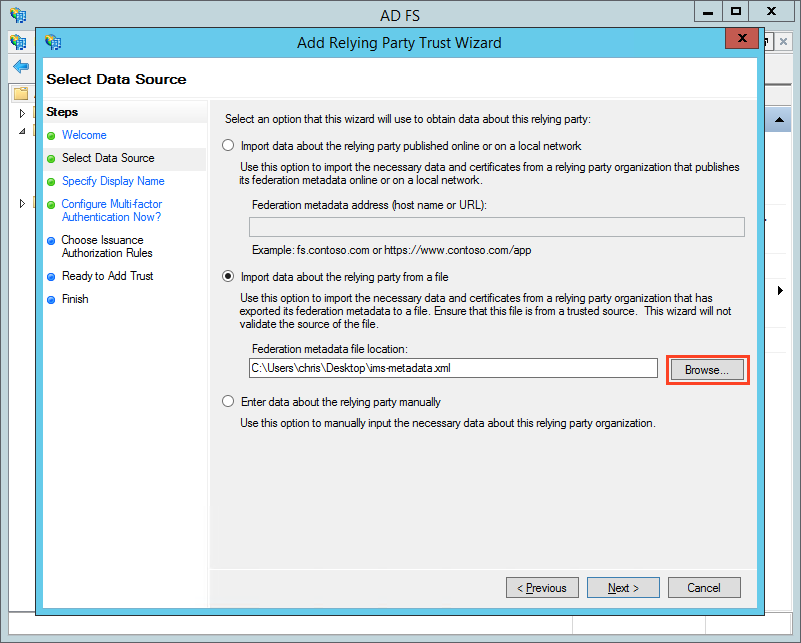
- Click "Browse" (highlighted in red, above) and choose the location of IMS's SP Metadata that you downloaded.
- You will need to download the SPMetadata from IMS into a file and get this onto the AD FS server. For example:
Click Next.
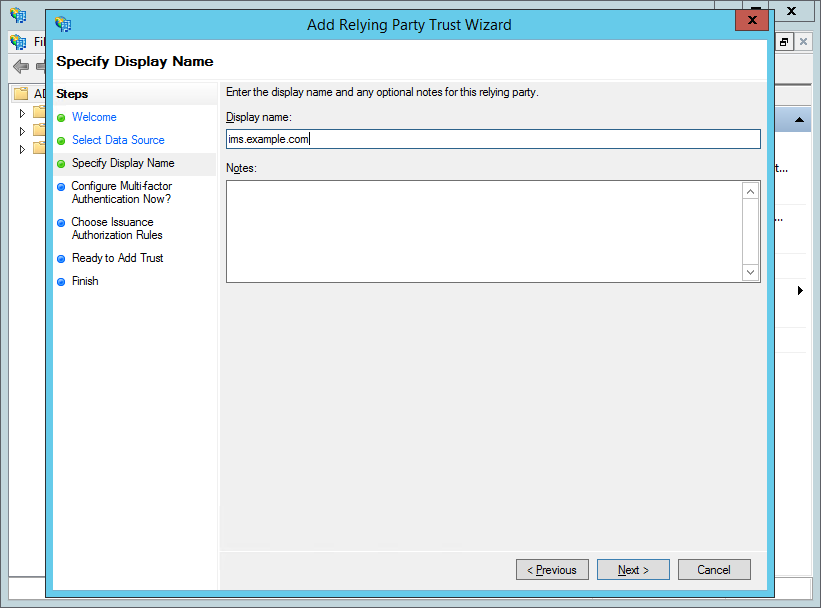
Enter a "Display name" (e.g. "ims.example.com"; the name that Relying Party will appear in the AD FS management tool) and, optionally, add some "Notes". Click "Next".
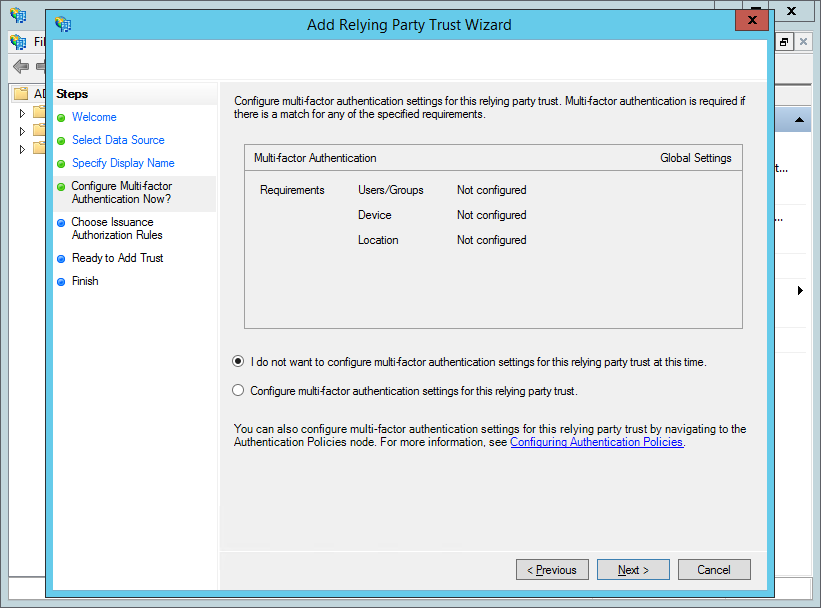
Click "Next".
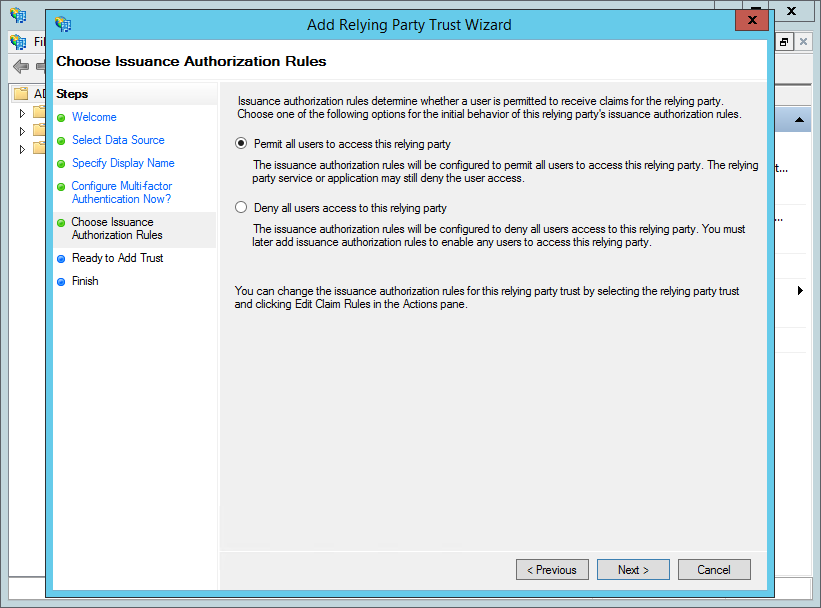
Click "Next".
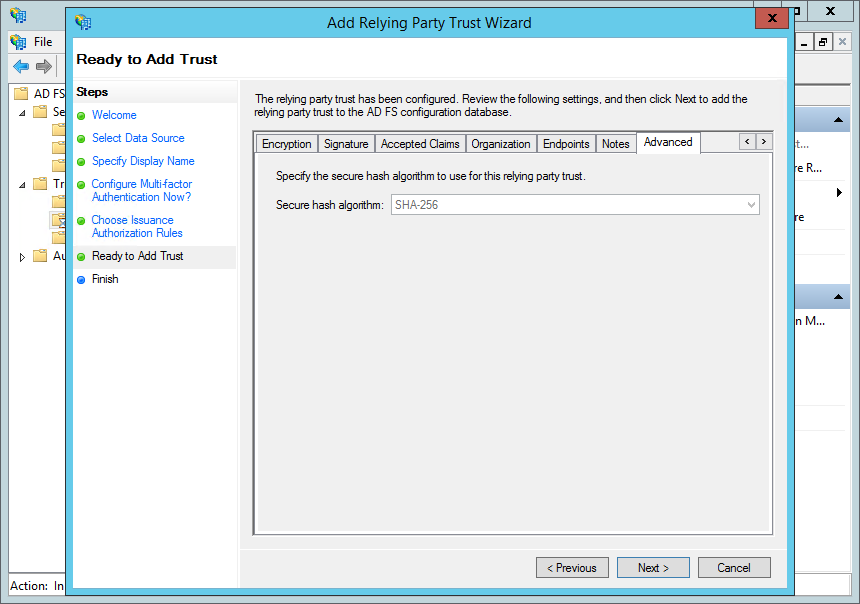
Click "Next".
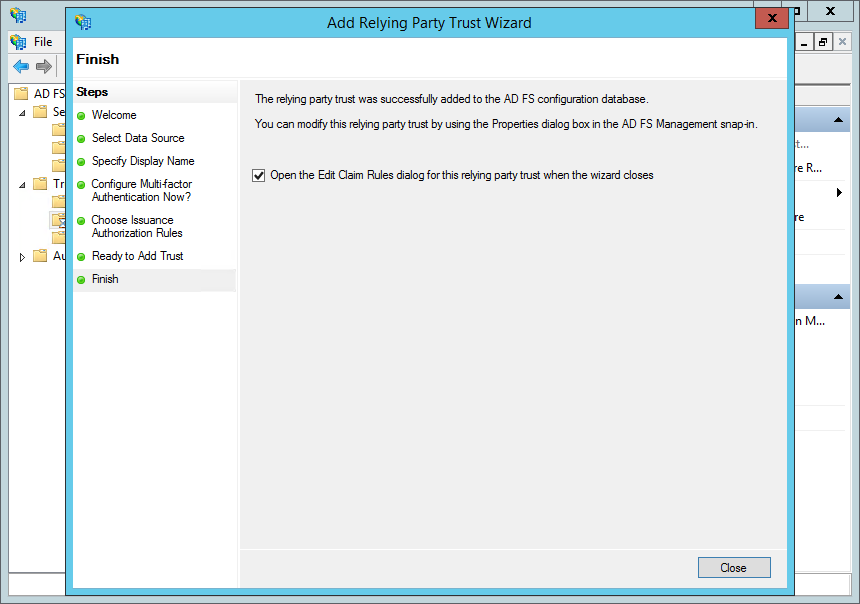
Ensure that "Open the Edit Claim Rules dialog for this relying party trust when the wizard closes" is checked. Click "Close".
Note: You can also get to this by right-clicking on the IMS Relying Party (e.g. ims.example.com) and selecting "Edit Claim Rules…".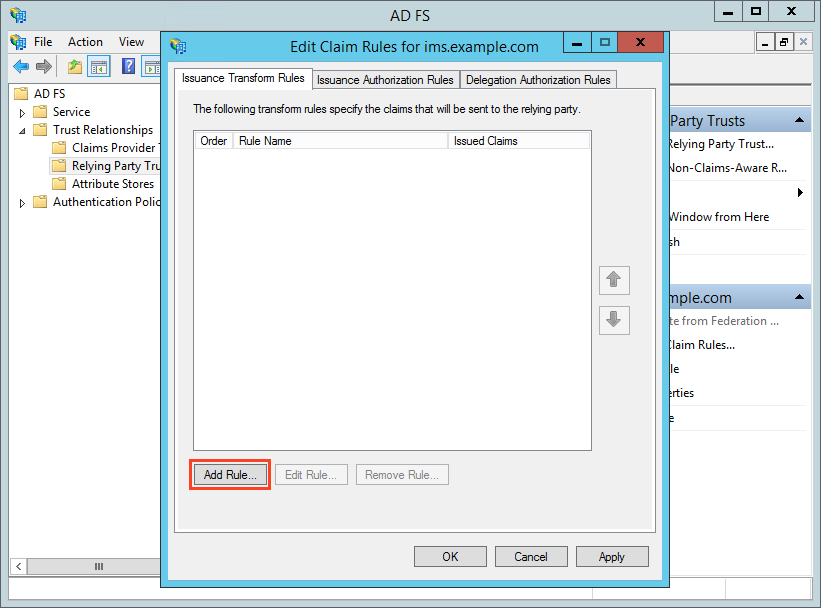
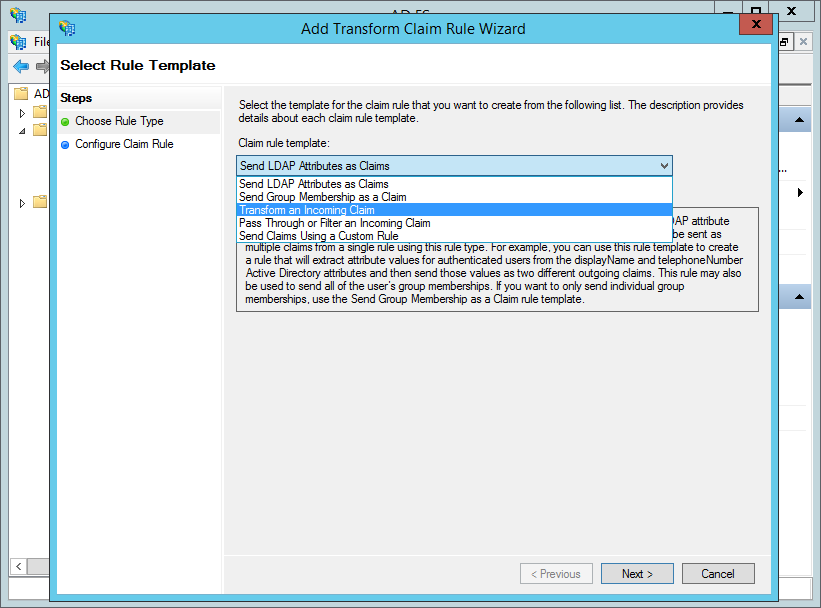
- Click "Add Rule…" (highlighted in red, above).
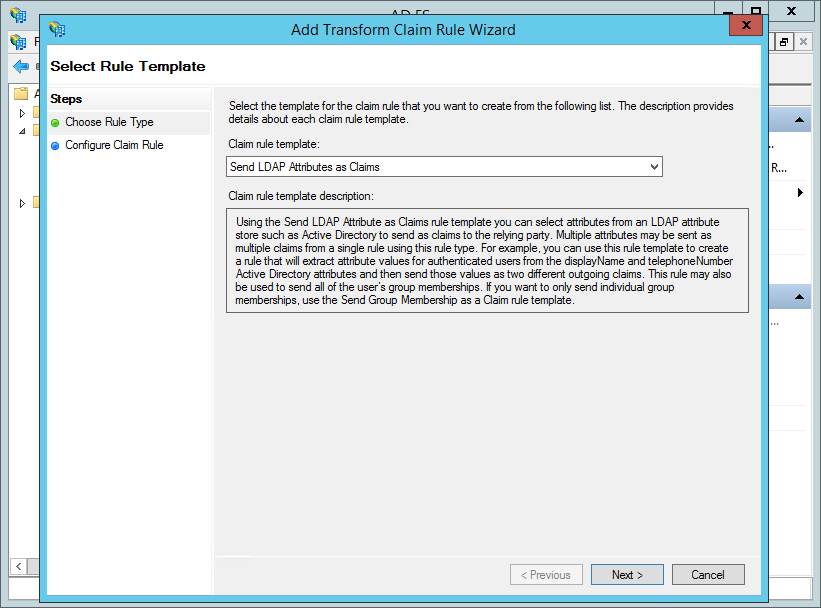
- Leave the "Claim rule template" as "Send LDAP Attributes as Claims" and click "Next".
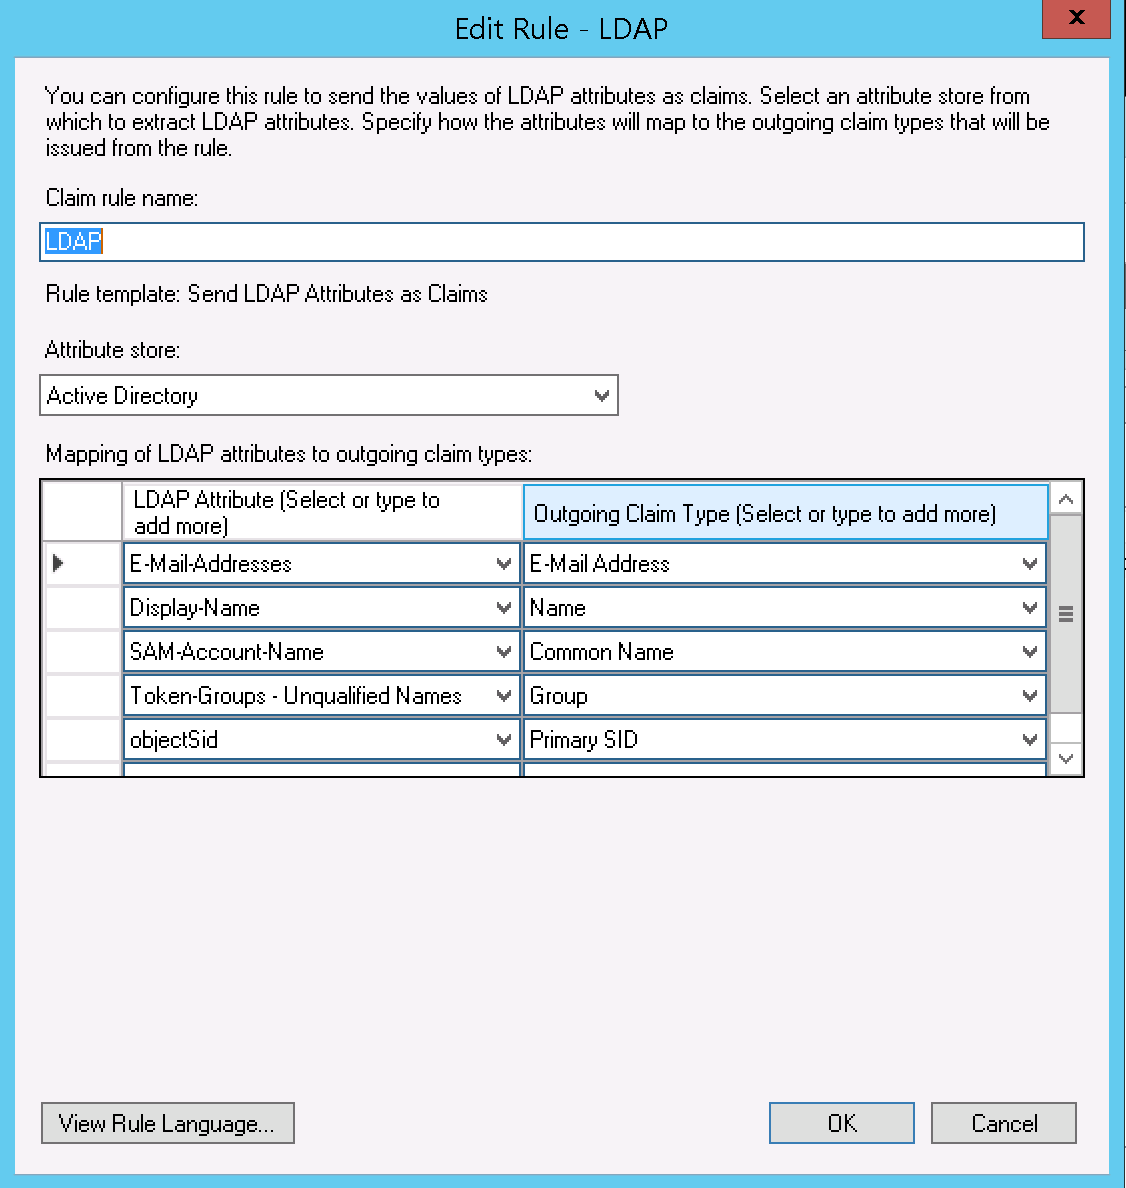
- Complete the form, as follows:
- "Claim rule name": "LDAP"
- "Attribute store": select "Active Directory"
"Mapping of LDAP attributes to outgoing claim types", as follows (note: the "Associated Claim Type URI" is configured in AD FS > Service > Claim Descriptions, and these should be provided by a default AD FS install).
LDAP Attribute Outgoing Claim Type Associated Claim Type URI Purpose in IMS E-Mail-Addresses E-Mail Address http://schemas.xmlsoap.org/ws/2005/05/identity/claims/emailaddressEmail Address - also used to find users where the authentication type has changed to SAML2 Display-Name Name http://schemas.xmlsoap.org/ws/2005/05/identity/claims/nameDescription - updated on login SAM-Account-Name Common Name http://schemas.xmlsoap.org/claims/CommonNameUsername - only used at initial creation Token-Groups - Unqualified Names Group http://schemas.xmlsoap.org/claims/GroupGroup mapping - updated on login objectSid Primary SID http://schemas.microsoft.com/ws/2008/06/identity/claims/primarysid
Generation of Name ID (see next rule) - used to identify bound users
- Click "Finish".
- Click "Add Rule…" again.
- Select "Transform an Incoming Claim" from the "Claim rule template"
- Click "Next".
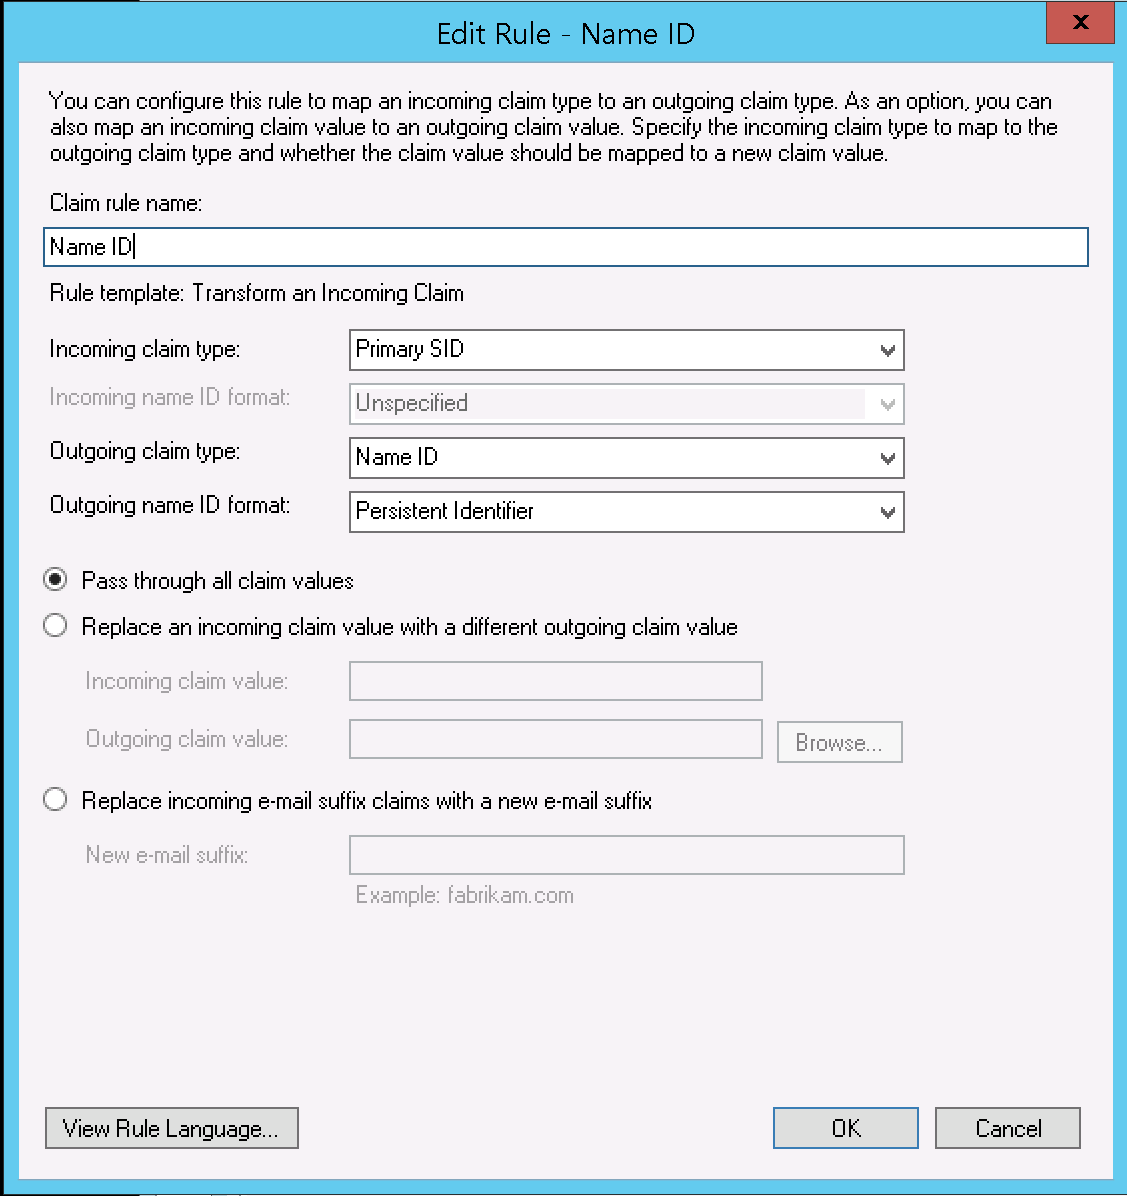
- Enter the following details:
- "Claim rule name": "Name ID"
- "Incoming claim type": "Primary SID"
- "Outgoing claim type": "Name ID"
- "Outgoing name ID format": "Persistent Identifier"
- Click "Finish".
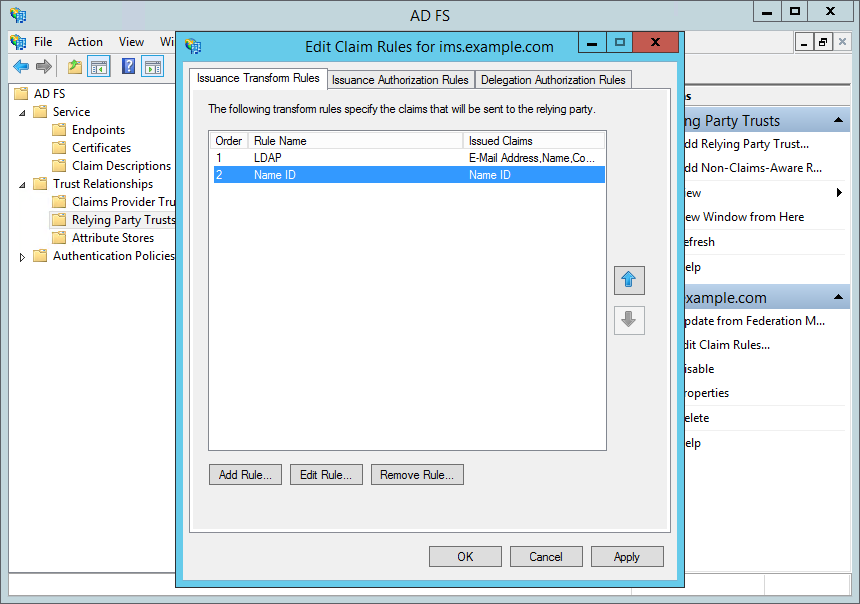
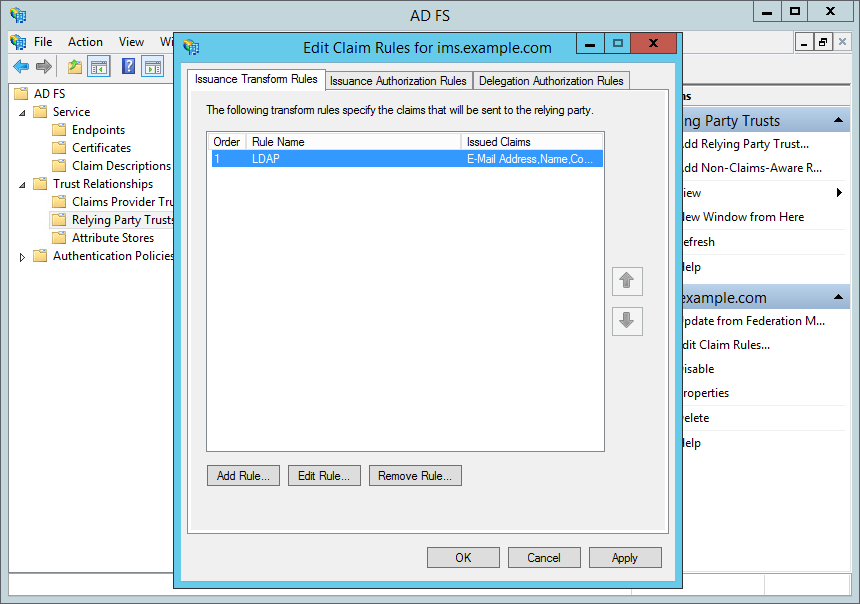
- Ensure that the order is "LDAP" and then "Name ID".
- Click "OK"
In the above, objectSid is used as the basis for generating a Name ID. You can use other fields - objectGuid being one suitable example. You should normally avoid using sAMAccountName / email / User Principal Name for this as they may change.
Testing the Configuration
IMS and AD FS should now both be configured for Single-Sign-On. To quickly test:
Open up IMS in your browser (e.g. http://ims.example.com)
If you're logged in, then logout.
Go to libraryhome.tlx (e.g. http://ims.example.com/libraryhome.tlx).
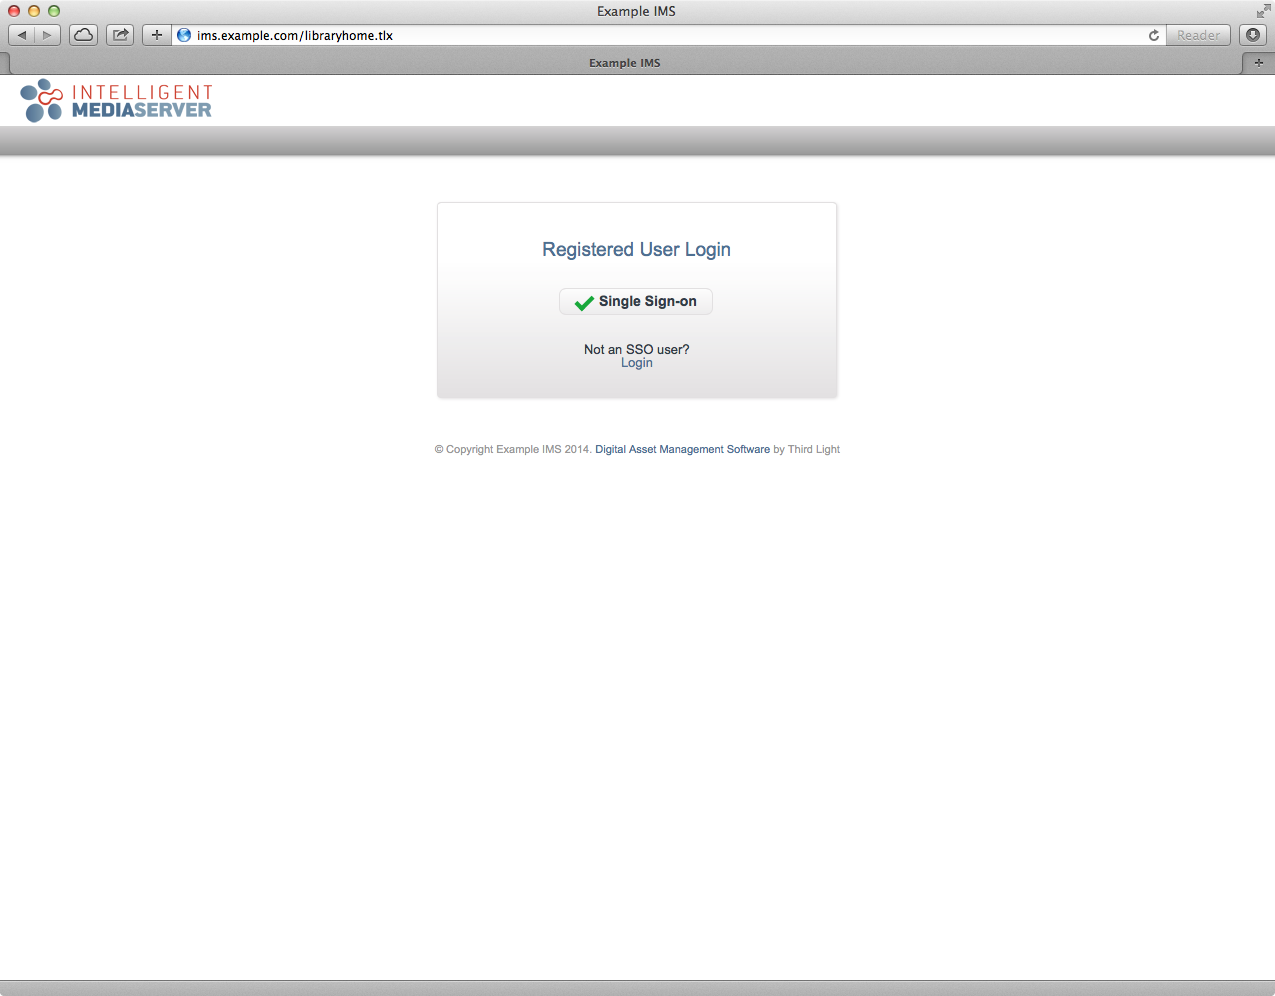
Click the "Login with SSO" button.
You should automatically be authenticated via AD FS.
Advanced Configuration
IMS Group Mapping
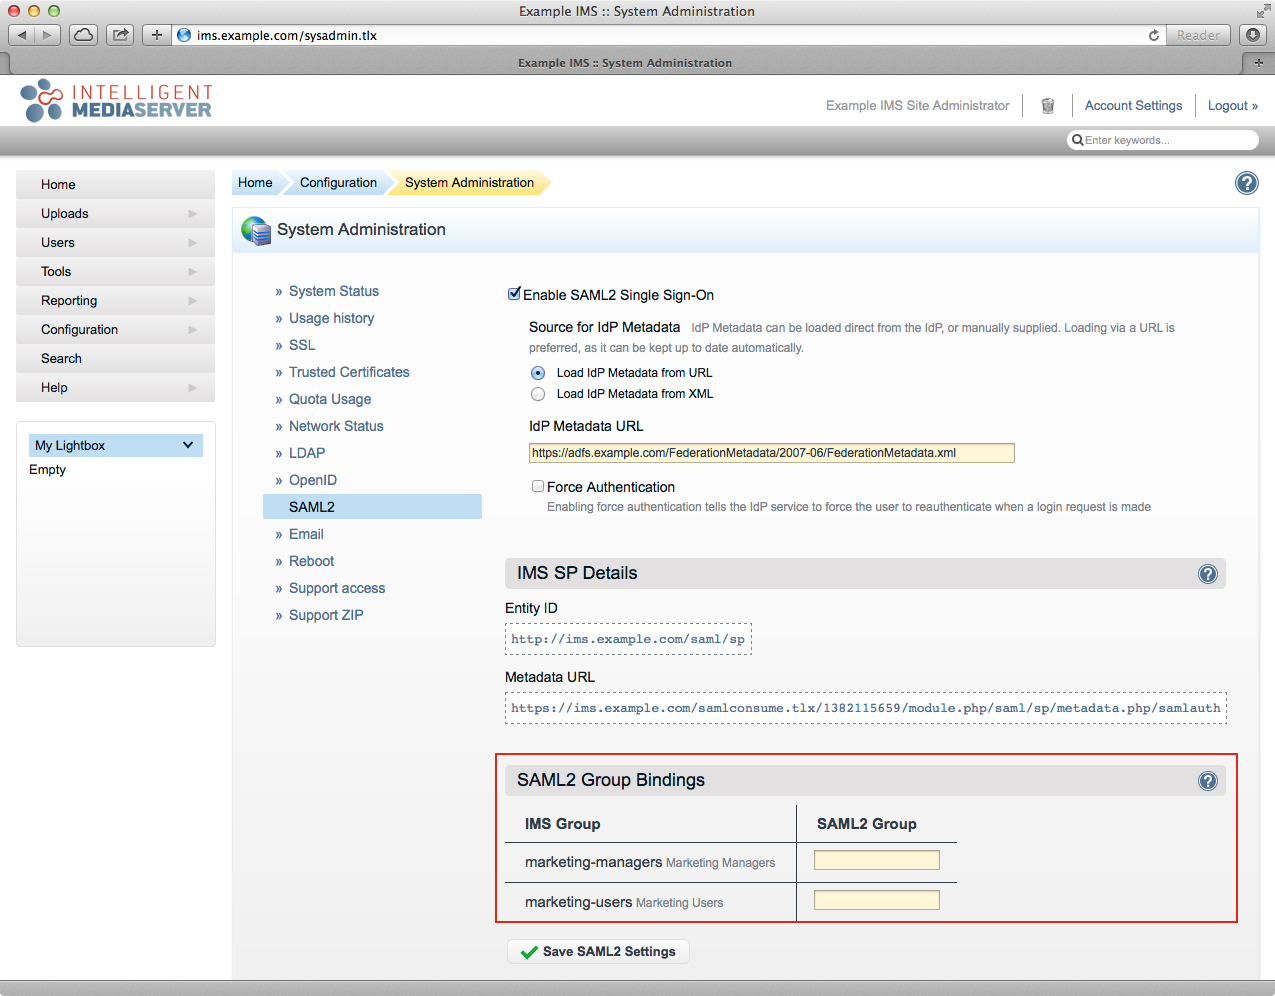
When a user first accesses IMS using AD FS for authentication a new IMS user will be created using the Auto User Preset and associated with their AD FS account (this is based on the value returned for the Name ID). Alternatively, the SAML2 Group Bindings (red box, above) enables placing a user in an IMS group based on their AD FS group membership (the "IMS Group" is the name of the group in IMS and the "SAML2 Group" allows you to enter the group name provided from AD FS). When using this feature, it is important to understand the following caveats:
- If a user's IMS group has been manually changed (see Adding Users To Groups) the user will remain in that group.
- IMS will choose the first mapped group from the Group Outgoing Claim (see AD FS Configuration, above).
- If the user's AD FS group membership changes then their IMS group will be changed when they next authenticate from AD FS to login to IMS.
Re-syncing metadata following replacement of token-signing certificate
If you have replaced the token-signing certificate on your ADFS server, the existing metadata on the IMS system will need to be refreshed to restore external authentication. Simply re-save your SAML2 configuration inside IMS to do this.
