Metadata panels created in the site metadata manager will cascade down to apply to all spaces and files in the site.
For this reason, panels applied at this level should be carefully planned. For more, see About: Metadata panels.
Consider! Department and project-specific panels may not be appropriate in a site-wide metadata manager. Create these on local space metadata managers to better suit the users in those spaces.
Open the site metadata catalog:
1. Click Admin at the top of Chorus and sign in to elevate.
2. Choose Metadata from the Admin menu. The Site Metadata manager will open.
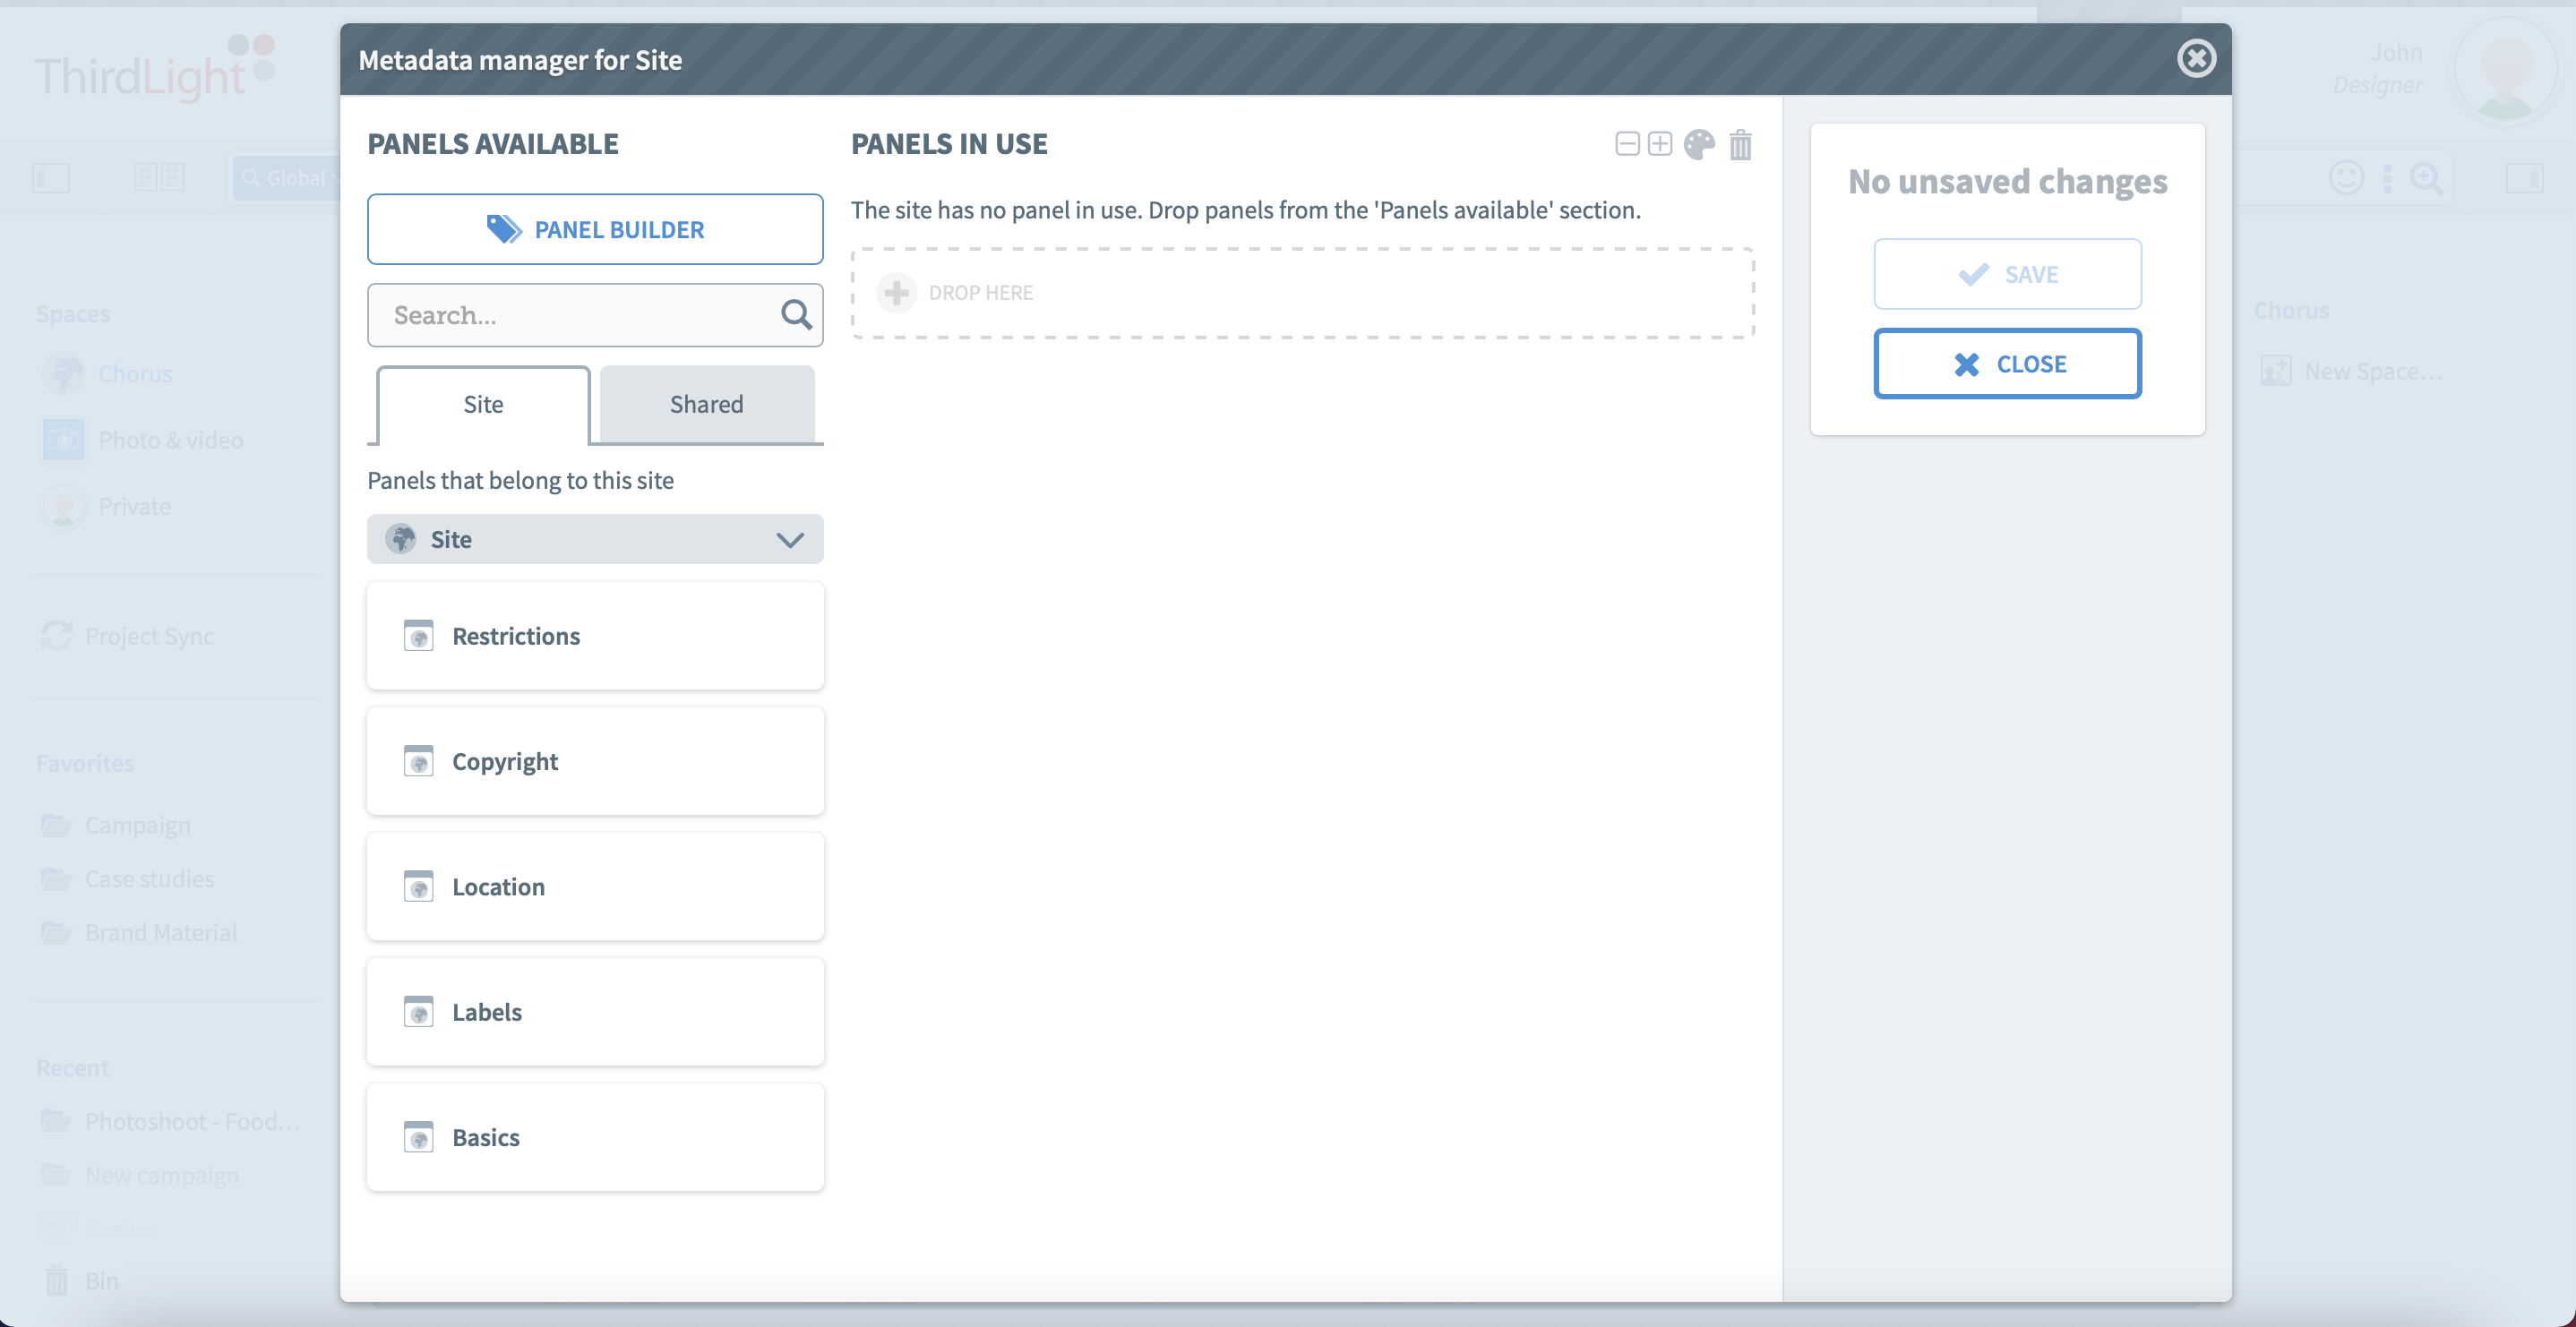
For new sites, the metadata manager will be empty. Otherwise, this is where you’ll get to see existing site panels. In the Panels Available section, you'll find two tabs:
- Site: this is where site panels which are not applied to the site yet will show
- Shared: this is where any panel shared by a space or a user will show
Step-by-step: Create a new metadata panel
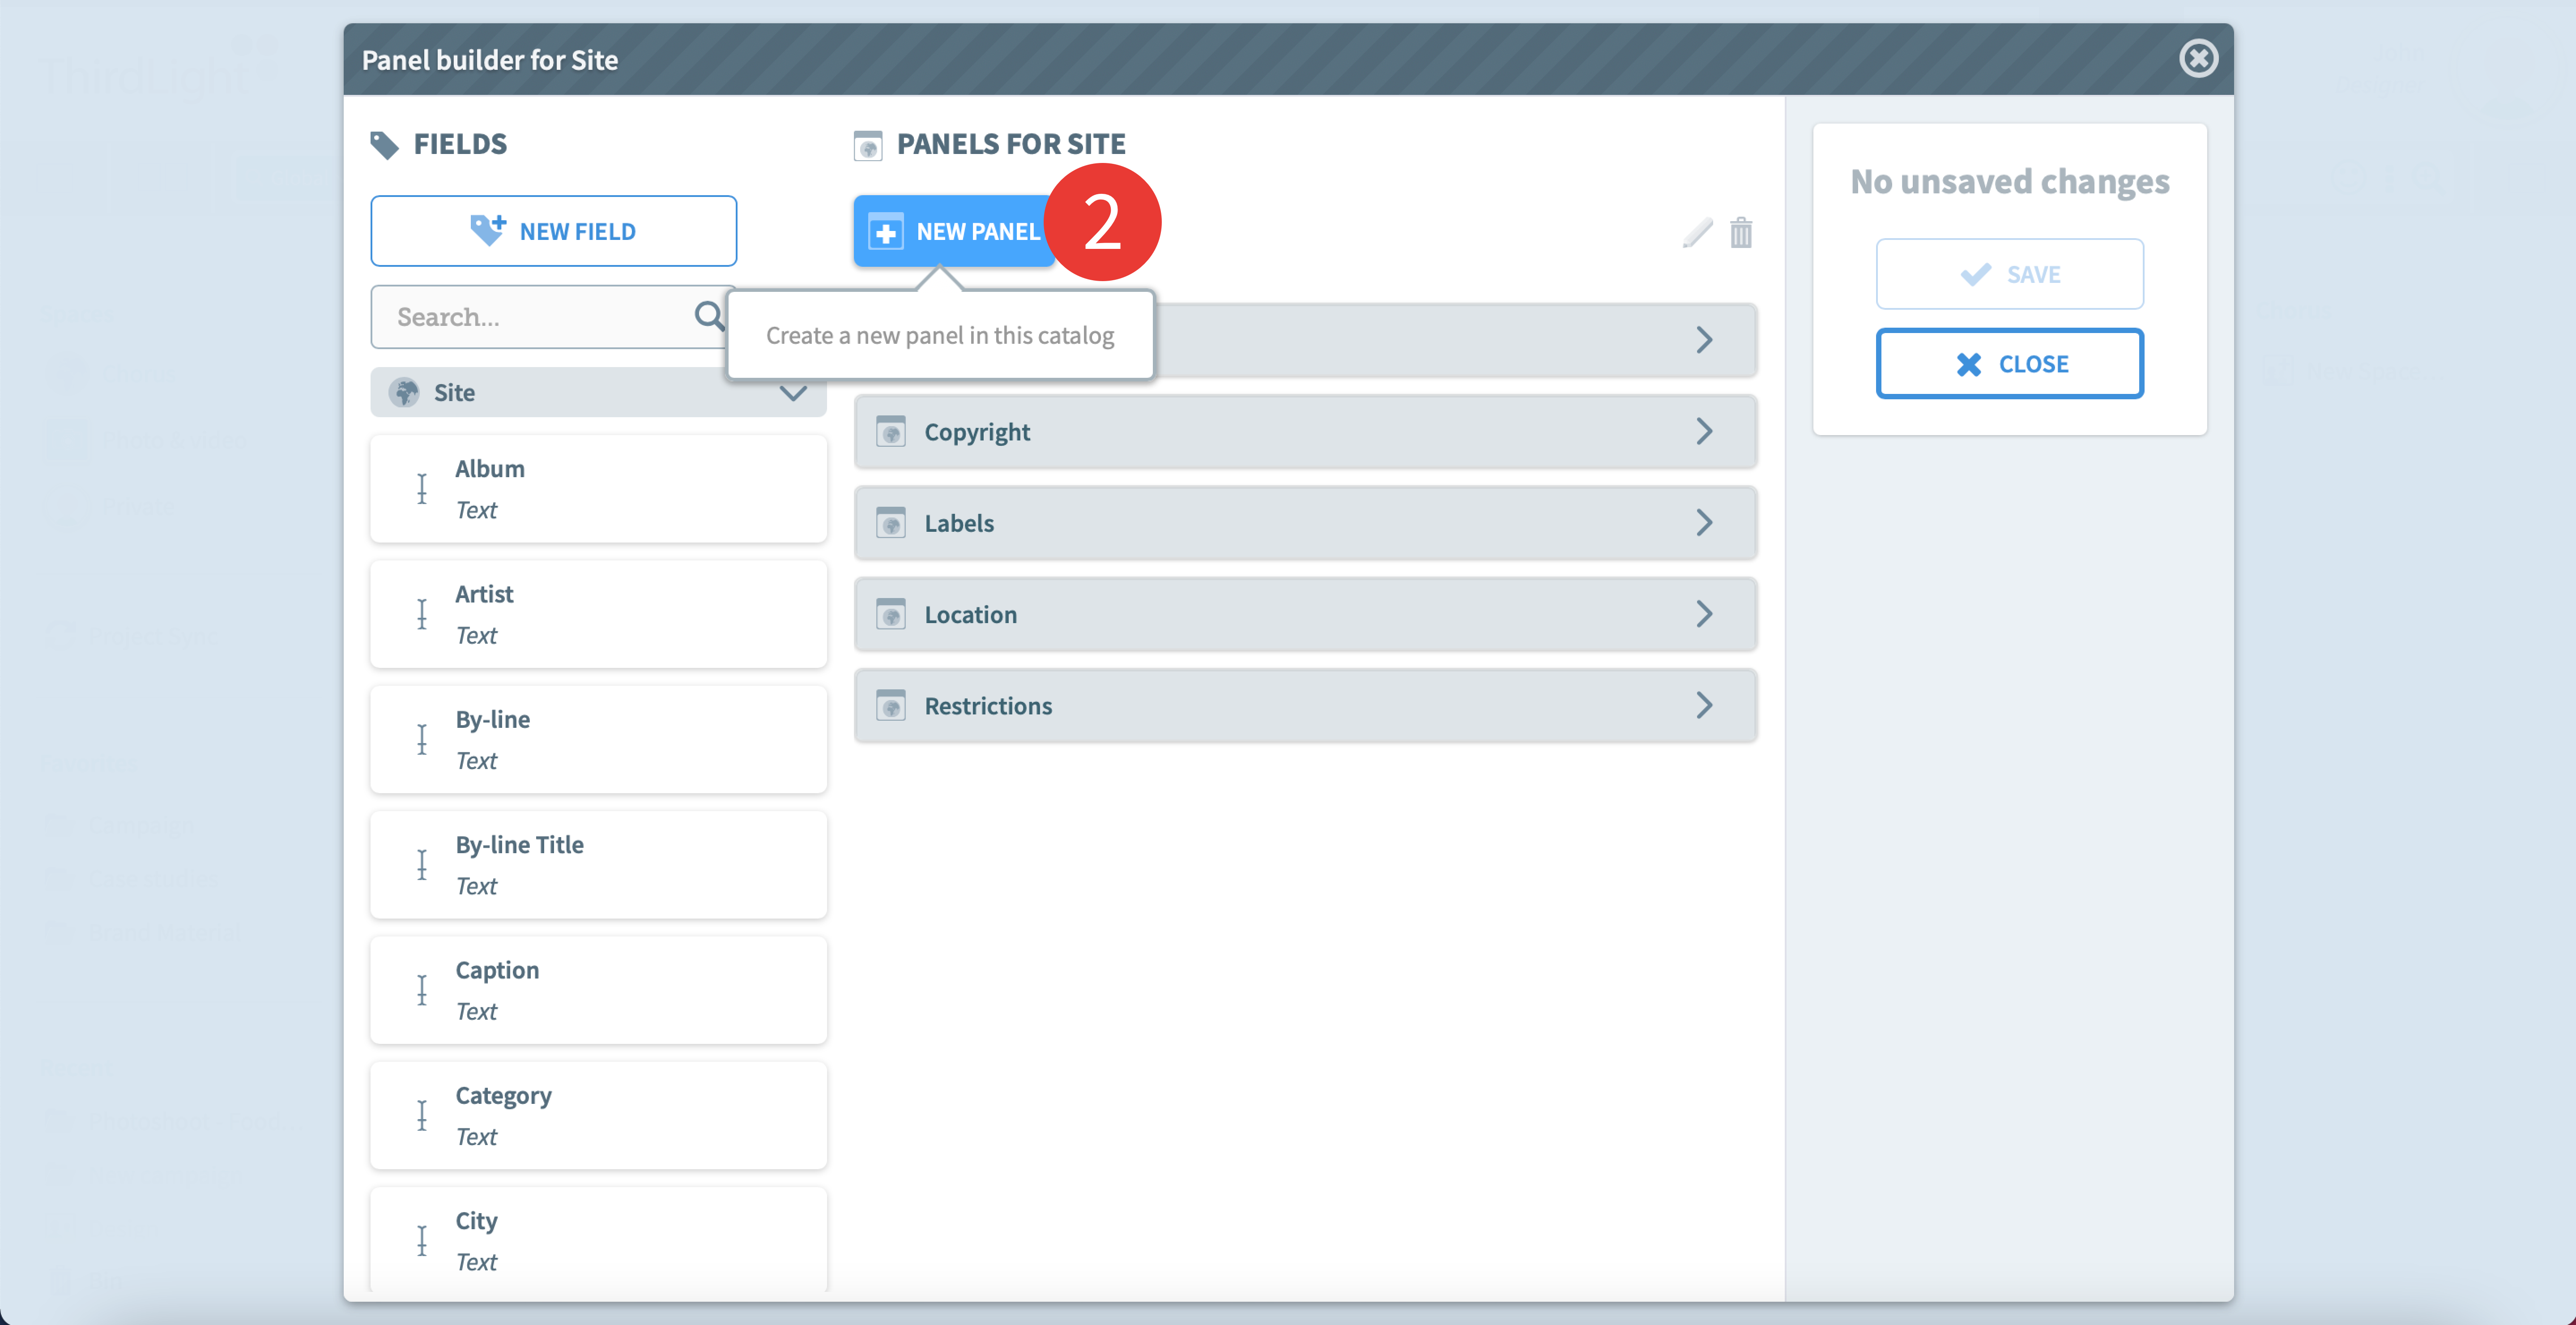
1. Open the Panel builder to create new site panels. Any new panel created will then show under the Site tab.

The Panel builder is composed of two sections: Fields & Panels.
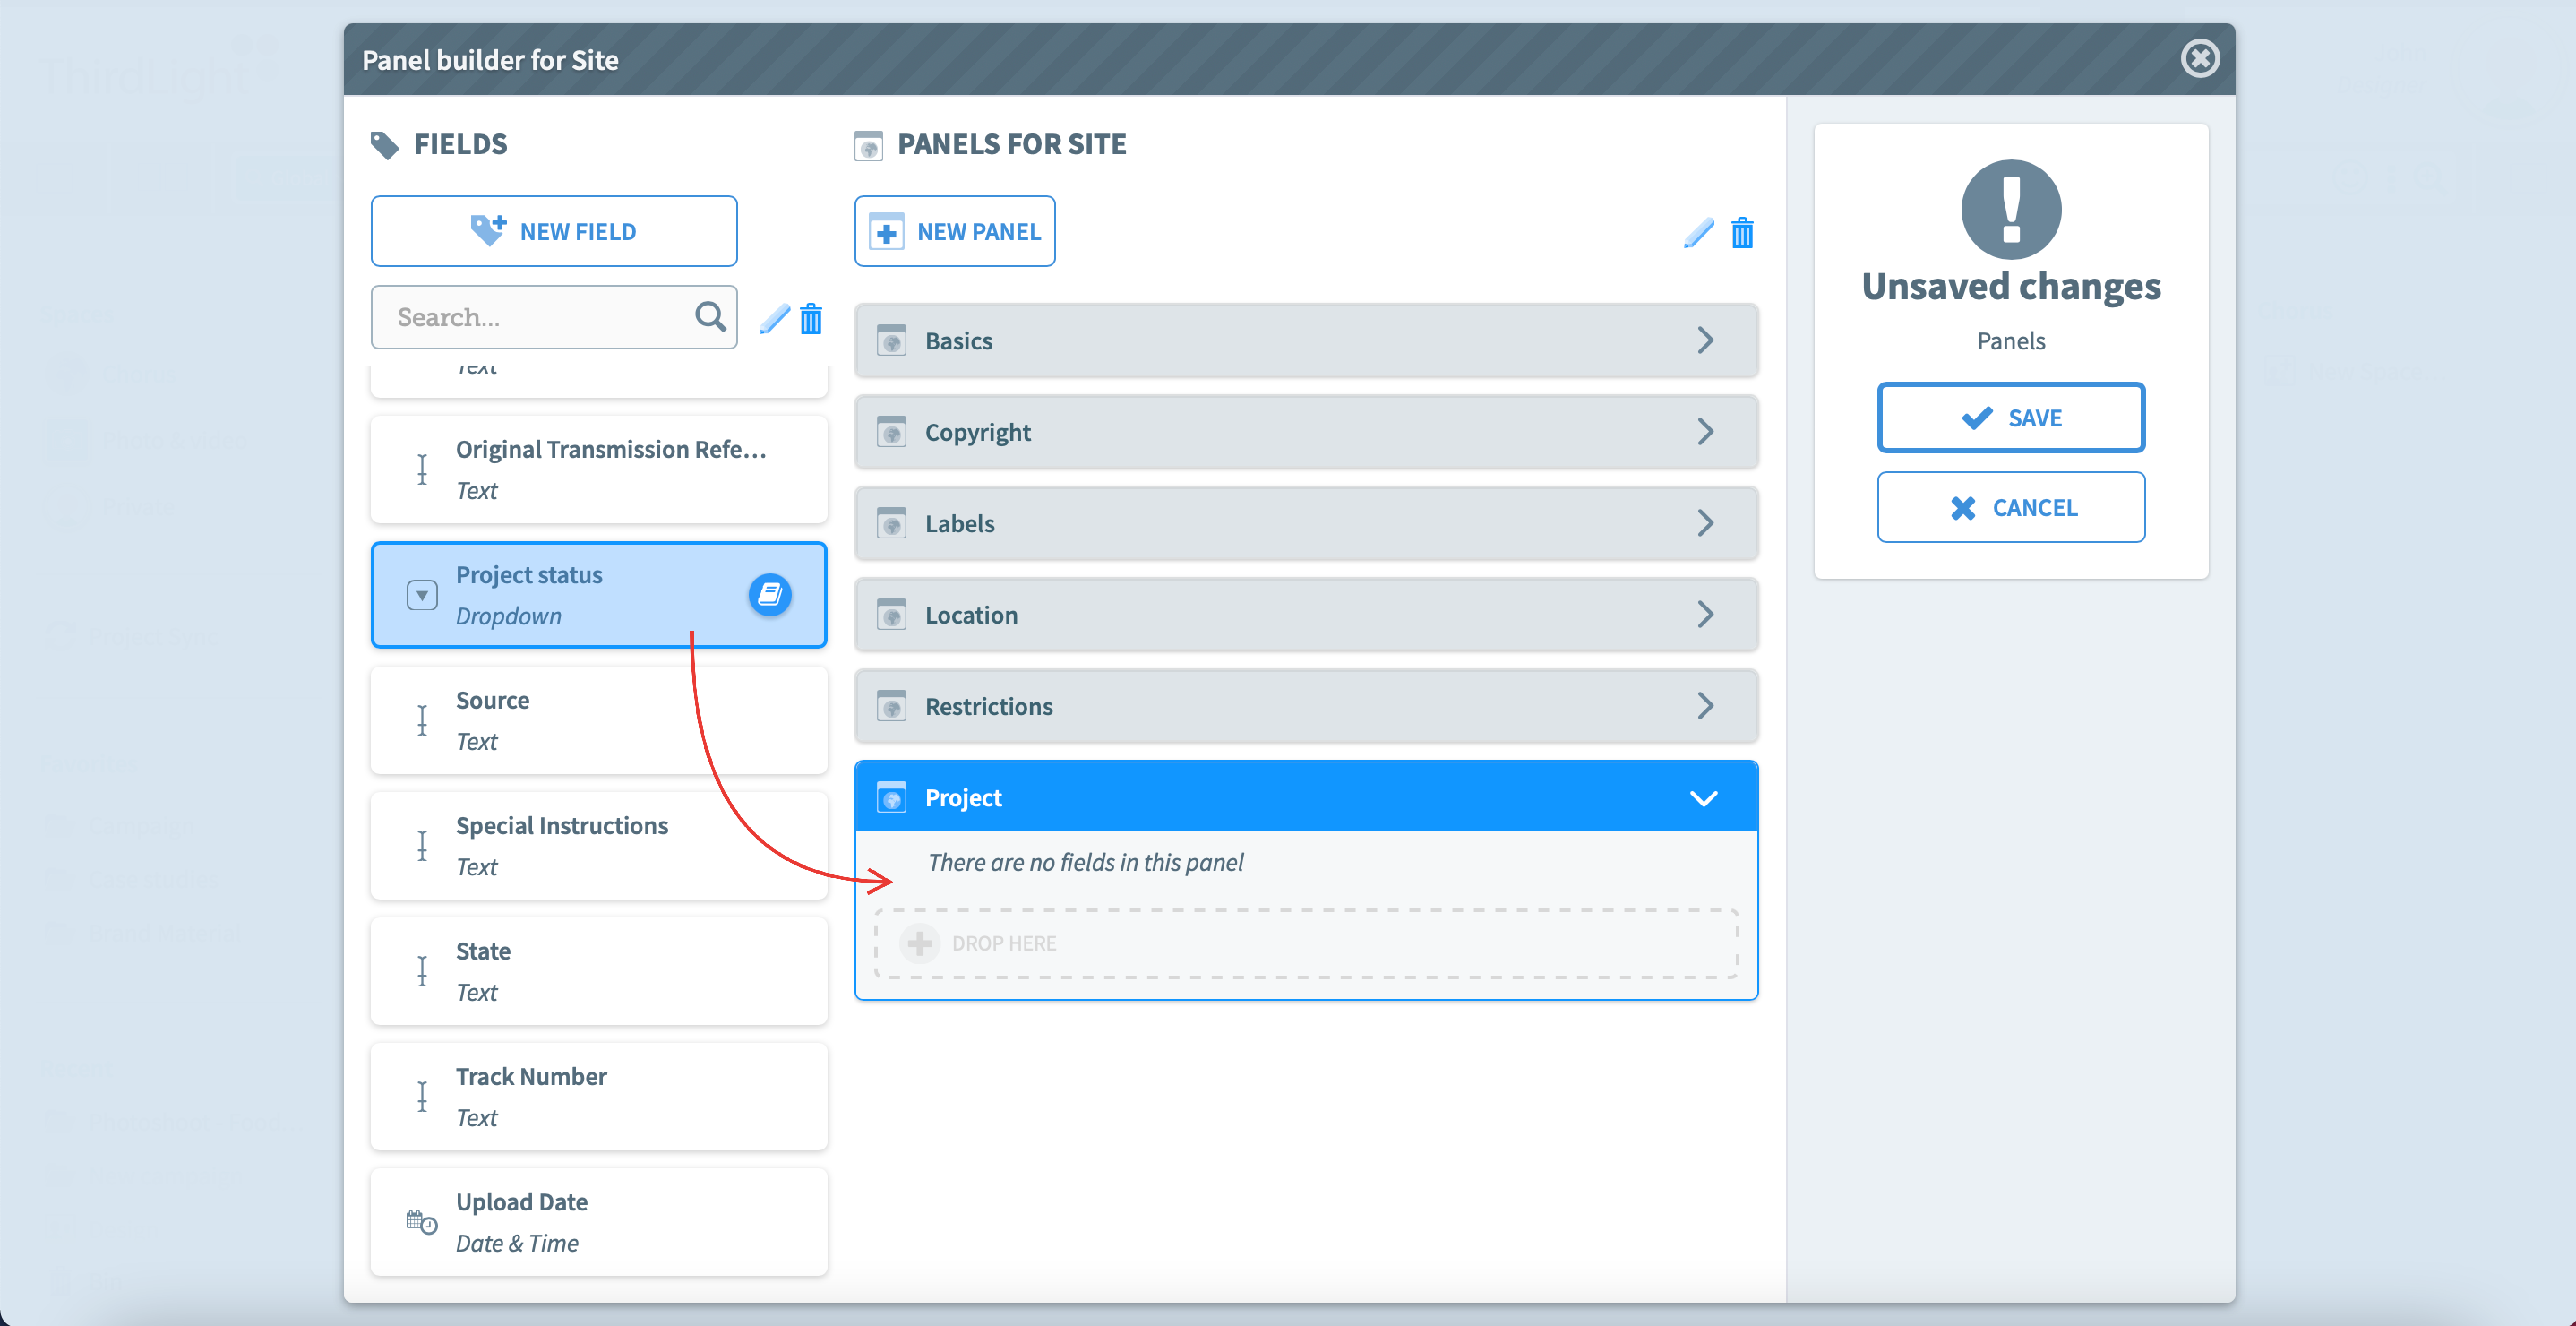
2. Create a new panel by clicking on the New panel button, in the Panels for Site section.
3. A new panel is created. Choose a name for it and press enter or click anywhere else to save its new name.
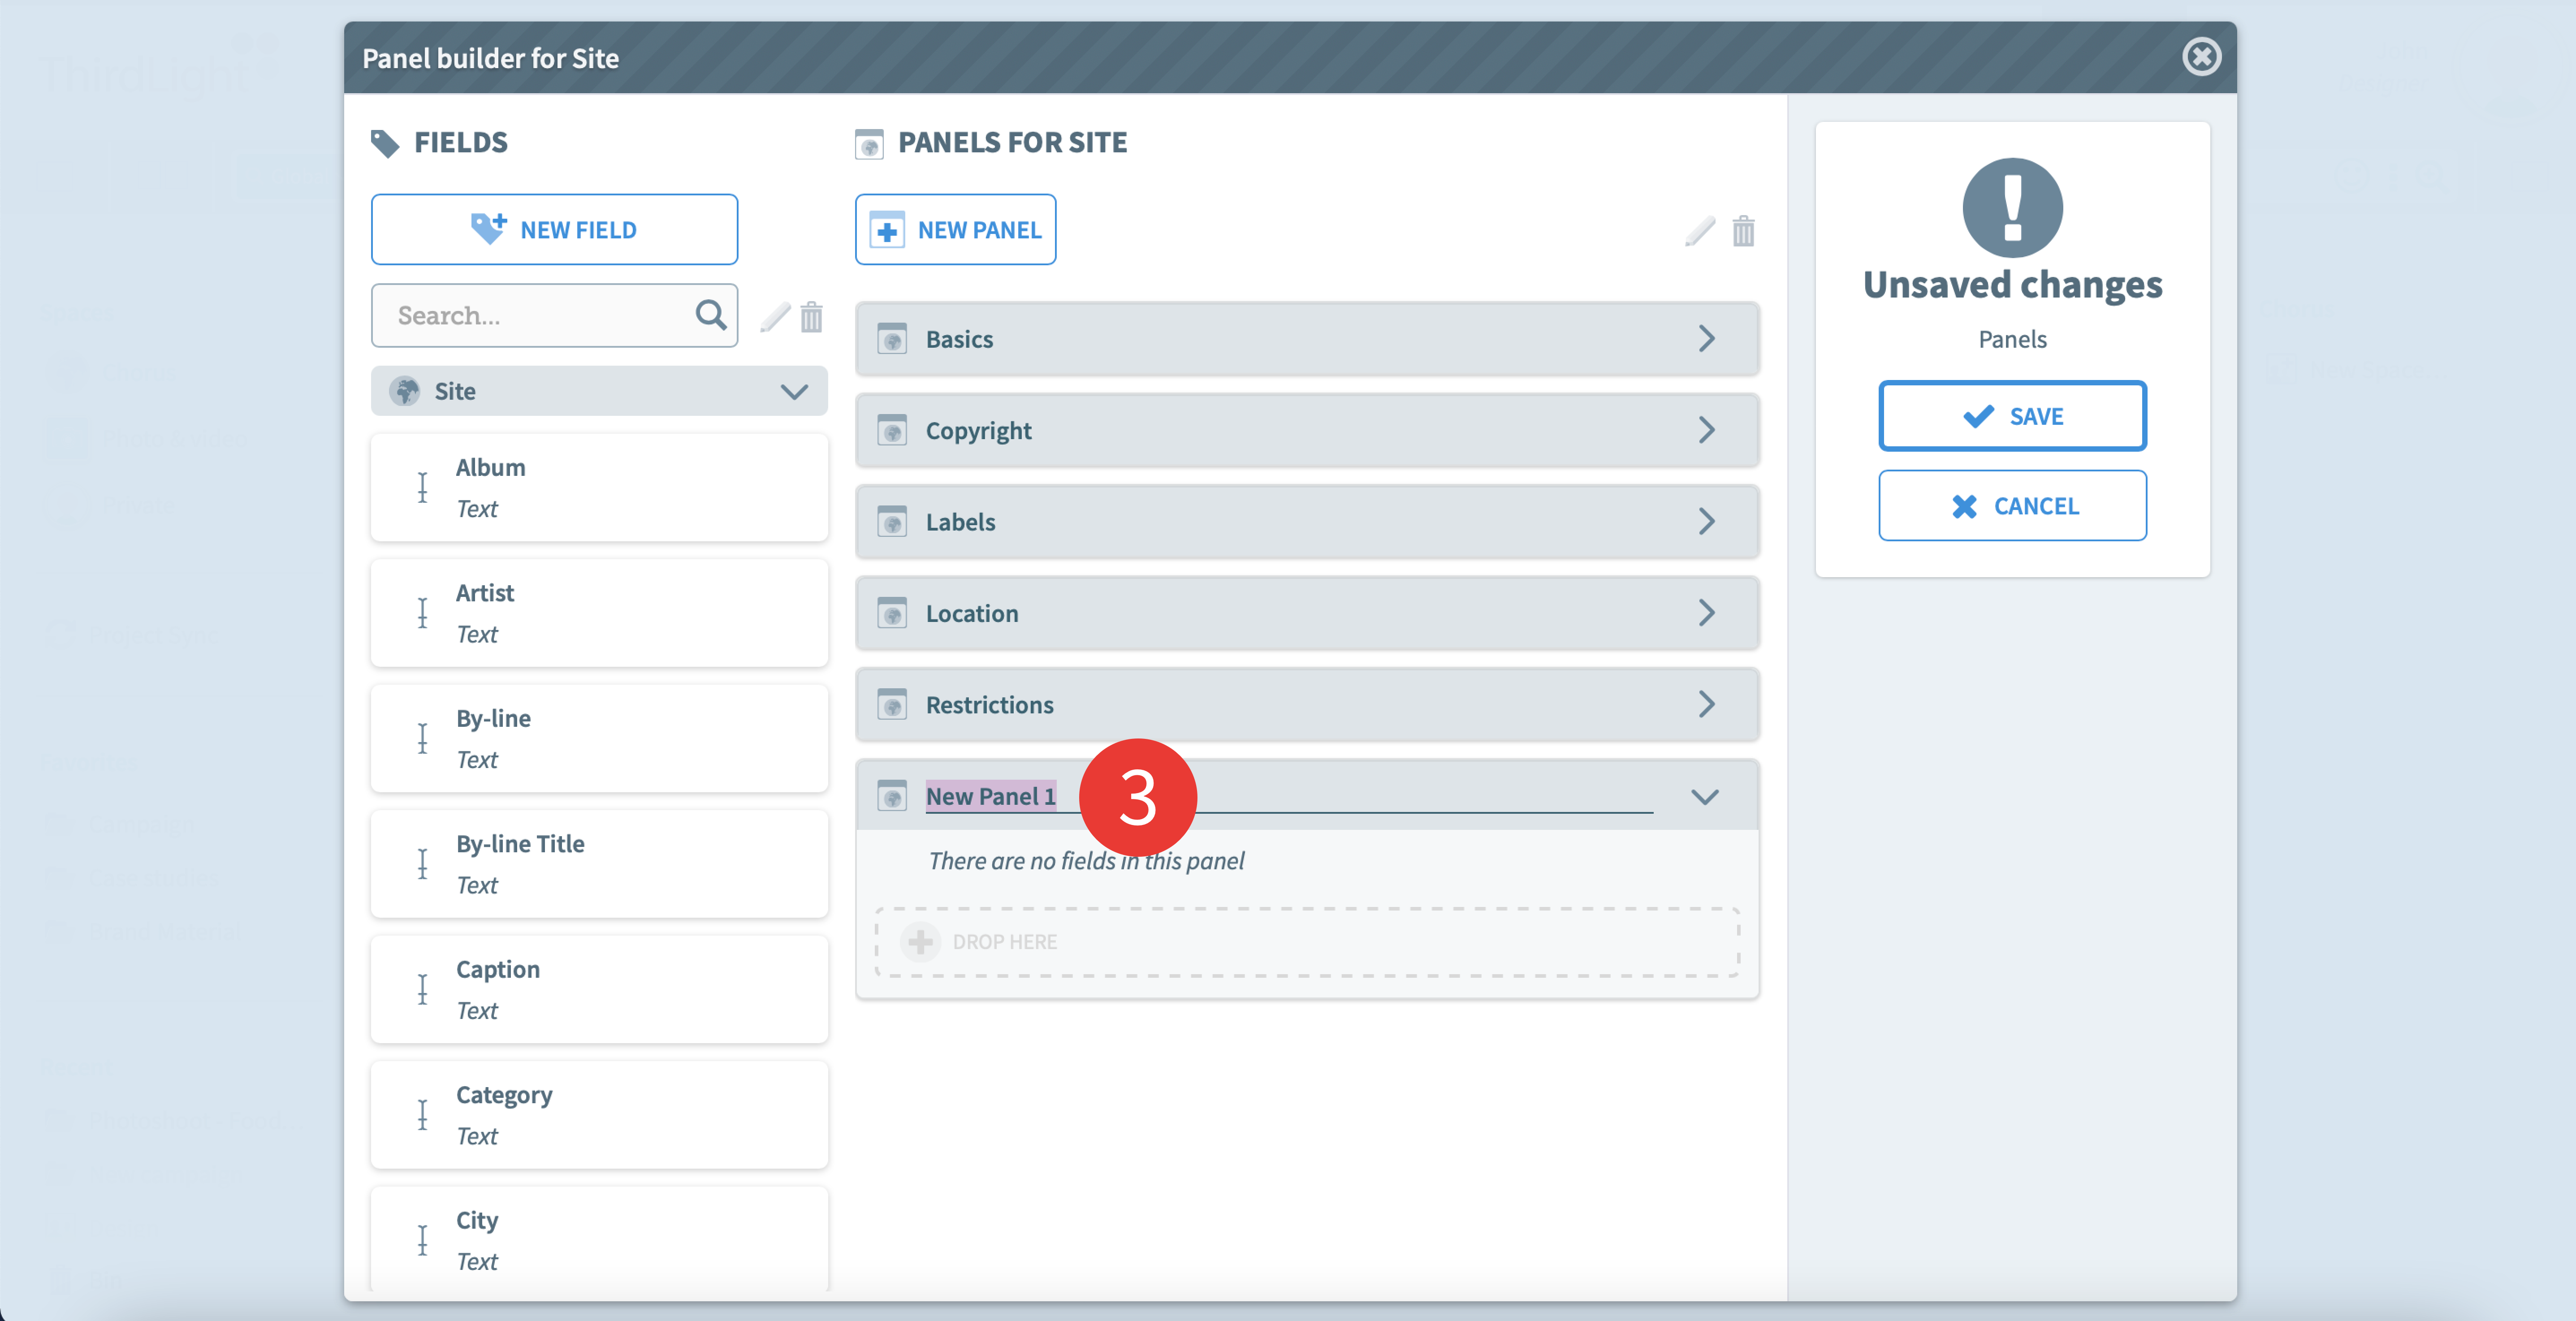
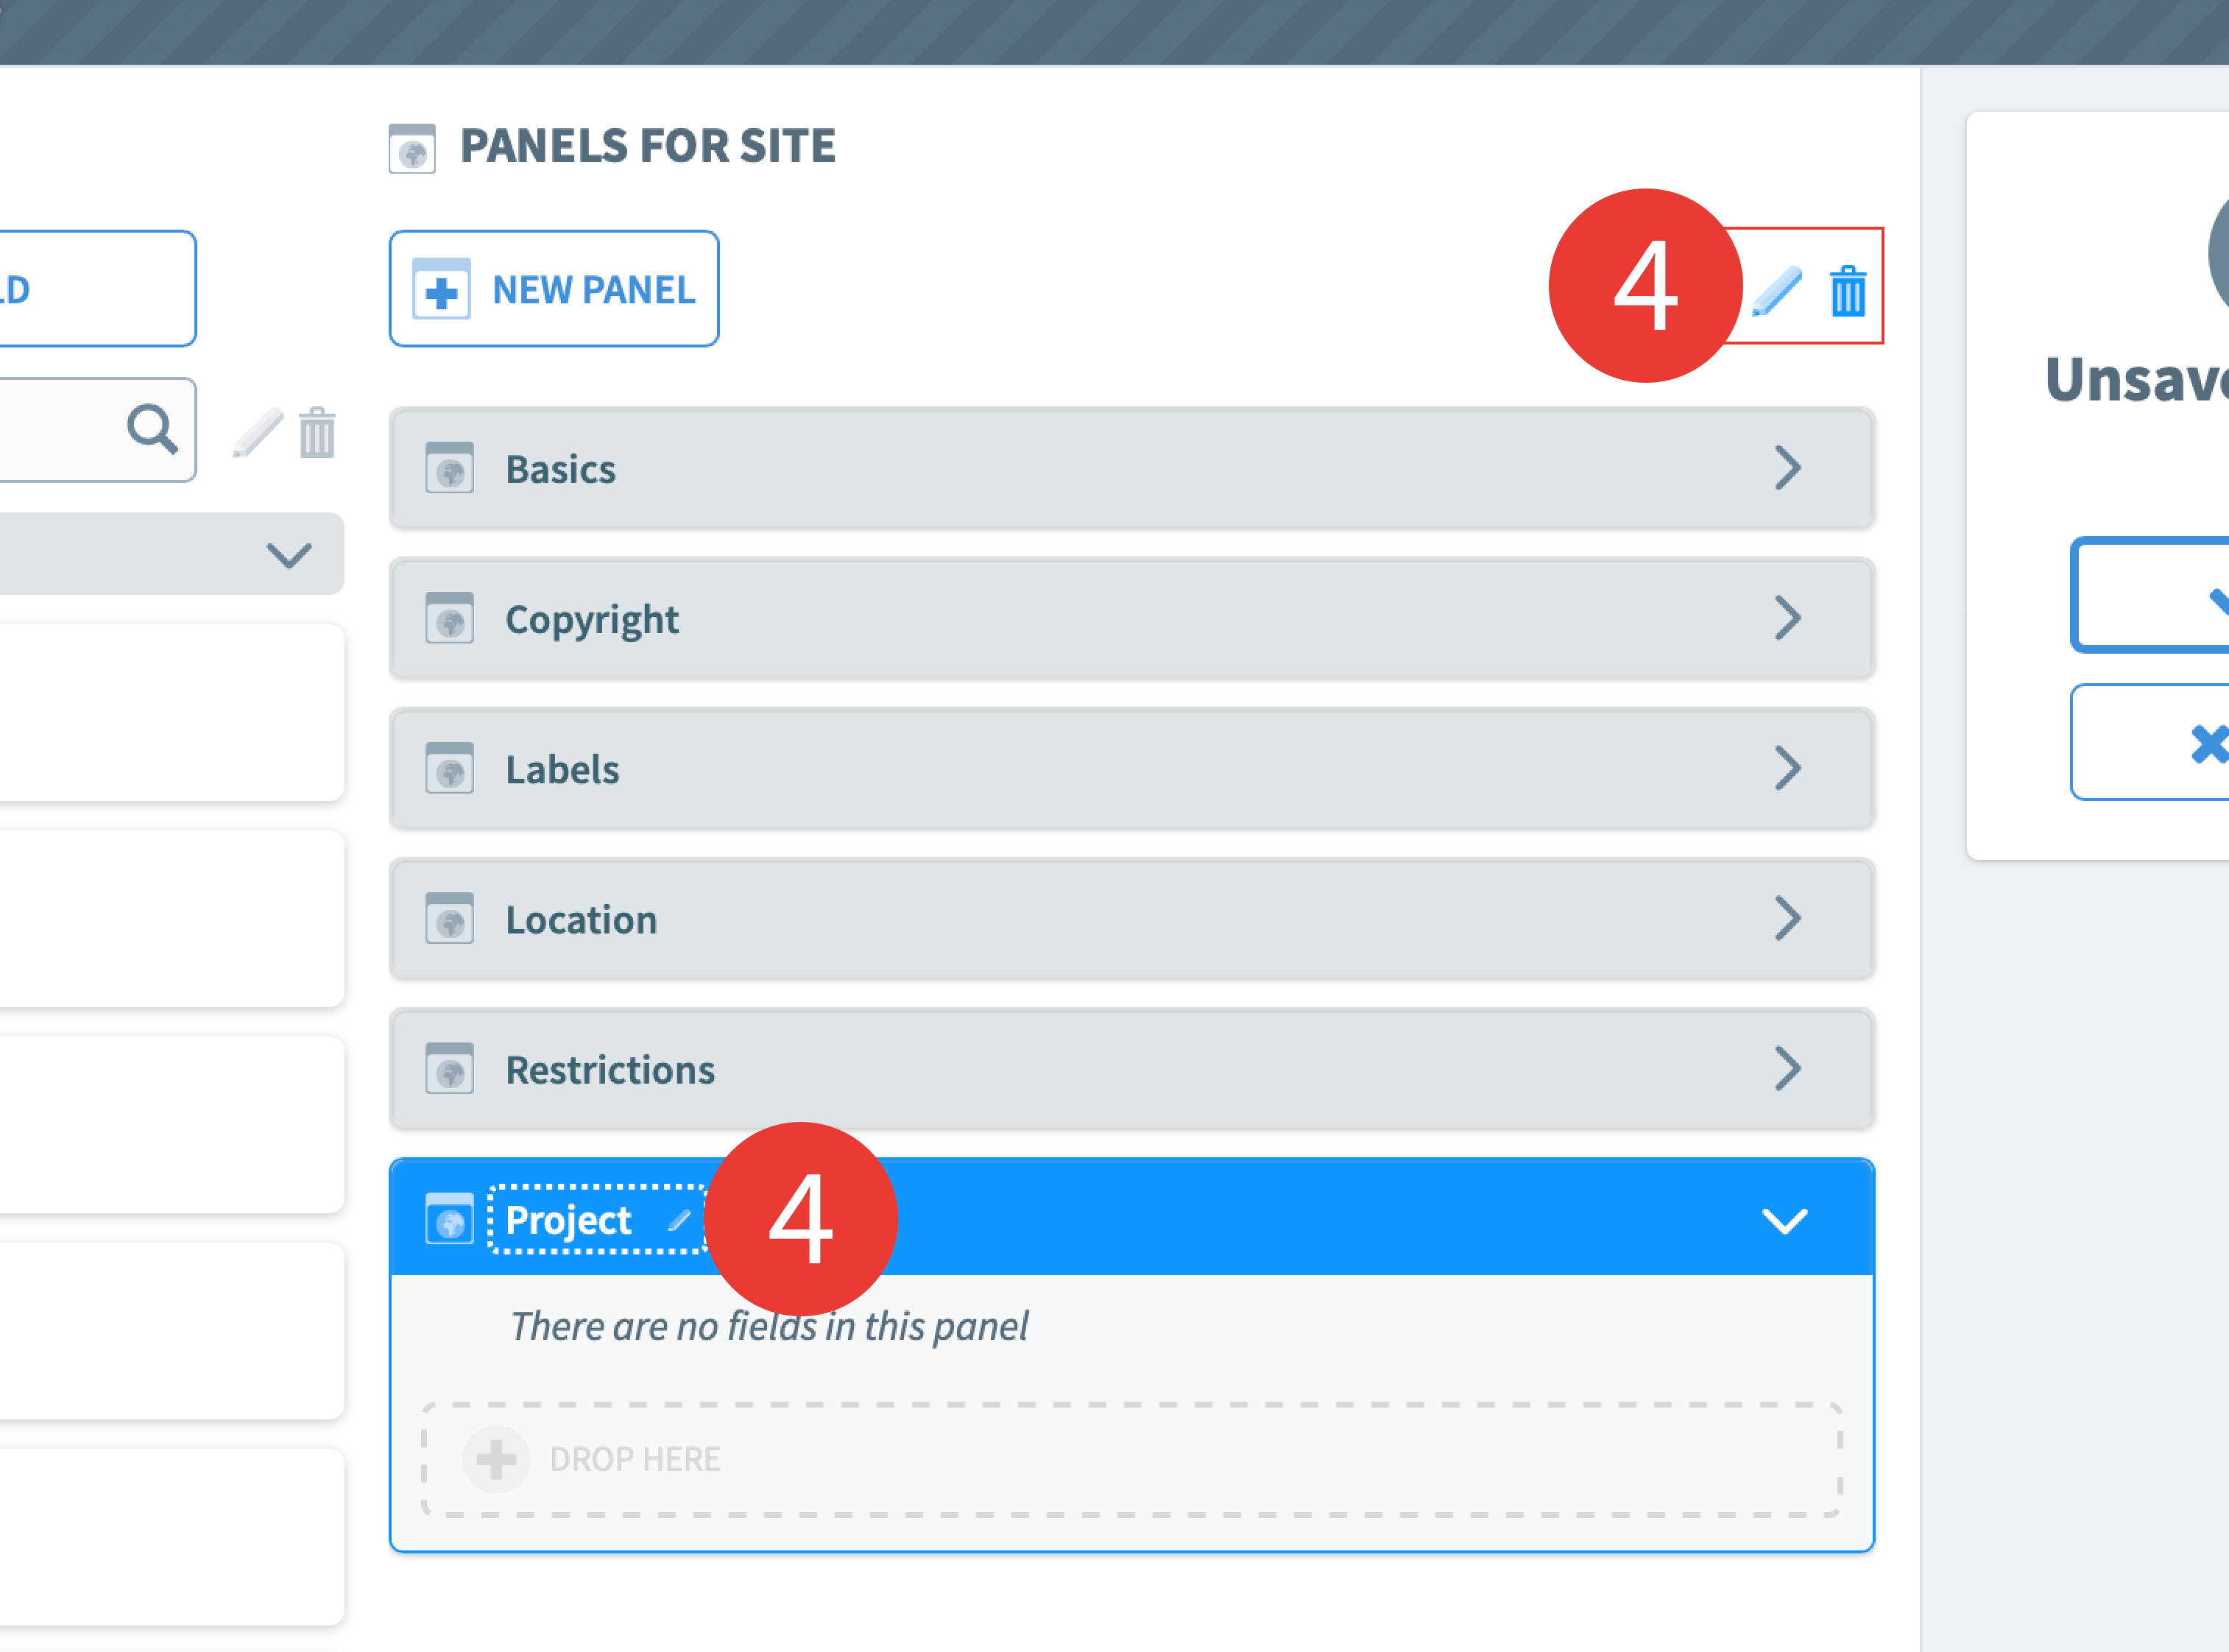
4. You can edit the name at any time by clicking on the pen icon, or delete it by clicking on the bin icon (available when the field is selected).
Step-by-step: Add a field to a panel
1. You now need to add fields to the panel. To do so, select one or multiple fields from the Fields section and drop it into the panel.
You can also create new fields by clicking on the New field button.
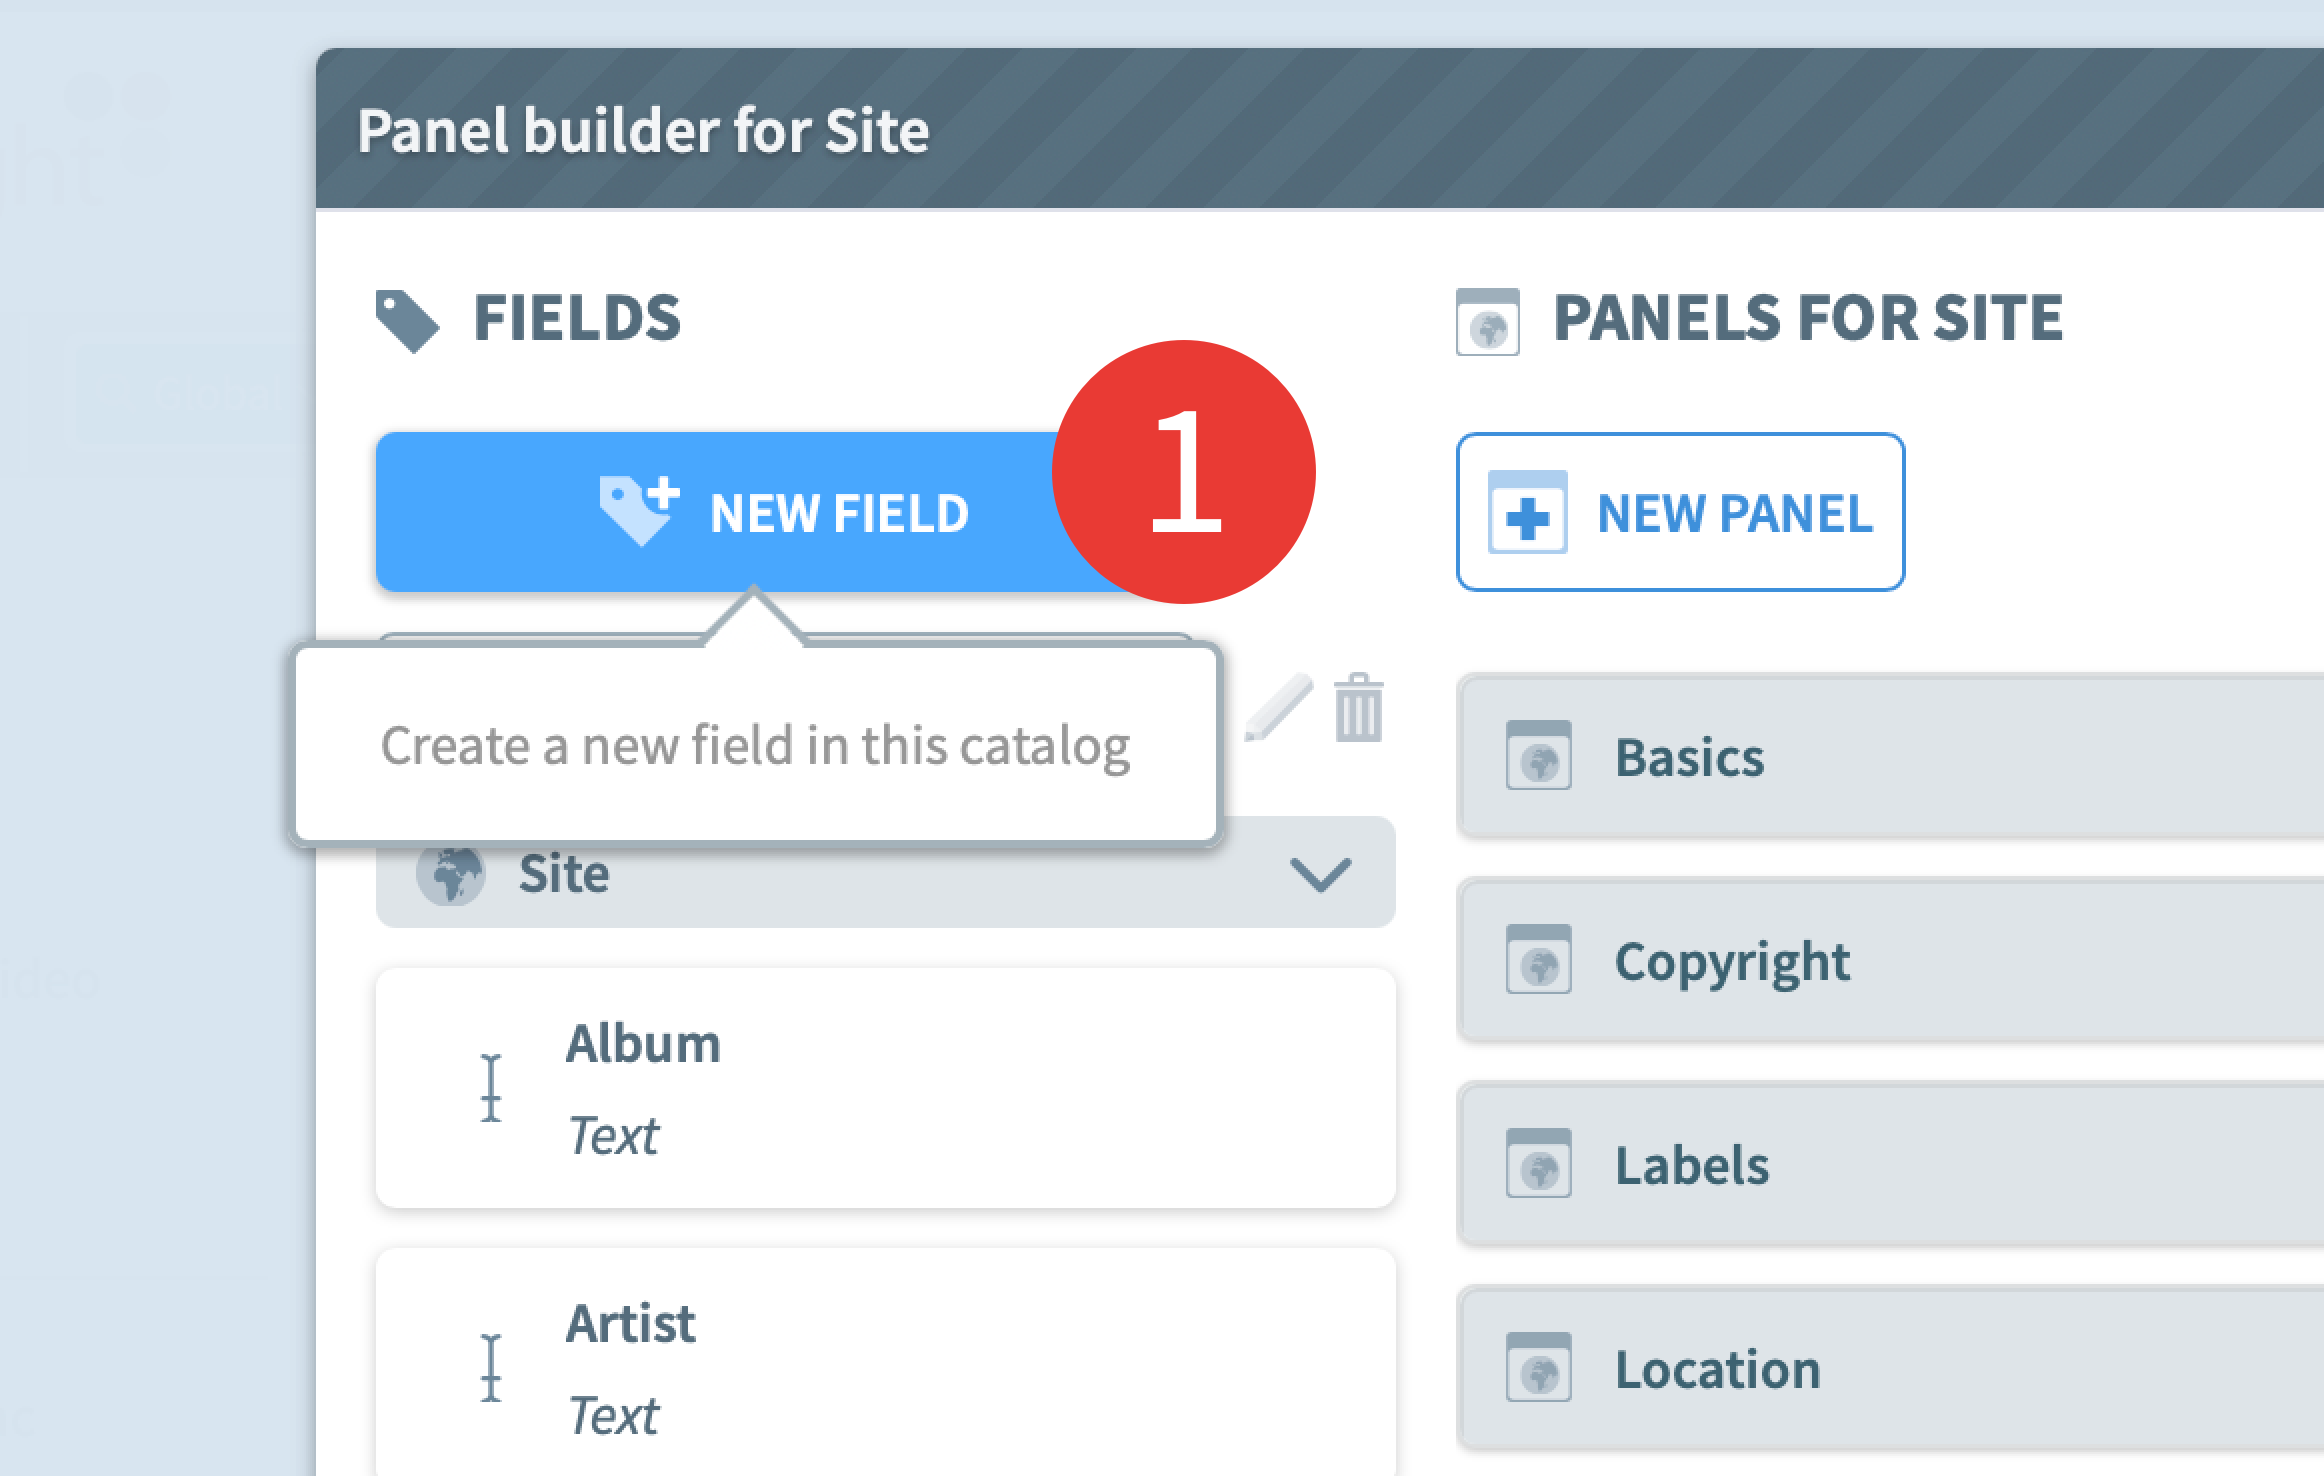
For details on each of the field types that come prepackaged with a Chorus site, see About metadata fields.
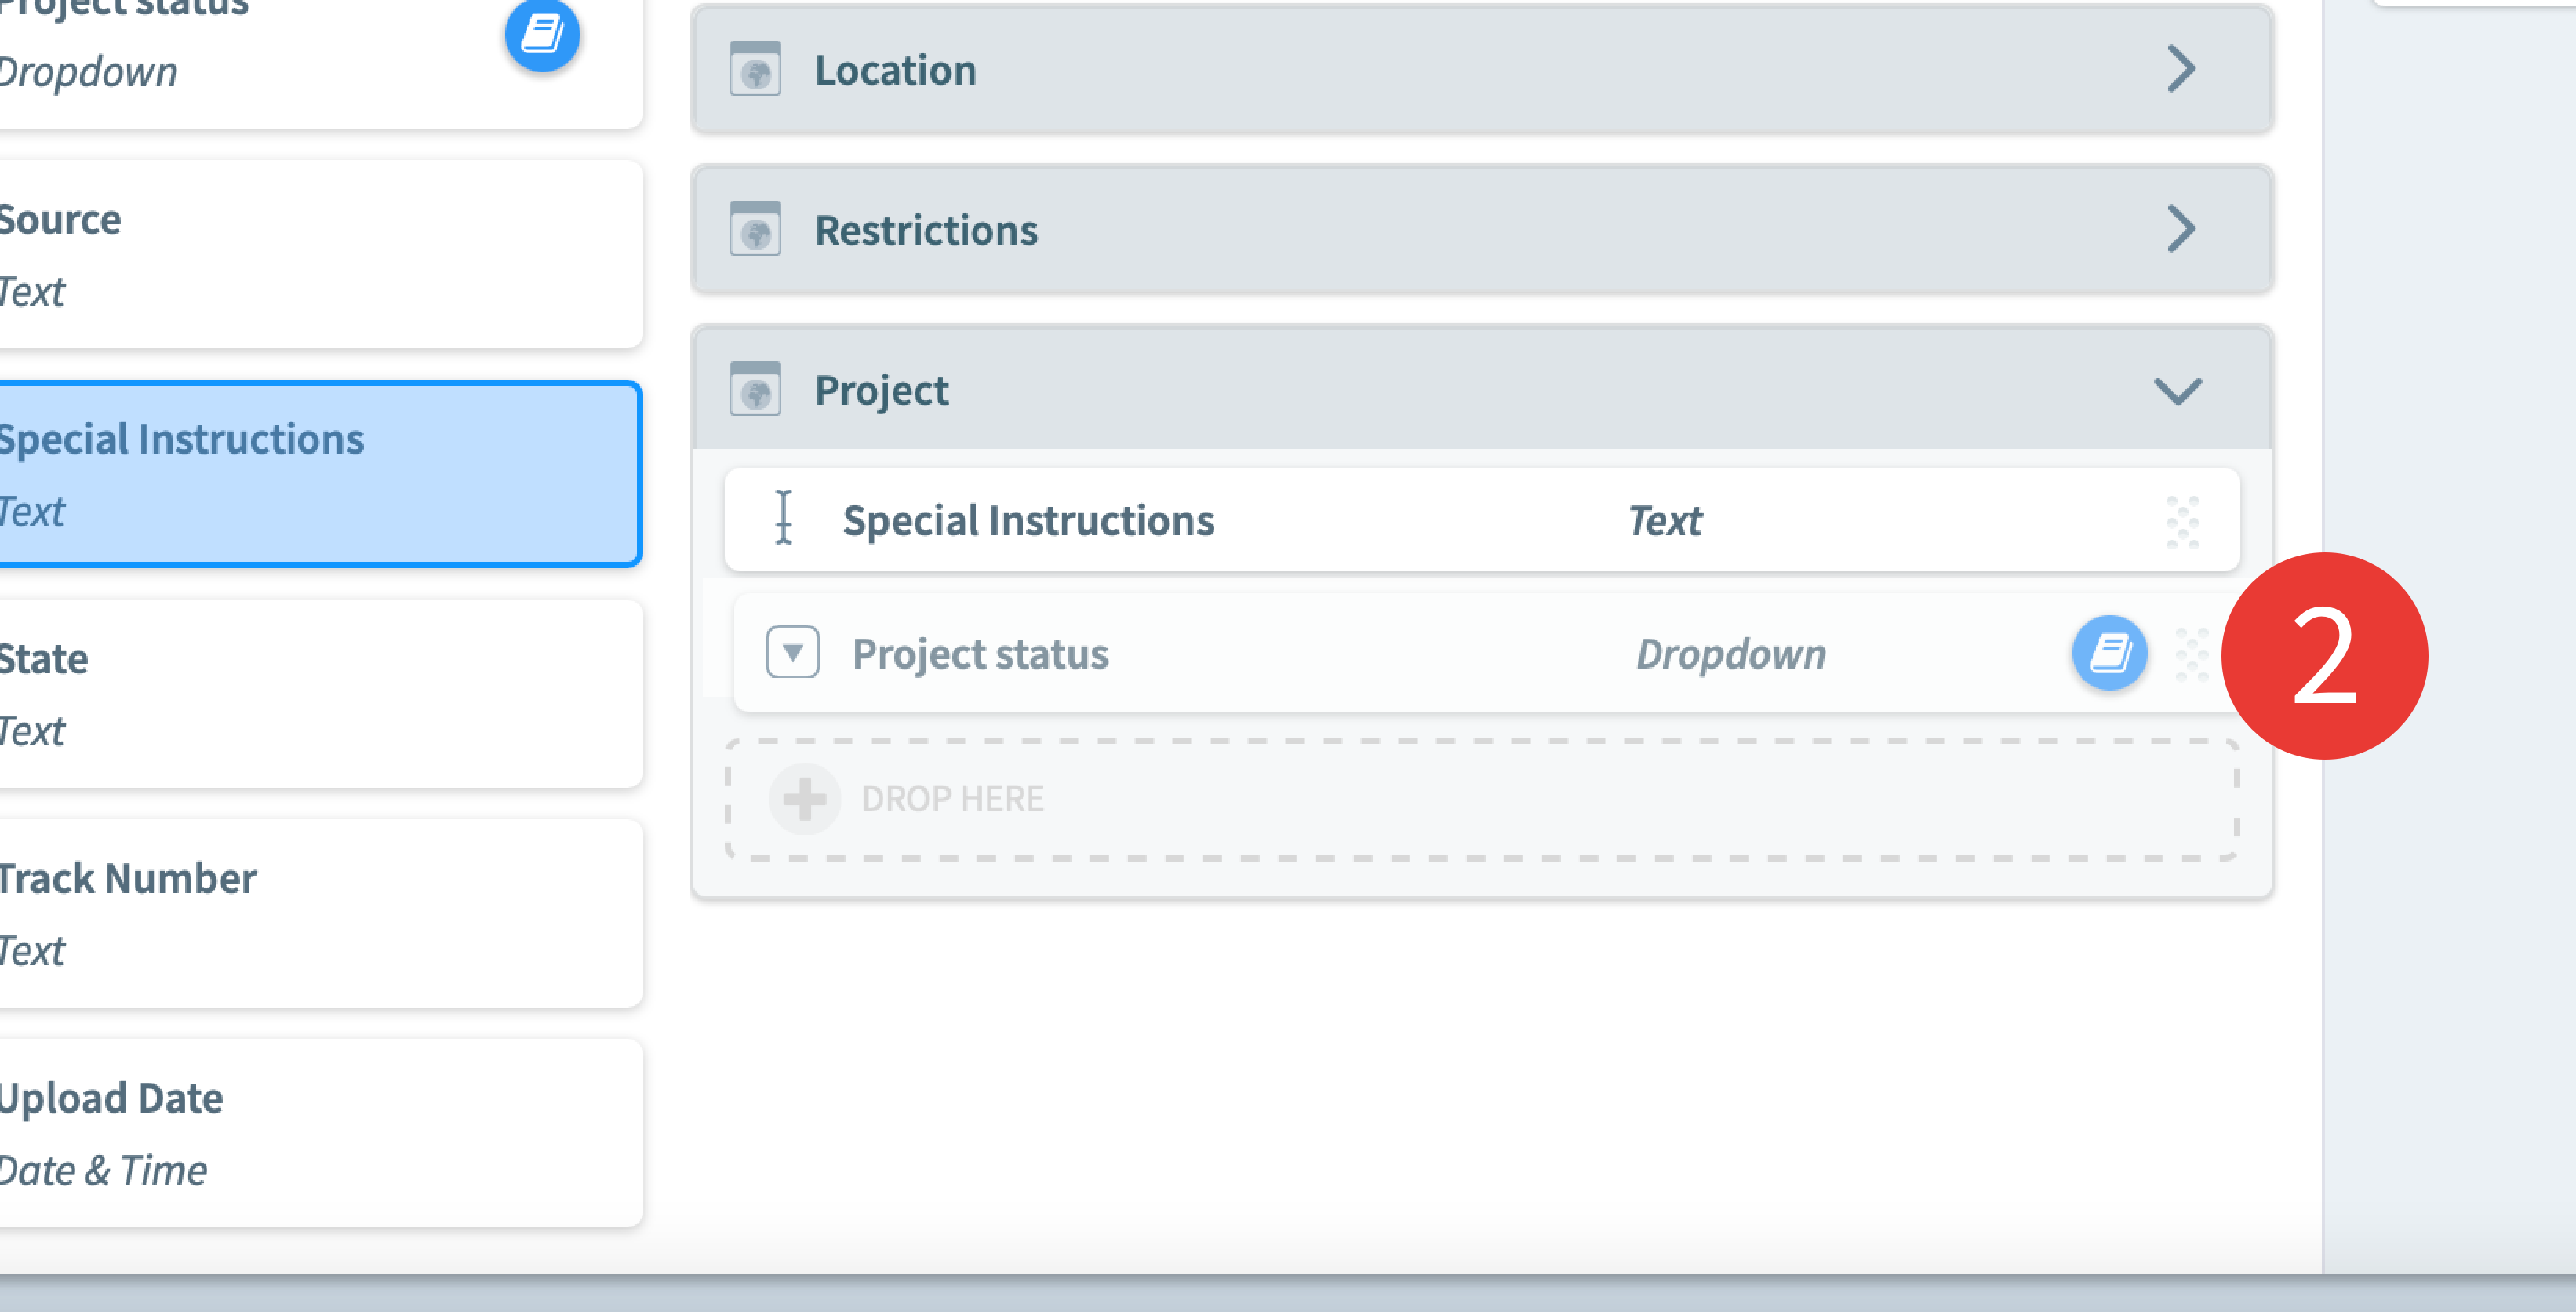
2. Once you’ve dropped all the fields that you need in a panel, you can reorder each one by holding the icon on the right and dragging the field in the position you want it to be.
3. Once you’ve created all the panels that you need, press Save and close the menu.
Step-by-step: Cascade panels to Spaces
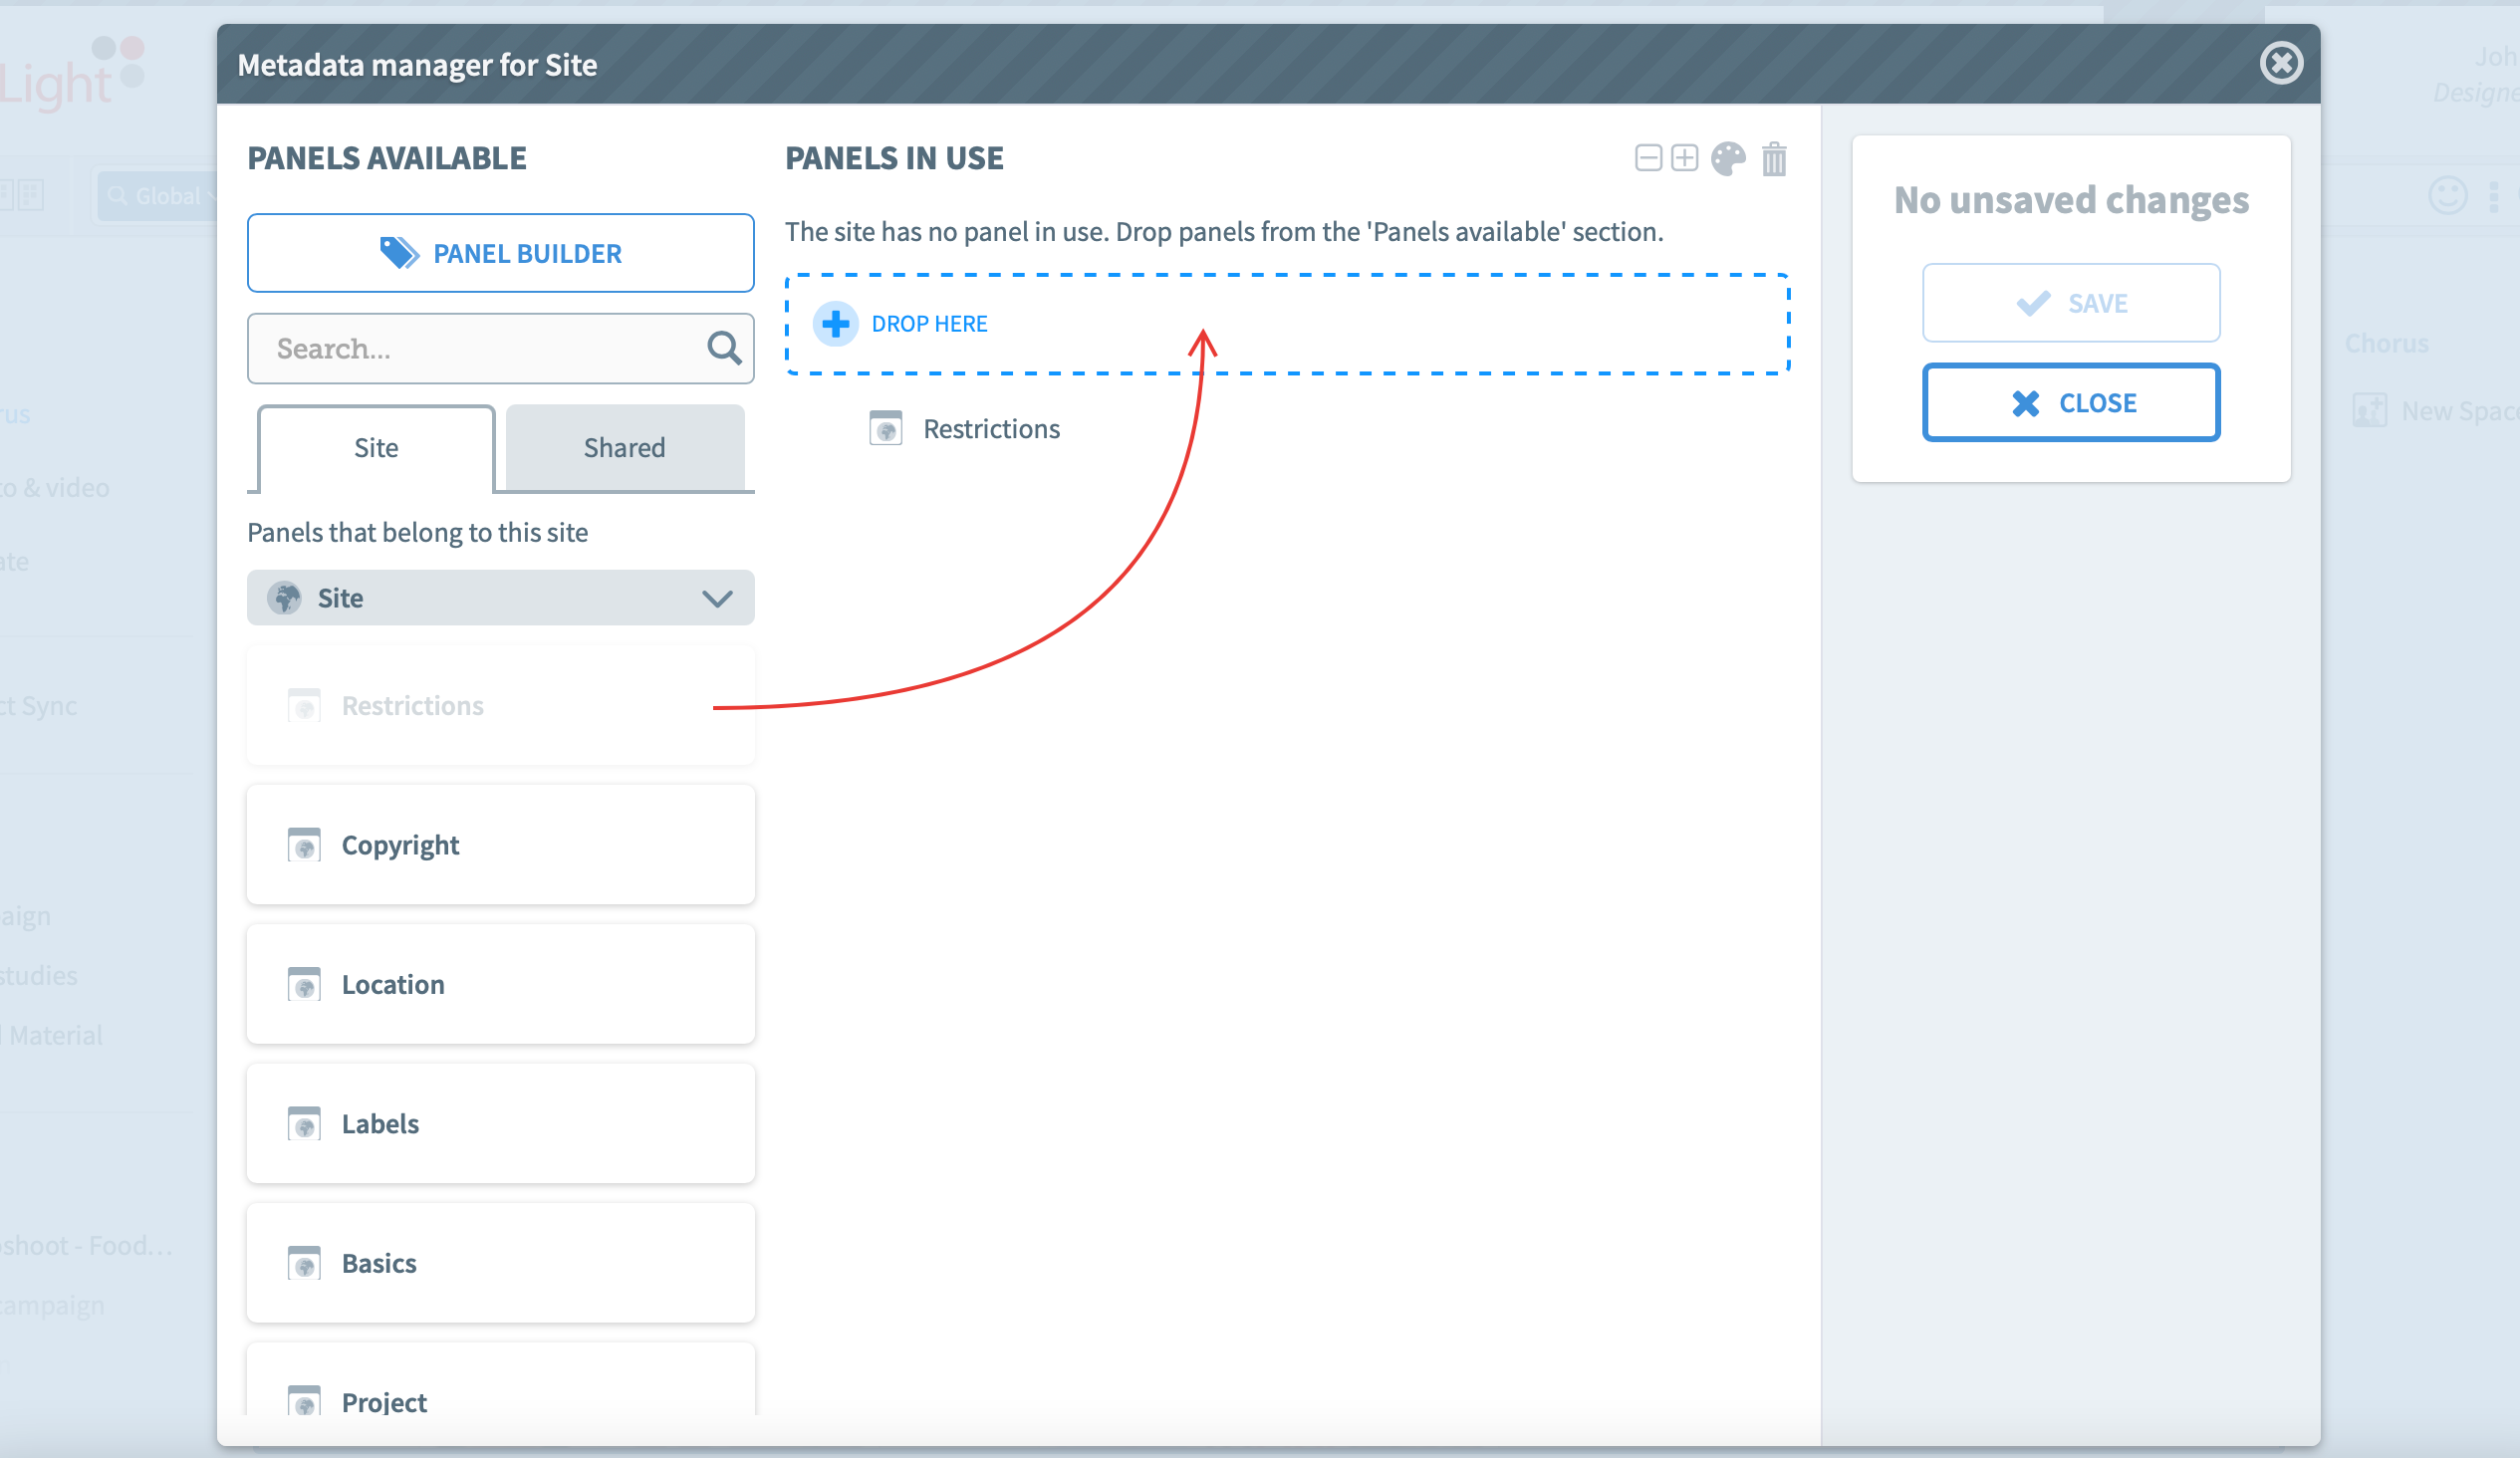
1. This will take you back to the Site metadata manager menu. You will see the new panels created under the Site tab. To apply a panel to all Spaces in the Site, select it in the Panels available section, and drag and drop it into the Panels in Use section.
2. Same as fields, you can change the position of a panel by holding the icon on the right and dragging the panel where you want it to be.
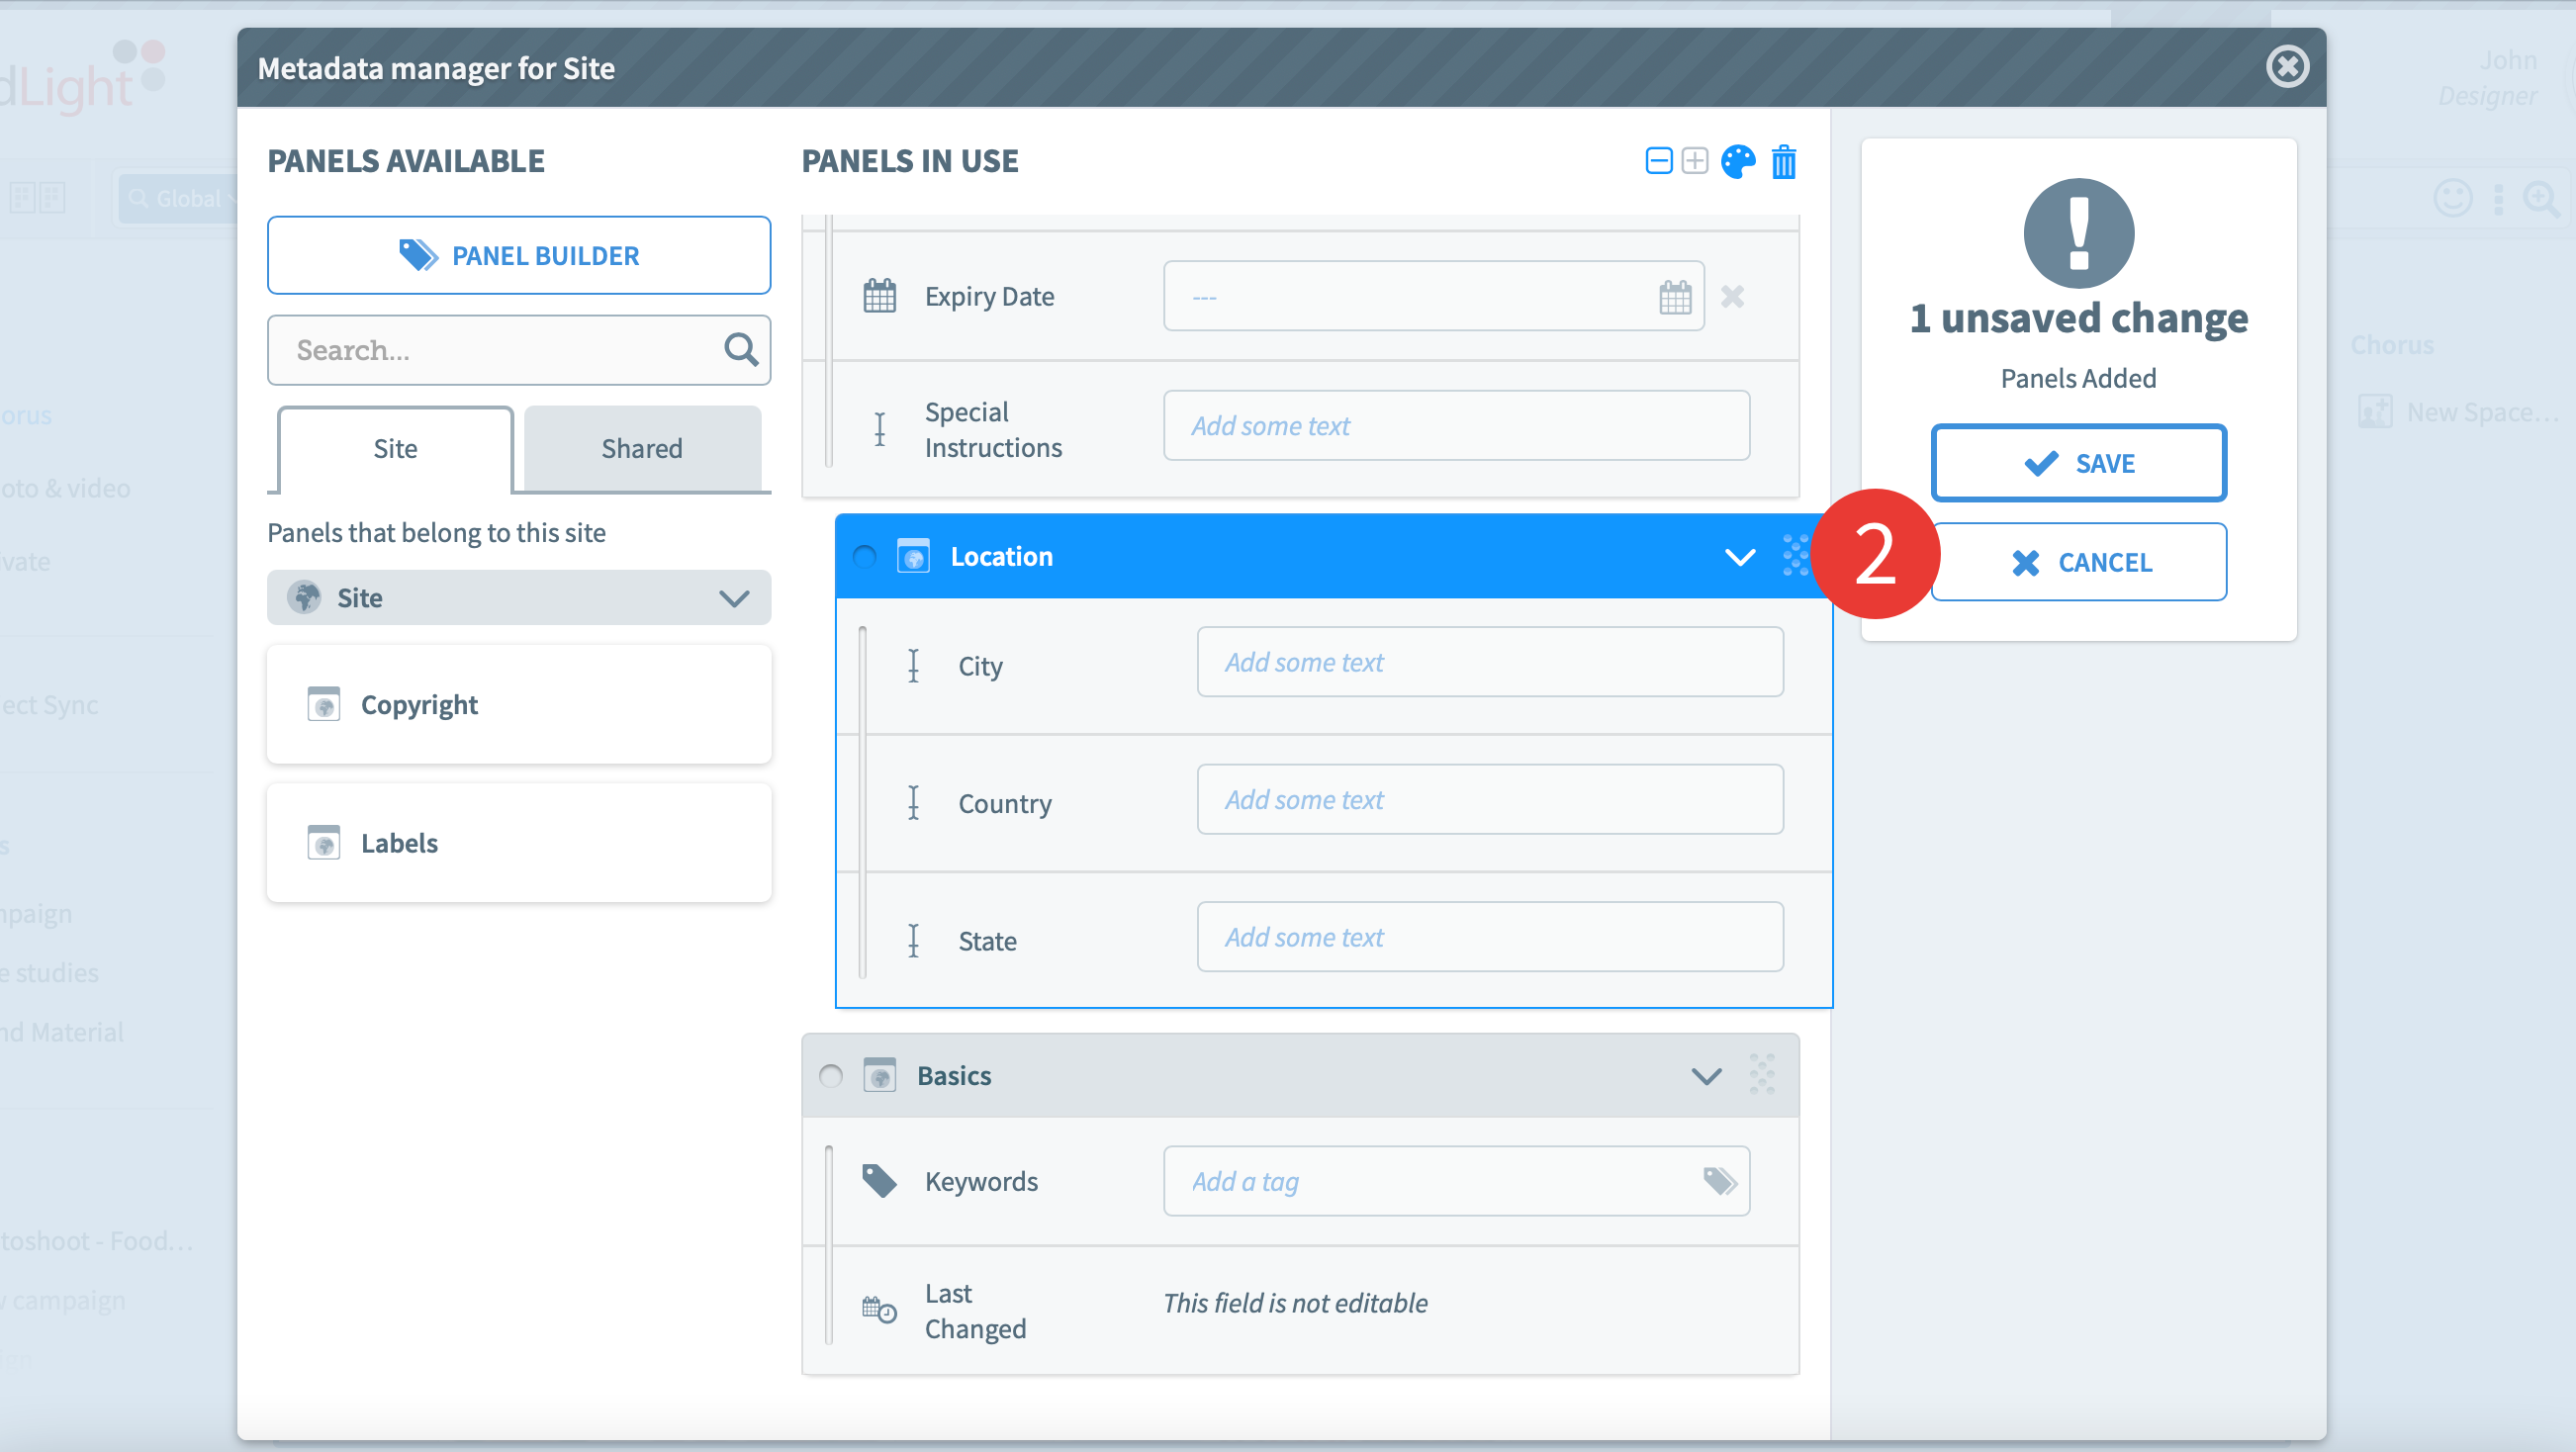
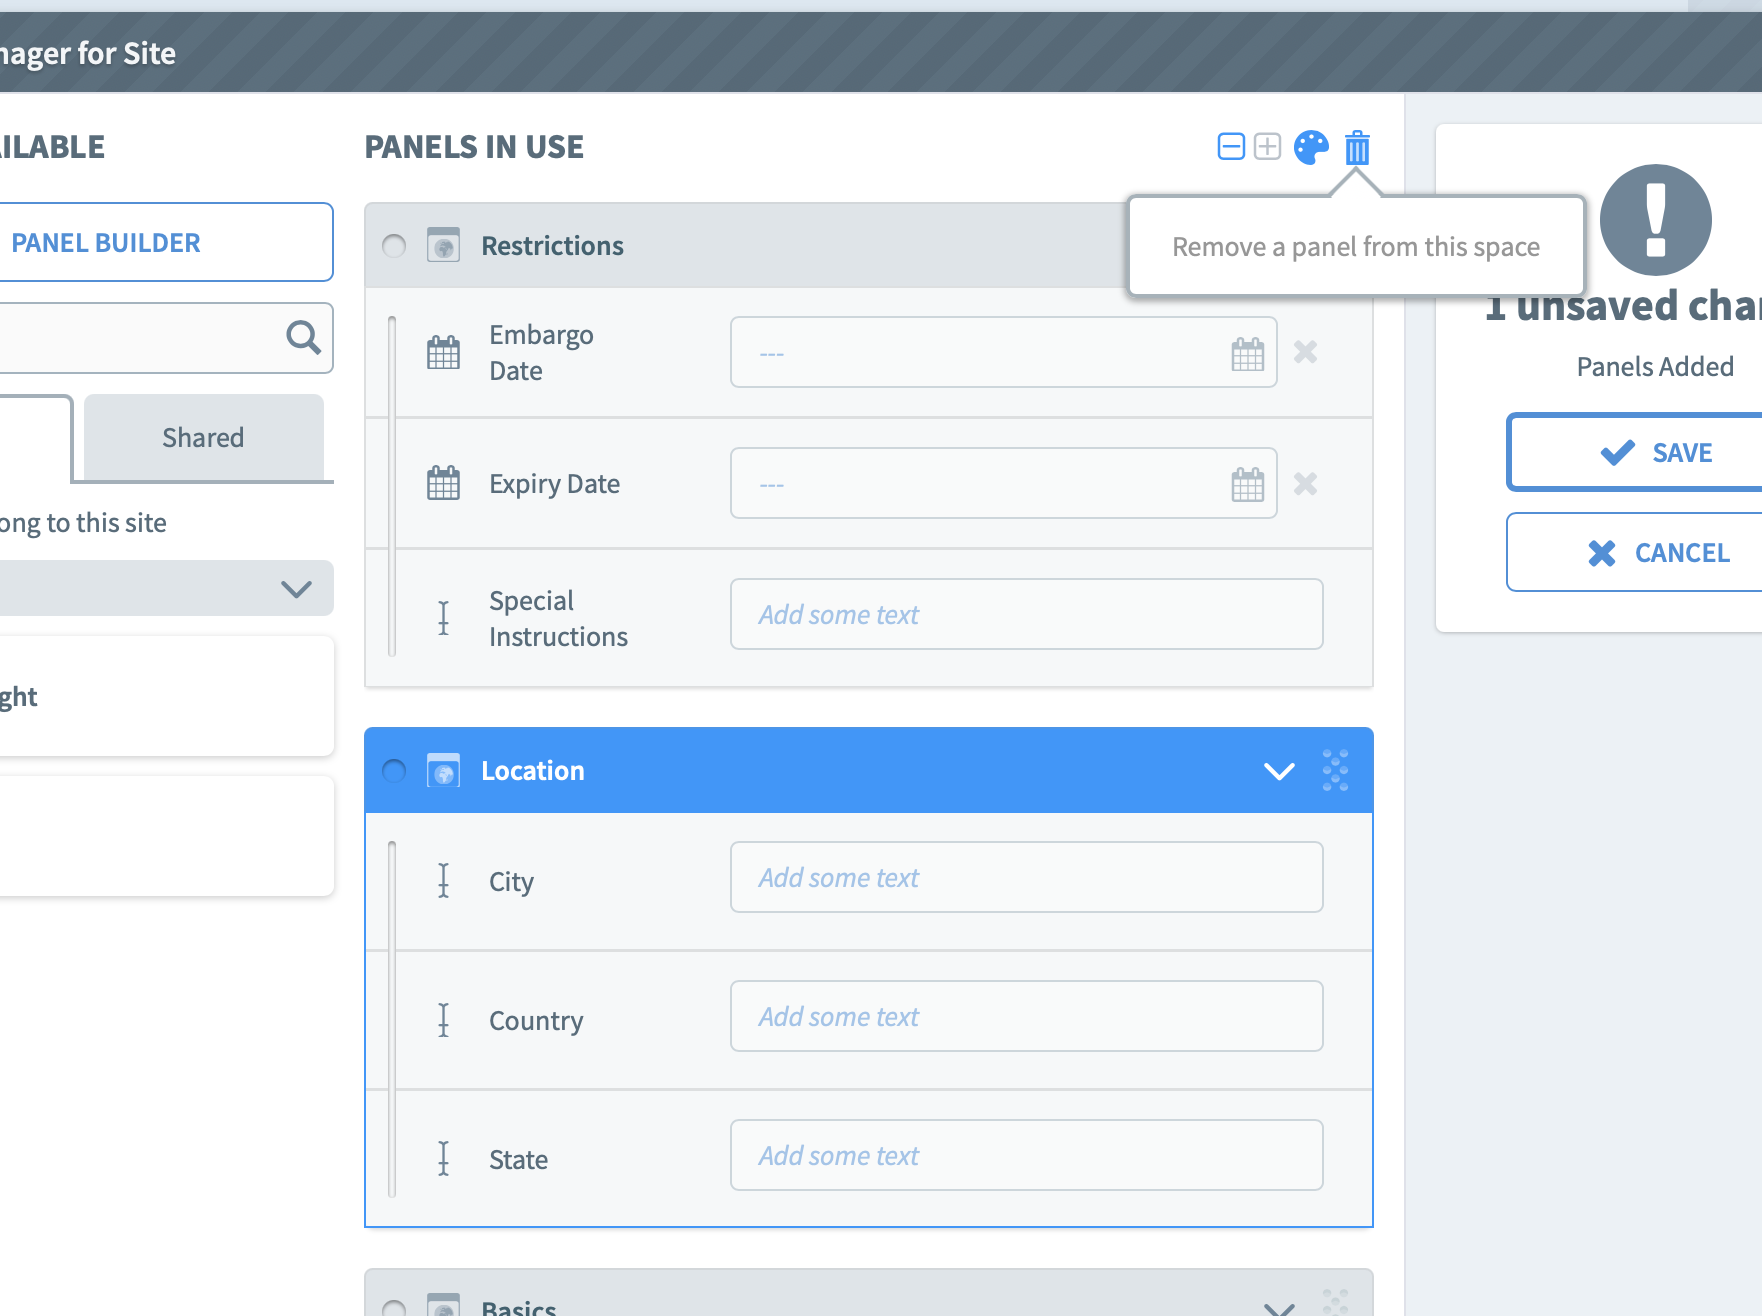
You can also remove a panel from the list by selecting it and clicking on the bin icon.
3. Once you are happy with the list and order of the panels in the Panels in Use section, press Save.
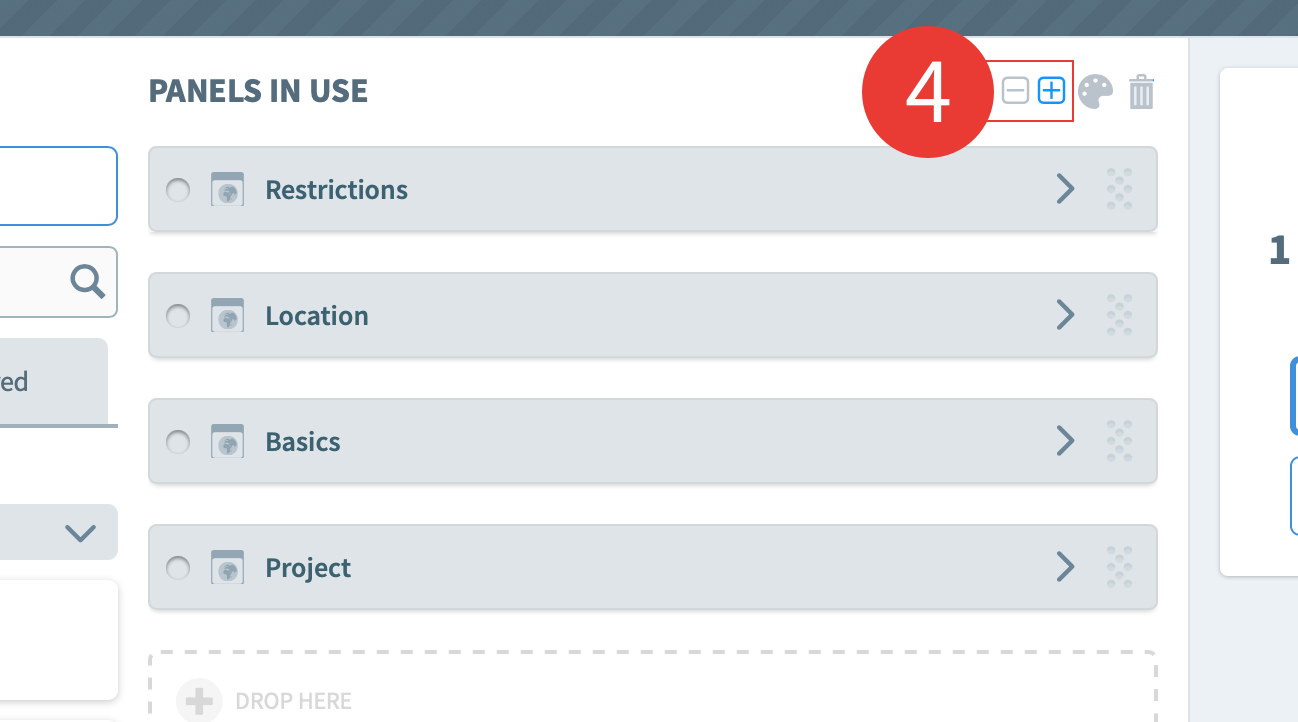
4. You can open all panels at once or close all panels at once by using the ‘-’ and ‘+’ buttons.
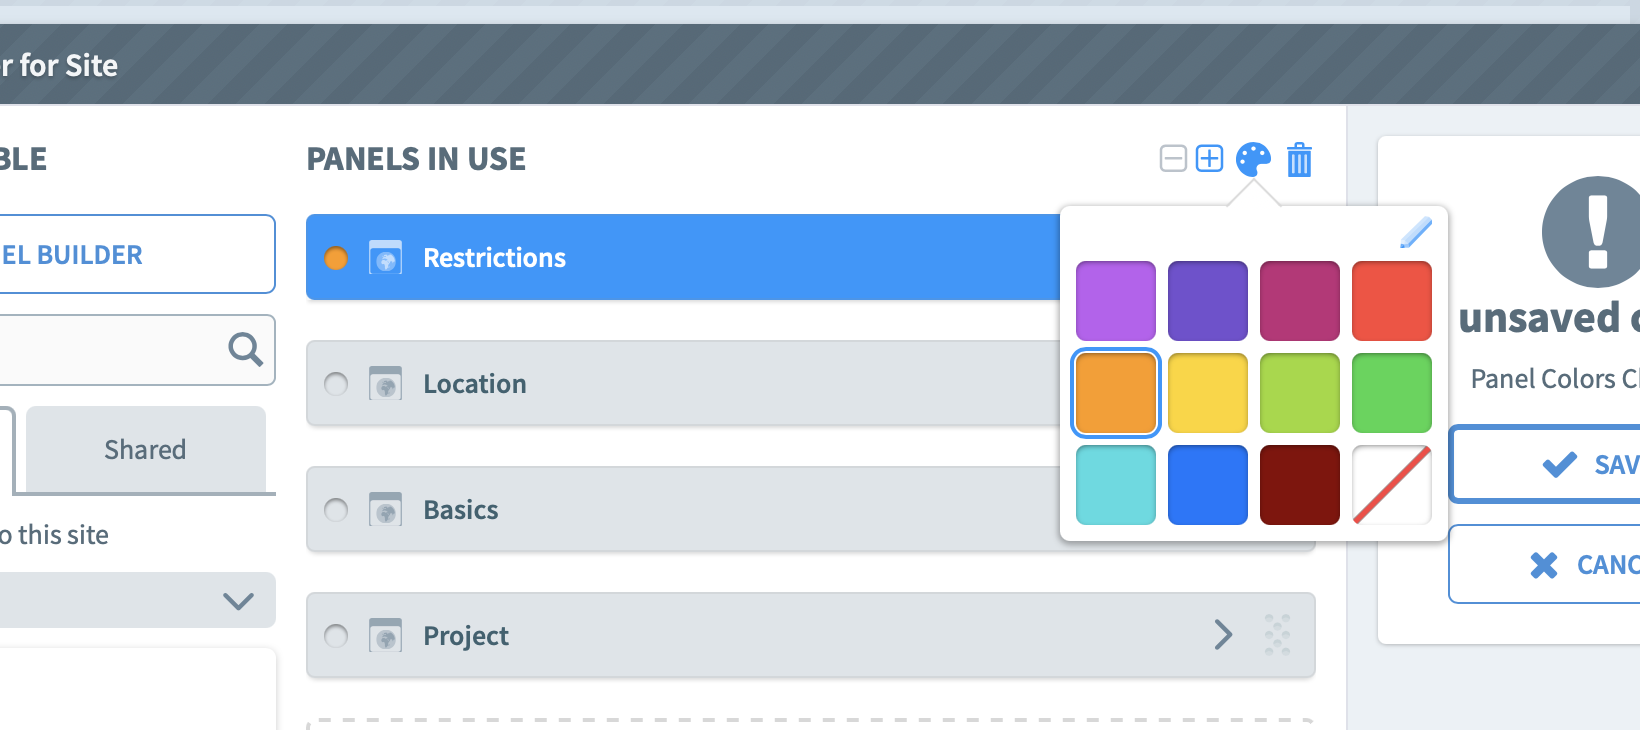
Step-by-step: Apply colors to Panels
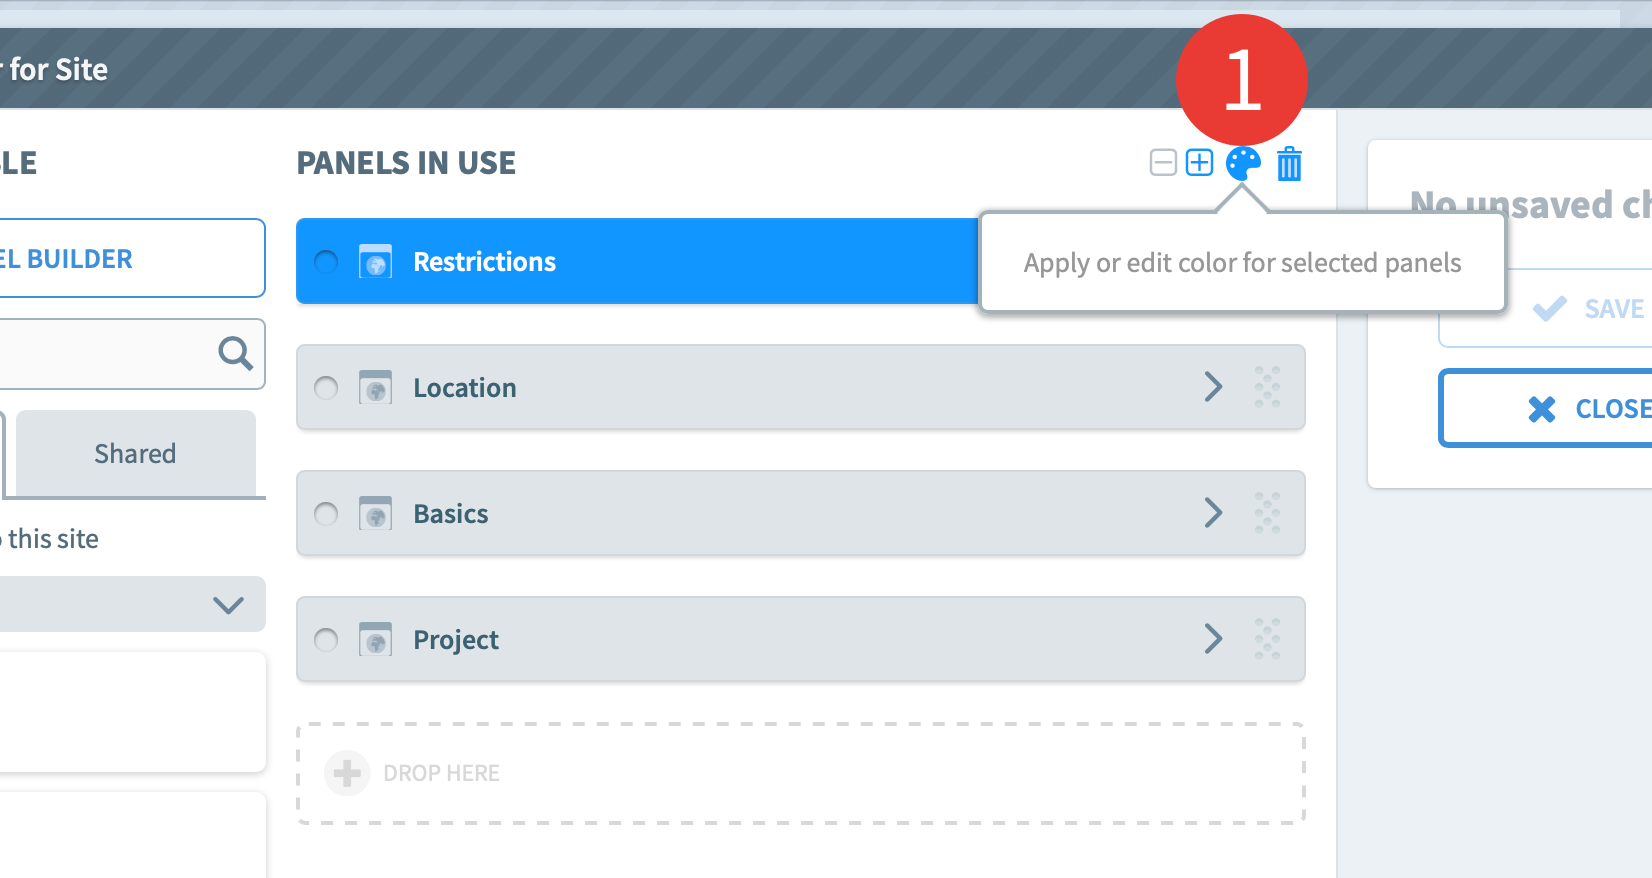
1. In the Site metadata manager, select a panel in the Panels in Use section, and click on the palet icon. If there is no panel in this section, drag and drop a panel from the Panels available section, or create a new panel through the Panel builder.
2. A popover will open, showing a list of 11 colors. Click on the color of your choice to apply it to the panel.
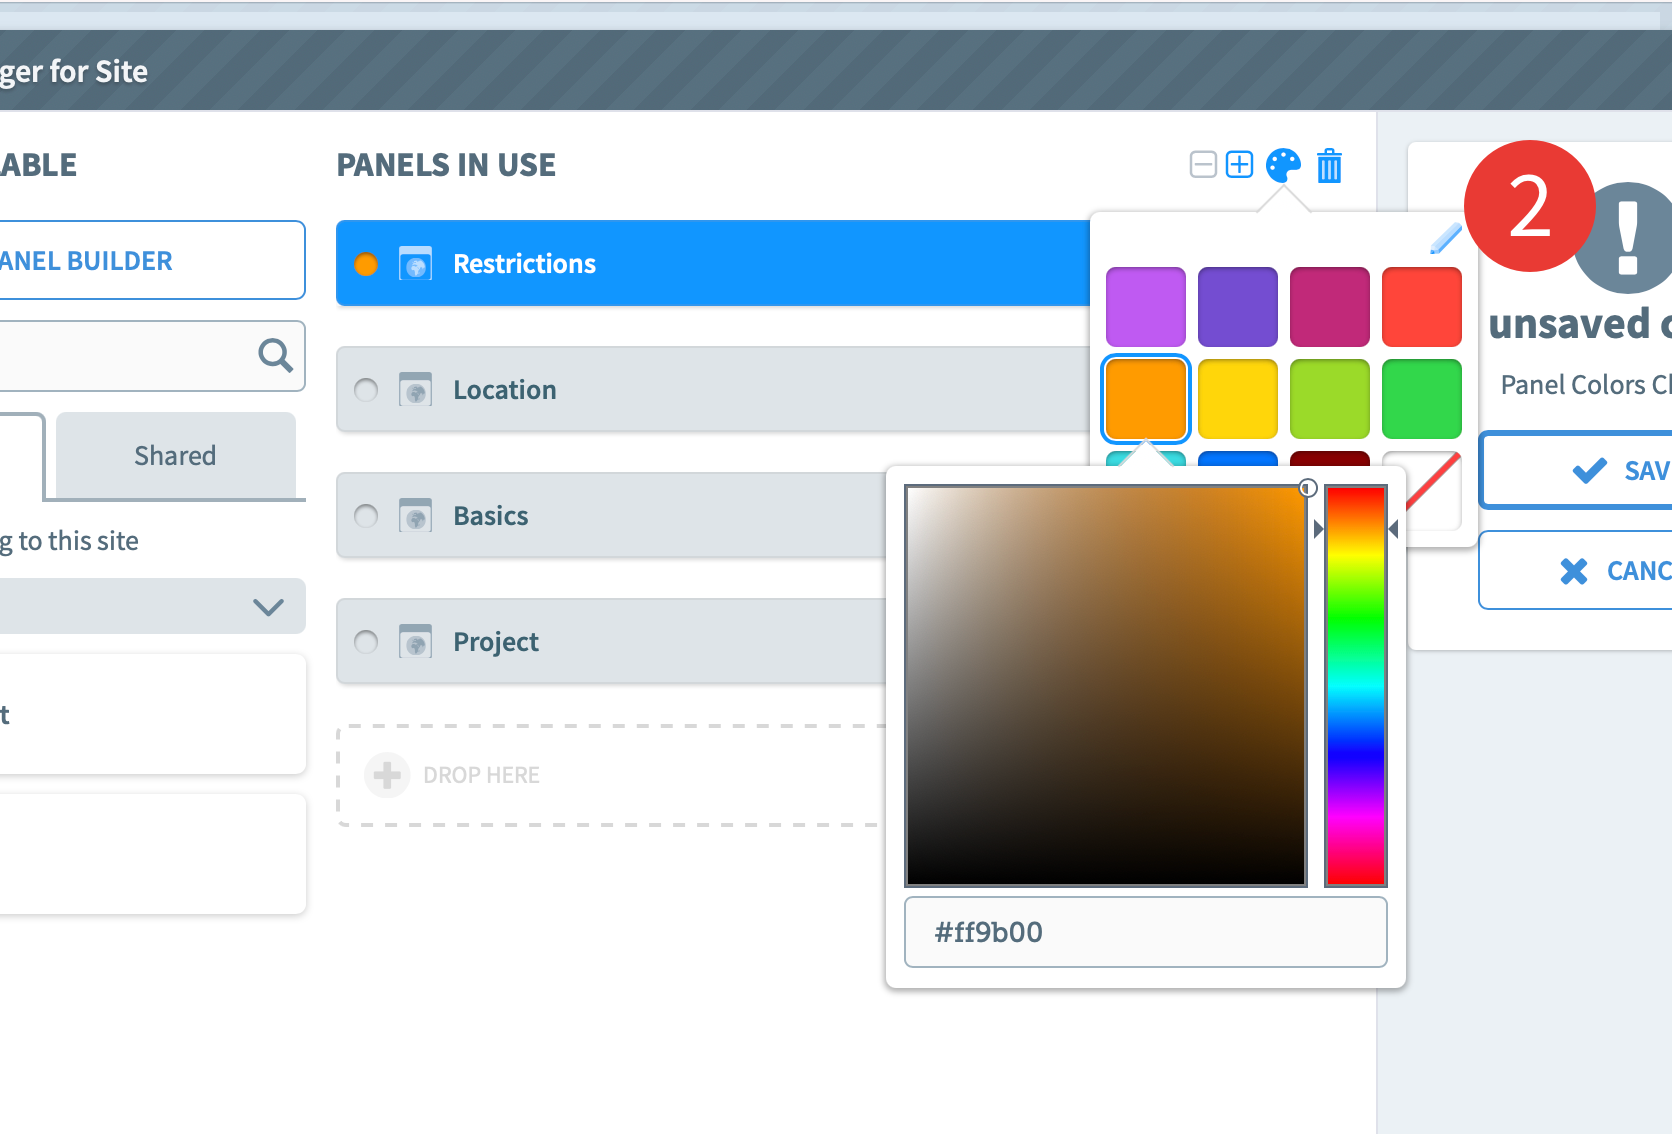
You can also edit a color by selecting it and clicking on the Pen icon. A color selector will open, allowing you to manually change the color or to add a color code.
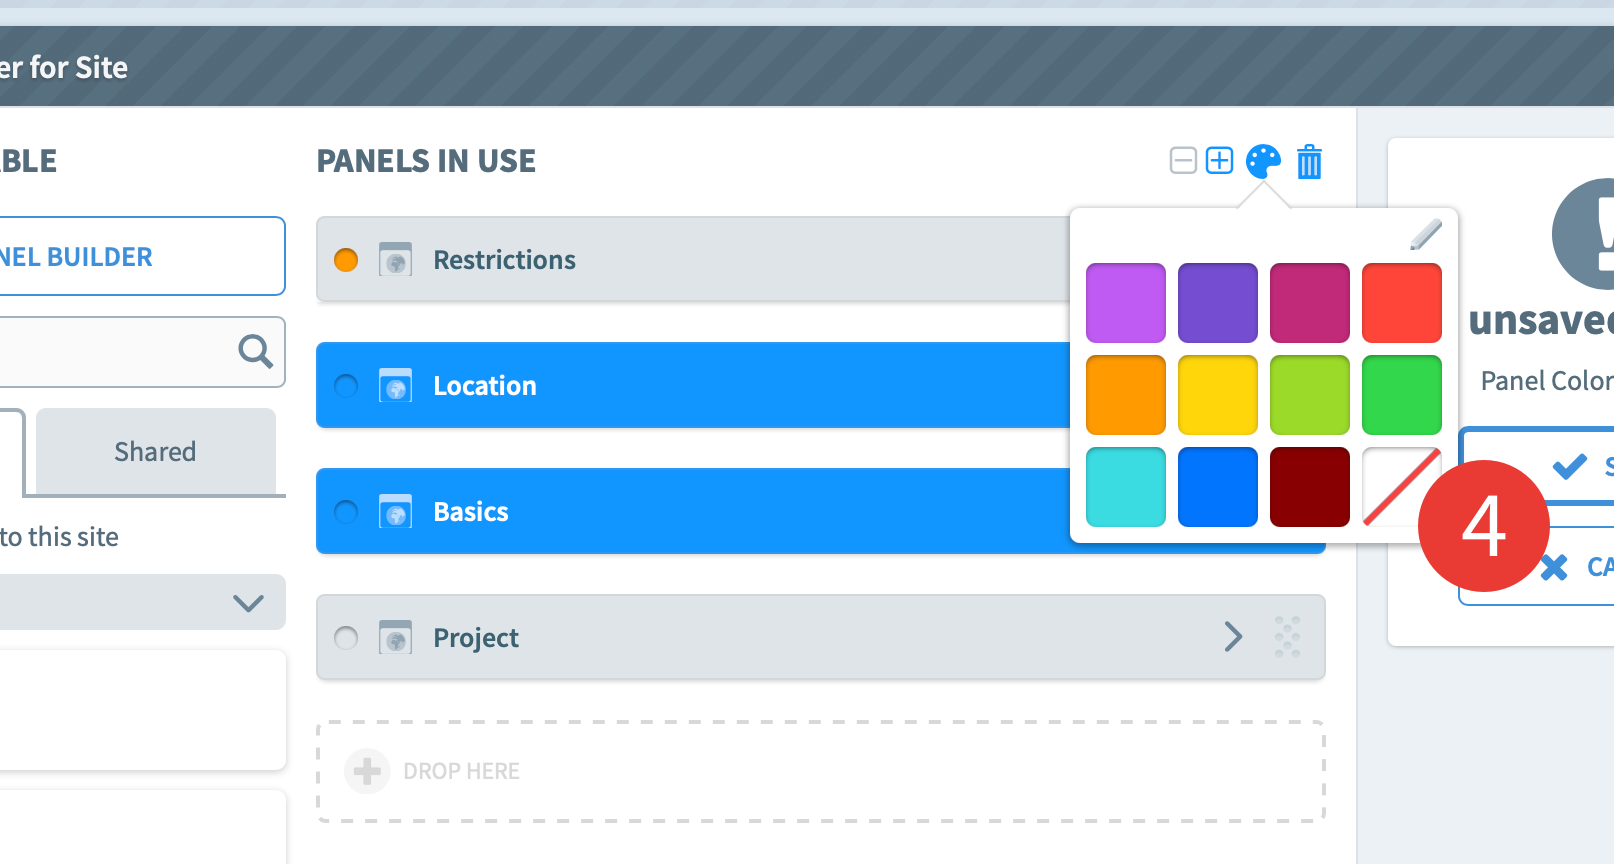
3. To apply color in batch, select multiple panels at once and click on the palet icon. Select the color of your choice.
4. To remove a color, click on the last square (white with red line).
5. Once you have applied all colors to site panels, click Save and close the Metadata manager. The colors will cascade down to Spaces using those site panels, but Space Managers are able to edit them at the space level.
You are here:
